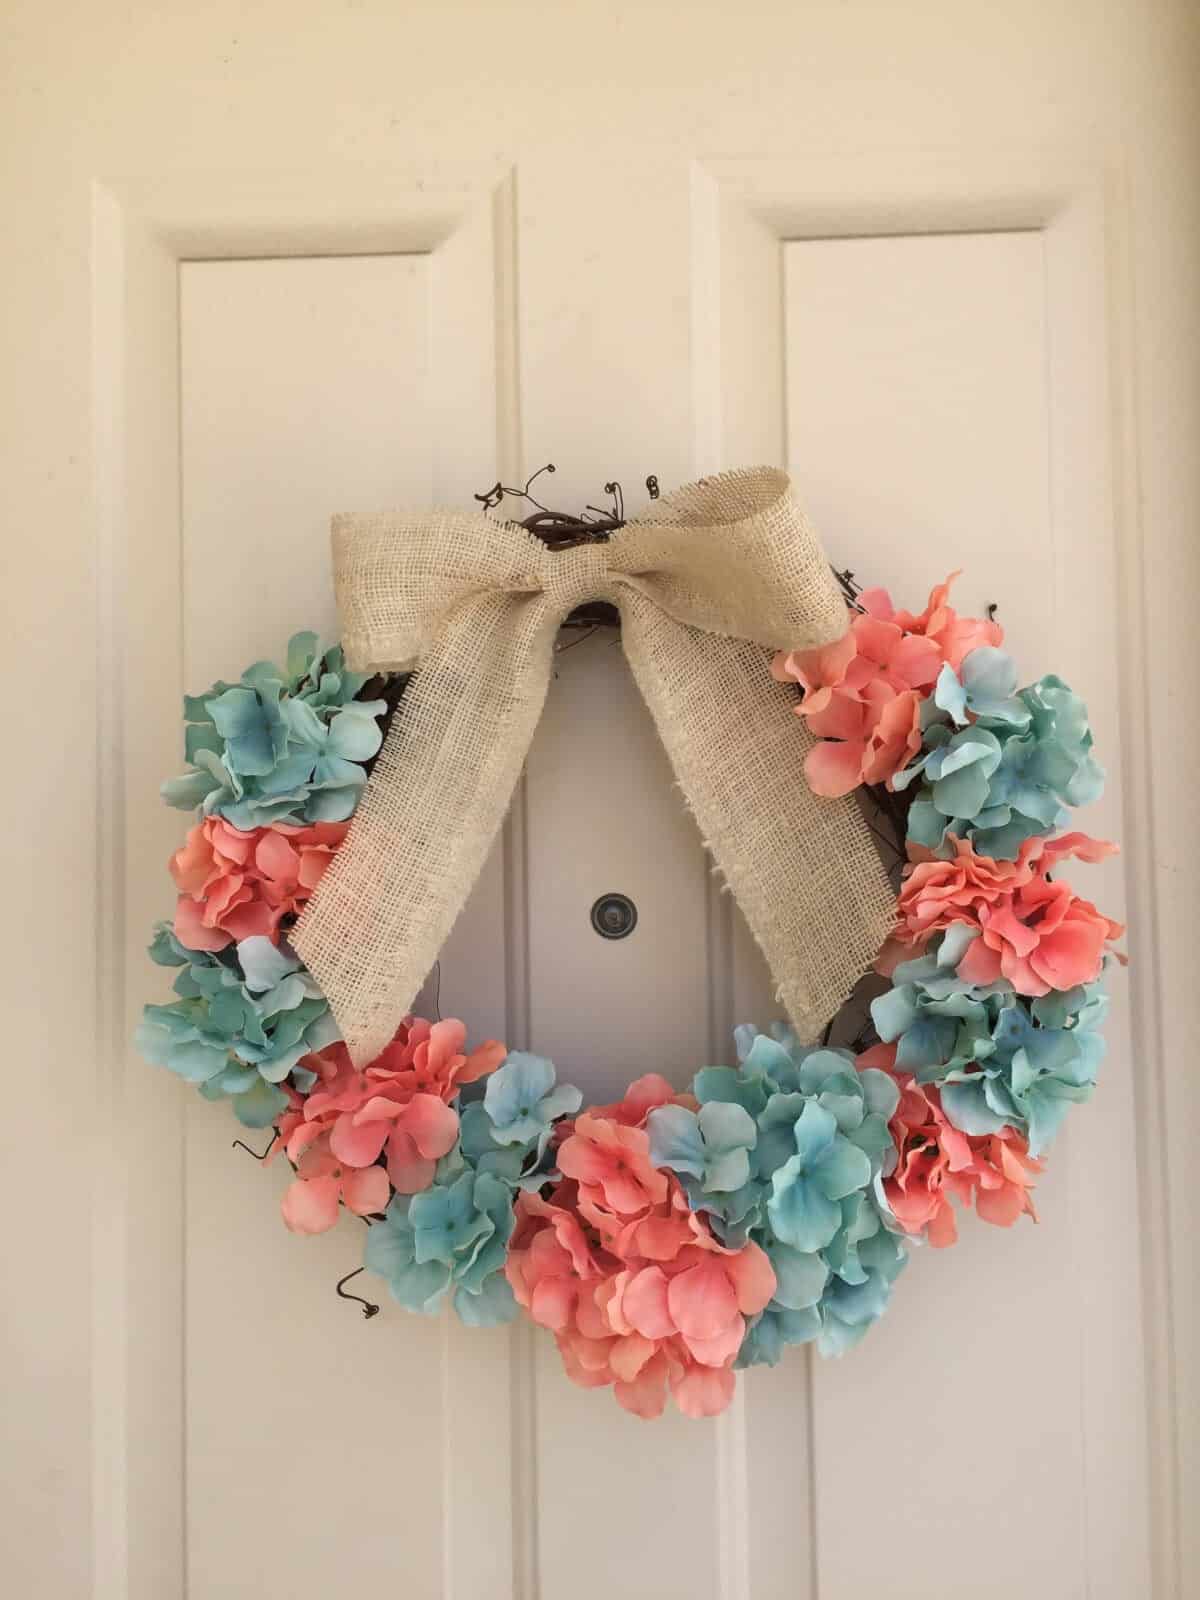
Spring is upon us and that means you need a fresh idea for your seasonal wreath collection. I’ve always wanted to make a floral wreath, but the prices have deterred me time and time again. Have you LOOKED at the cost of a fake flower? I know it lasts much longer than a regular flower, but that doesn’t mean I love the price tag. Well, this year I took the plunge for a spring wreath because I found a great sale. If you shop wisely, you can easily make a gorgeous floral wreath and not break the bank!
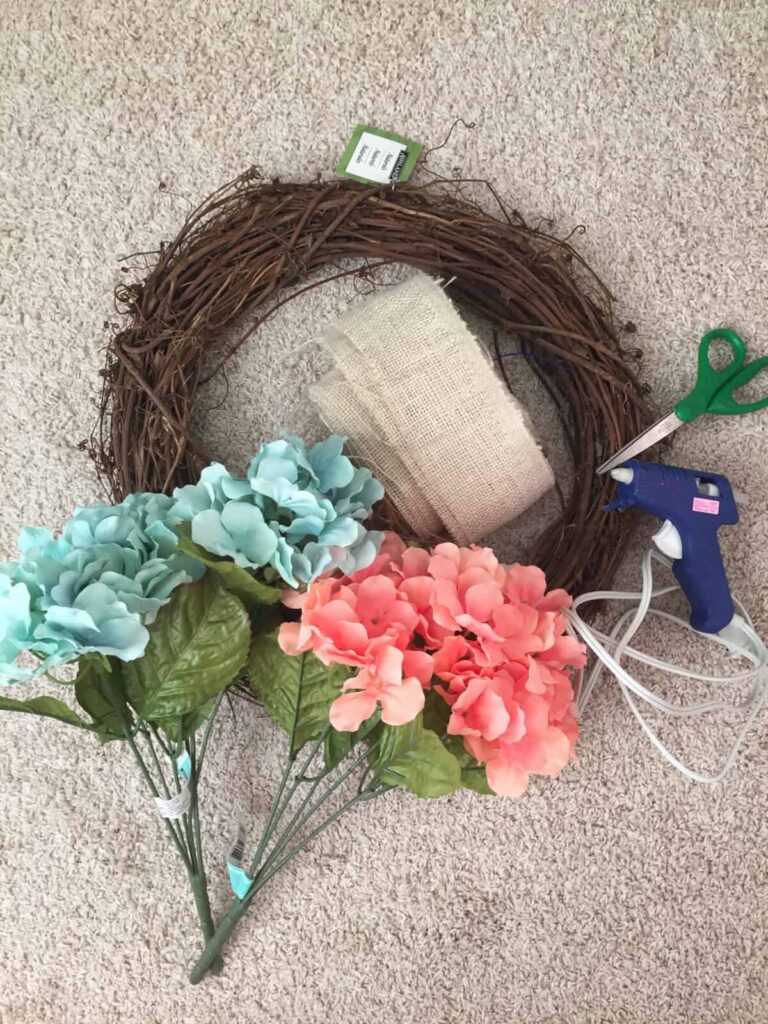
Supplies:
Grapevine Wreath
Hydrangea Blossoms
Hot Glue
Scissors
Burlap
Small piece of yarn or thread
Wire Cutters (not pictured)
Instructions:
First things first: as I mentioned above, fake flowers are expensive. Most craft stores have big sales (up to 50% off) but they are still expensive when you consider that most craft projects require a lot of pieces. It took me two trips to Michaels (the first one was a total bust because you cannot shop for deals when a 3-year old is wreaking havoc in the St. Patrick’s Day aisle) to finally find what I wanted and not cost me a fortune. So here’s my two cents: shop floral “bushes” instead of stems. One bush was $4.50 (and that was the 1/2 off price) and it came with 6 blossoms. A decent size stem of 1 hydrangea blossom cost $3.5o for ONE. So, there’s my little sneaky trick for you all! Buy the bushes and you can simply trim each one off.
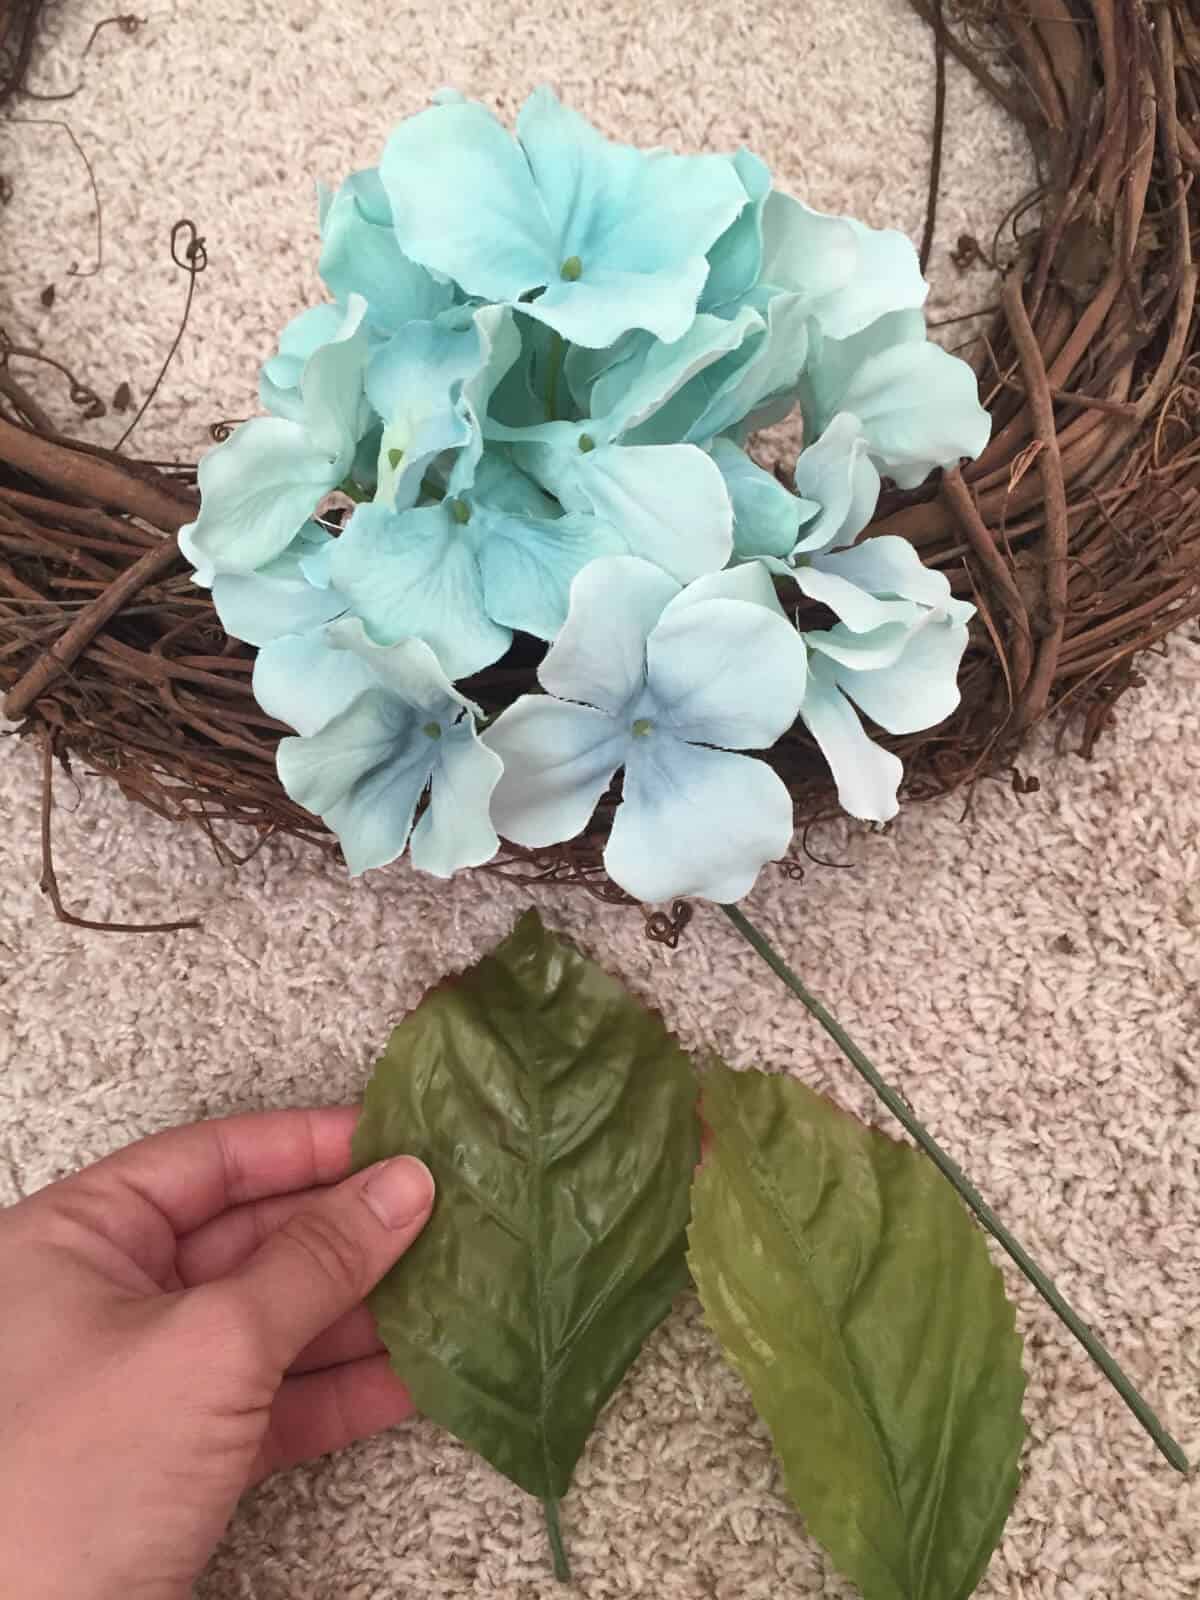
Use needle nose pliers that have a wire cutter or just a regular pair of wire cutters to separate the blossoms. Though it looks like these are just plastic, there is indeed a piece of wire in each stem that will ruin your regular scissors if you try and cut through.

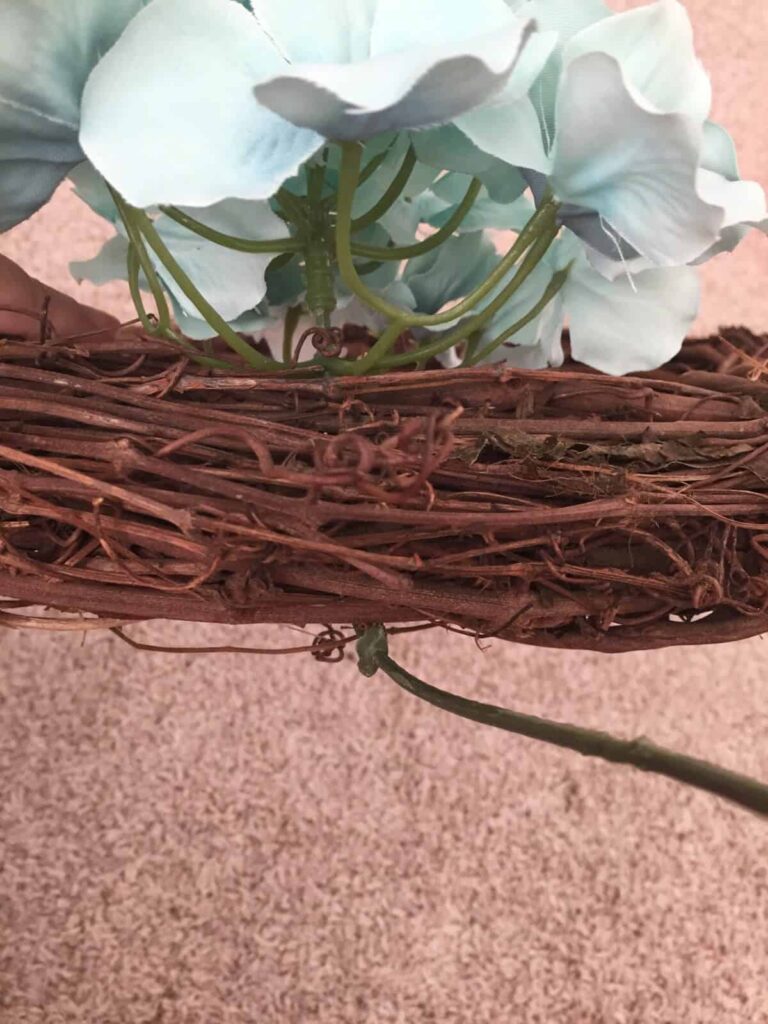
Then remove any leaves, because they are usually further down the stem and will not go through your wreath. Find a starting point and start inserting your blossoms through the grapevine. You will have to wiggle it through, but I believe in you. You can do it.
Leave the long stem on your stem and bend it out of the way. You will trim it off later, but I like to leave my own to make sure I like my arrangement before snipping everything down.
Start adding the rest of your blossoms in whatever pattern and arrangement you want!

Initially I was only going to add blossoms at the bottom, but it turned out I had plenty, so I kept adding.

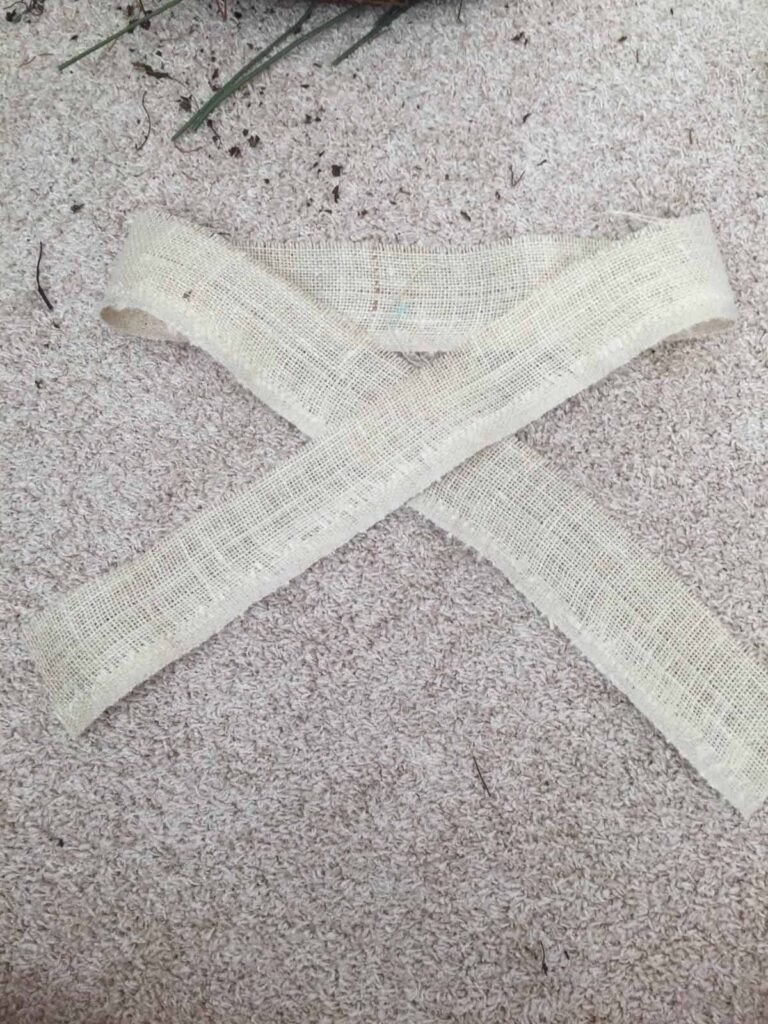
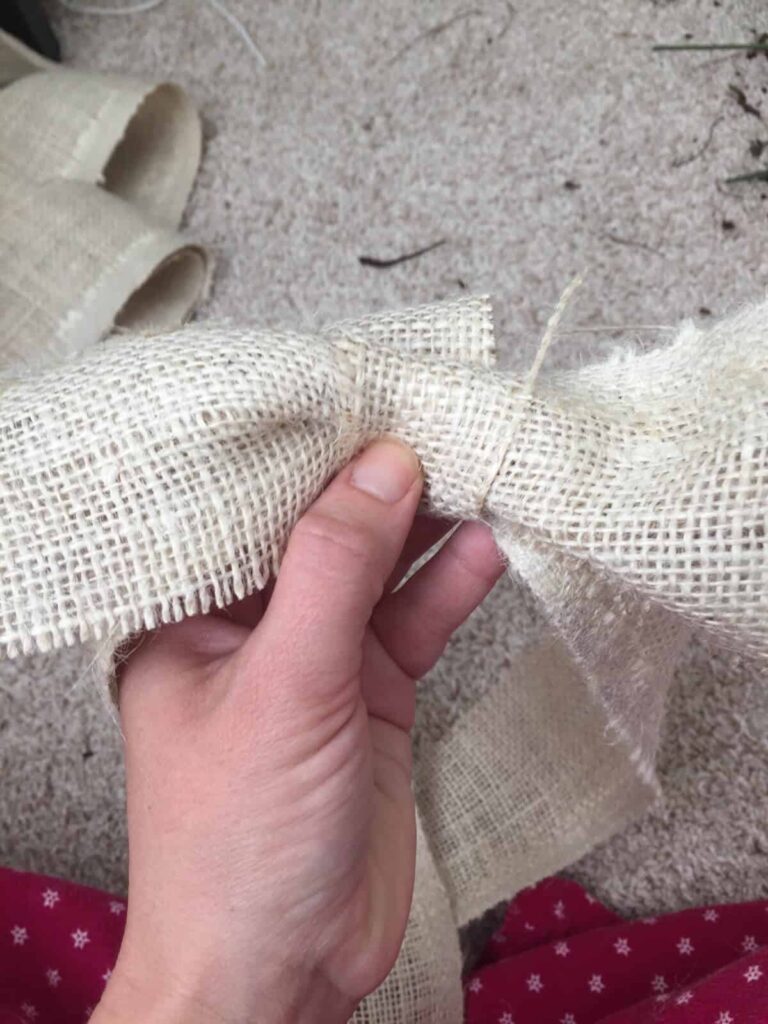
I had just enough room to make a burlap bow and add to the top. Don’t feel like you have to buy a bow- you can EASILY make one and I’ll show you how. The proof is in the pudding because you will witness my very first attempt, as I captured it for you on film. First, take a strip of burlap, anywhere from 3-5″ wide and about 18-24″ long (the longer the better because you can always trim it later), and lay it flat with the ends crossed over each other. (p.s. Don’t mind my dirty carpet. That’s complements of my shedding grapevine wreath.)
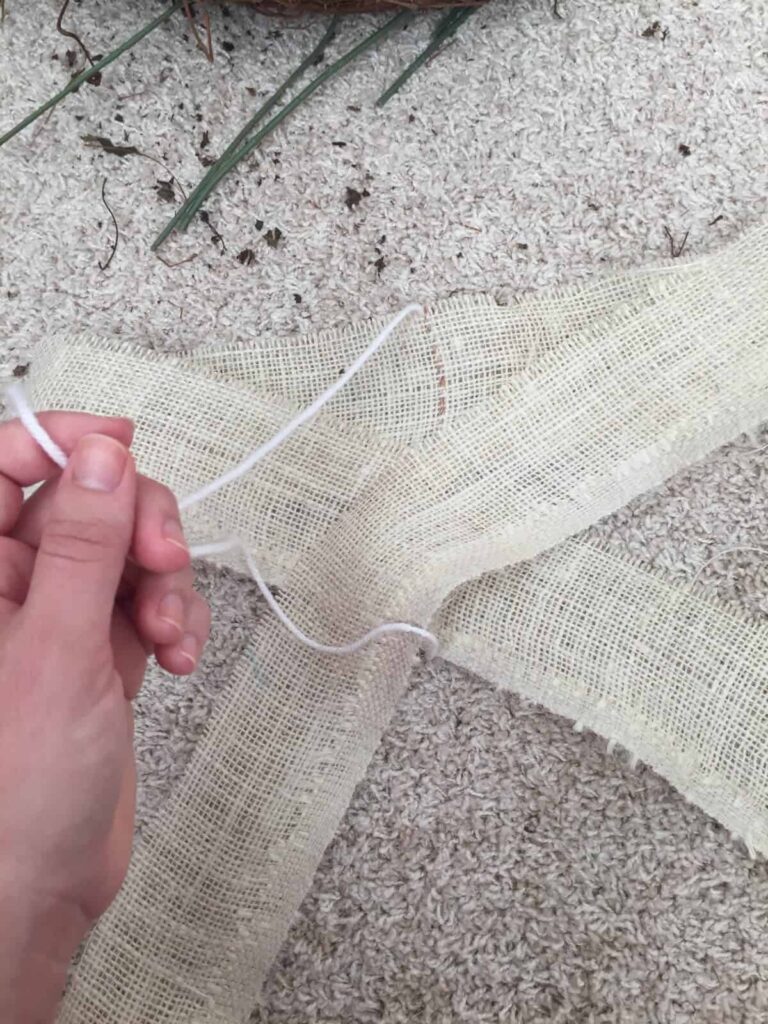
Take your small piece of yarn or thread and place it under the burlap, and then tie a knot where the three pieces overlap.
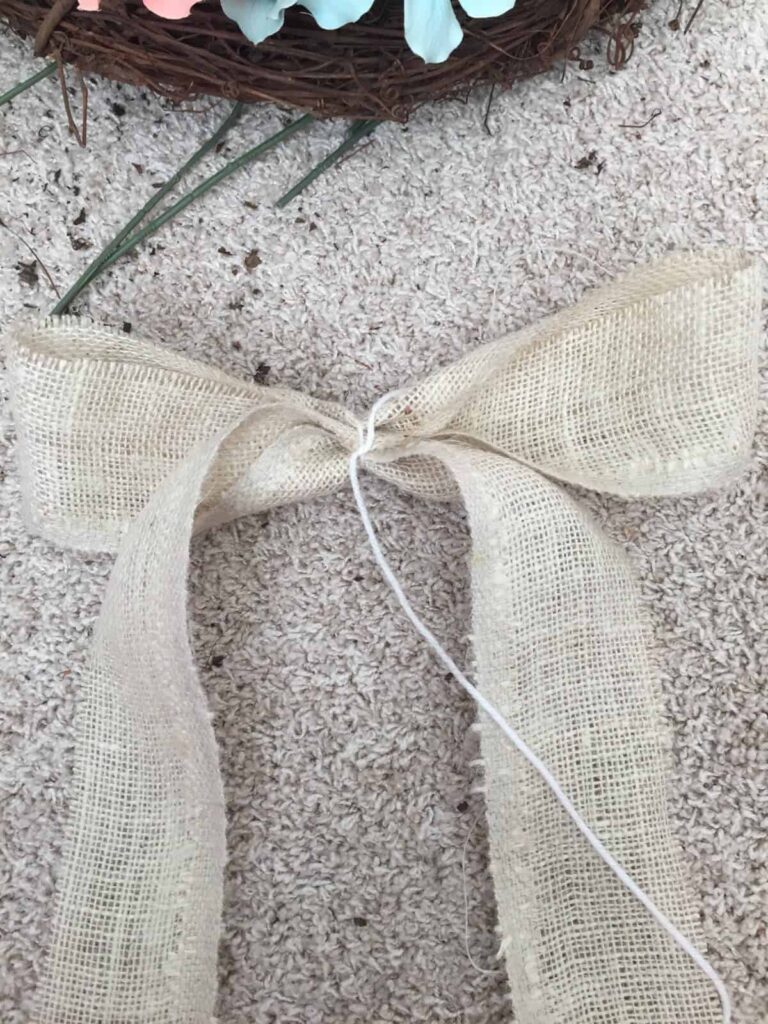 Before tying too tightly, straighten out the bow so it looks like you want. If you like this look, you can cut off the thread ends and call it a day. Or you can cut a small piece of burlap to cover up the string like I did. It was beyond easy, and I just wrapped and secured it with hot glue (and yes, I’m wearing my pink Christmas pajamas in this photo!).
Lay down some hot glue on the back of your bow and then slap it on to your wreath!

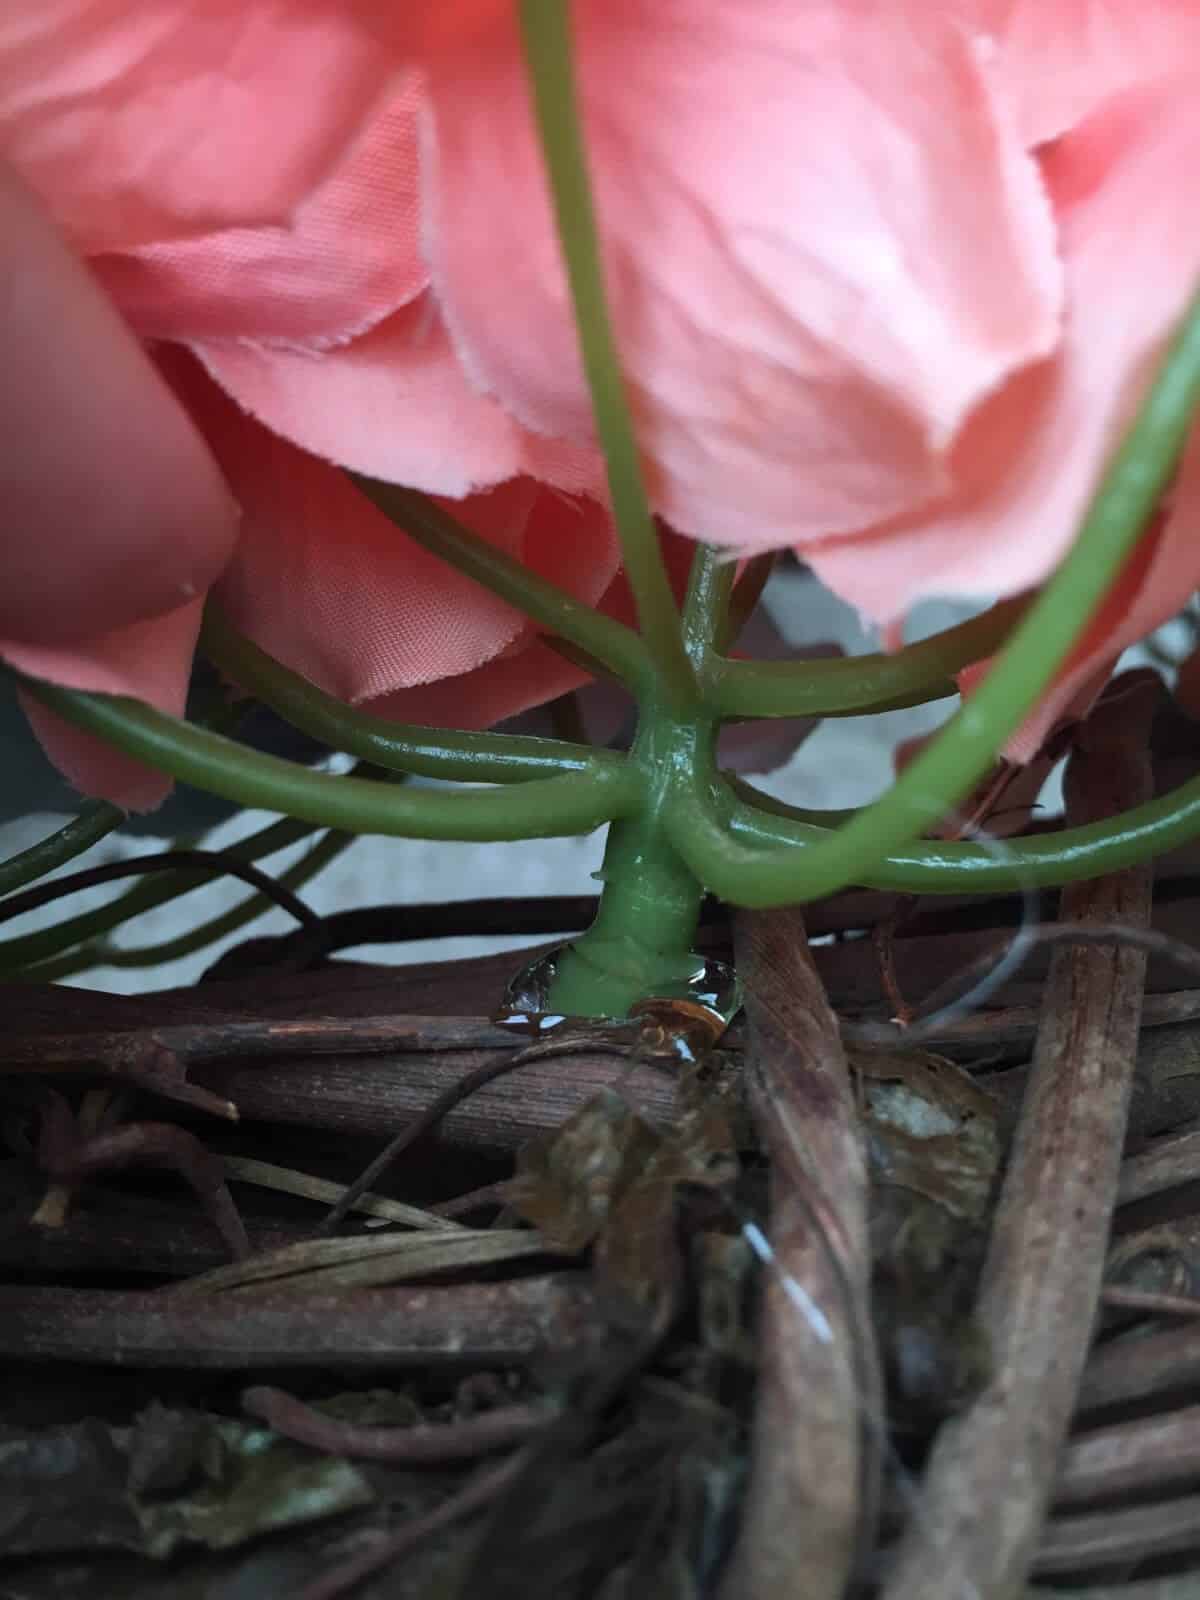
Now that you’re satisfied with your wreath, go back in and remove the stems. I also added some hot glue to the underside of the blossom to ensure staying power. One good thing about a grapevine wreath is it does a pretty good job of holding on to your floral pieces, but I wanted to be doubly sure.
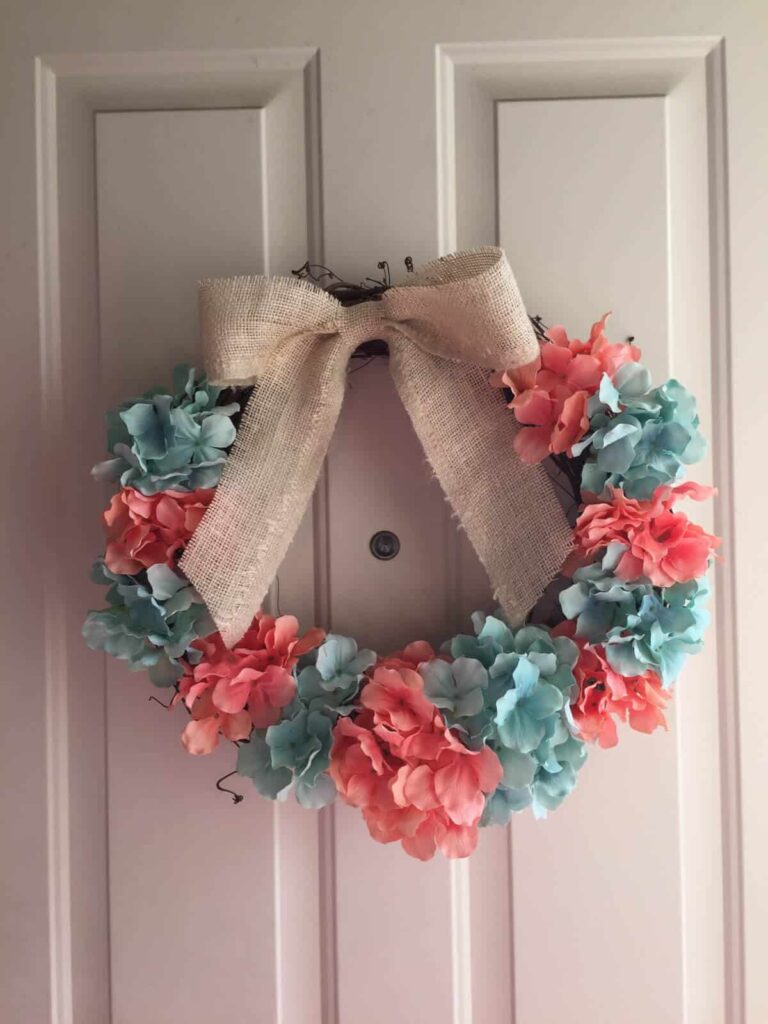
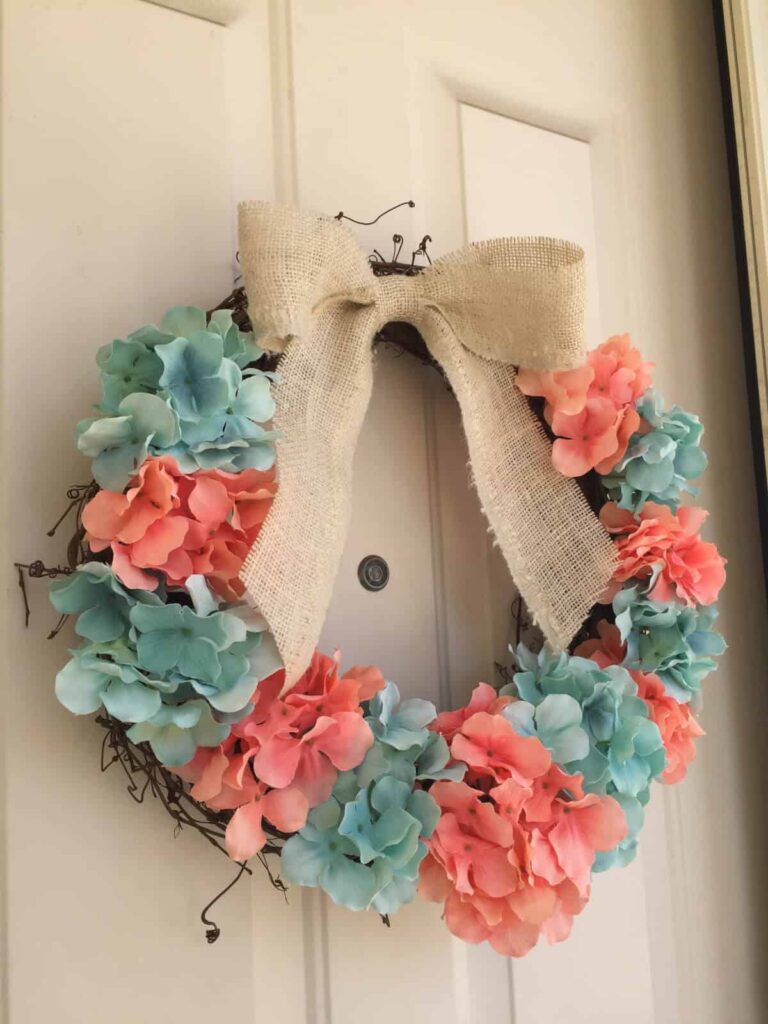
 All that’s left to do is hang it up and enjoy!


Karly Wood
Latest posts by Karly Wood (see all)
- 15 Wonderful White Kitchens - January 14, 2019
- We Want All These Spring Manis And We Want Them Now - January 8, 2019
- DIY Heart-Shaped Valentine’s Day Wreath - January 4, 2019
Related Images:
Karly Wood
Latest posts by Karly Wood (see all)
- 15 Wonderful White Kitchens - January 14, 2019
- We Want All These Spring Manis And We Want Them Now - January 8, 2019
- DIY Heart-Shaped Valentine’s Day Wreath - January 4, 2019