Welcome to our comprehensive Water Heater Repair Guide, where we’ll provide you with all the information you need to fix a water heater. Whether you’re experiencing a lack of hot water, leaks, or thermostat issues, we’ve got you covered.
Understanding how to fix a water heater can save you time, money, and the hassle of waiting for a professional plumber. With our step-by-step instructions and troubleshooting tips, you’ll be able to tackle common water heater problems like a pro.
Key Takeaways:
- Learn how to troubleshoot common water heater issues
- Discover DIY repair techniques for certain problems
- Maintain your water heater to prevent future breakdowns
- Gain insights into the significance of professional water heater repair
- Follow a maintenance checklist to ensure optimal performance
Troubleshooting Water Heater Issues
Before diving into repairs, it’s important to identify the root cause of the problem. In this section, we will discuss common water heater problems and provide troubleshooting tips to help you pinpoint the issue.
Water heater issues can disrupt your daily routine and leave you without hot water when you need it the most. By identifying and resolving common problems, you can save time and money on unnecessary repairs or replacements. Let’s take a look at some troubleshooting steps you can take to diagnose and address water heater issues.
1. No Hot Water
One of the most common issues homeowners face with their water heaters is a lack of hot water. If you find yourself taking cold showers or struggling to do the dishes with lukewarm water, there are a few possible causes to consider:
- The pilot light is out
- The gas supply is insufficient
- The heating element is faulty
To troubleshoot this problem, start by checking if the pilot light is lit. If it’s out, follow the manufacturer’s instructions to relight it safely. If the pilot light remains lit but you still have no hot water, it could be due to a gas supply issue or a faulty heating element.
2. Inadequate Hot Water
If your water heater is producing hot water, but it’s not enough to meet your needs, there are a few potential explanations:
- The thermostat is set too low
- The heating element is covered in sediment
- The water heater is undersized for your household
Start by checking the thermostat setting on your water heater. If it’s set too low, increase the temperature and see if that improves the water temperature. If the issue persists, sediment buildup on the heating element could be reducing its efficiency. Flushing the tank and cleaning the heating element may help resolve the problem. However, if your water heater is undersized for your household’s hot water demands, you may need to consider upgrading to a larger capacity unit.
3. Strange Noises
Unusual noises coming from your water heater can be unsettling. If you hear popping, banging, or hissing sounds, it could indicate mineral or sediment buildup inside the tank:
- Sediment buildup can cause overheating and make the tank less efficient
- The increased temperature and pressure can lead to the popping or banging noises
To address this issue, you can try flushing the tank to remove the sediment. Consult your water heater’s manual or consider seeking professional assistance for this task.
“Identifying the root cause is crucial when troubleshooting water heater issues. By understanding the possible causes of common problems, you’ll be able to implement targeted solutions and get your hot water flowing smoothly again.”
Now that we’ve discussed some common water heater problems and troubleshooting tips, you’re ready to move on to the next step: DIY water heater repairs. In the next section, we’ll guide you through the process of fixing certain issues on your own, saving you time and money.
DIY Water Heater Repair
If you’re a handy homeowner, you don’t always have to call a professional to fix your water heater. Many common water heater problems can be resolved with some DIY know-how and a few basic tools. In this section, we’ll guide you through the necessary steps to safely and effectively repair your water heater without professional assistance.
Before you begin any DIY repairs, it’s important to ensure your safety. Make sure to turn off the power supply to your water heater and close the gas valve if you have a gas-powered unit. TIP: If you’re unsure how to do this, consult your water heater’s instruction manual or contact the manufacturer for guidance.
Step 1: Troubleshoot the Problem
The first step in DIY water heater repair is to identify the exact issue you’re facing. Is your water heater not producing any hot water at all? Is the water temperature inconsistent? Are you experiencing leaks? Understanding the problem will help you determine the appropriate course of action.
Step 2: Gather the Necessary Tools
Once you’ve identified the problem, gather the tools you’ll need to perform the repair. Common tools for DIY water heater repair include adjustable wrenches, screwdrivers, a multimeter for electrical testing, and a pipe wrench for plumbing-related repairs. Make sure you have all the necessary tools on hand before you begin.
Step 3: Fixing Common Water Heater Problems
In the following table, we’ve listed some of the most common water heater problems and their corresponding DIY solutions:
| Problem | Solution |
|---|---|
| 1. No hot water | Check the circuit breaker, reset the high-temperature cutoff switch, or replace a faulty heating element. |
| 2. Inconsistent water temperature | Adjust the thermostat settings or replace a faulty thermostat. |
| 3. Leaking water heater | Tighten loose fittings, replace a faulty pressure relief valve, or drain and flush the tank to remove sediment buildup. |
| 4. Strange noises | Flush the tank to remove sediment or replace a faulty heating element. |
Note: The solutions provided are general guidelines. Make sure to consult your water heater’s instruction manual or contact a professional if you’re unsure about the specific repair process.
Step 4: Safety First
When performing any DIY repairs on your water heater, it’s crucial to prioritize safety. Always follow proper safety protocols, including turning off the power and gas supply, before working on your water heater. If you’re uncomfortable with any aspect of the repair or if you’re unsure about your abilities, it’s best to contact a professional plumber for assistance.
Remember, DIY water heater repair can save you time and money, but it’s important to know your limits. If you’re dealing with complex issues or if you’re uncomfortable with performing repairs yourself, it’s always best to seek professional help. Stay tuned for our next section, where we’ll discuss essential water heater maintenance tips to keep your unit running smoothly.
Water Heater Maintenance Tips
Regular maintenance is essential for keeping your water heater in optimal condition. By following these water heater maintenance tips, you can extend the lifespan of your unit and prevent potential problems.
1. Check the Pressure Relief Valve
Inspect the pressure relief valve annually to ensure it is functioning correctly. This valve is designed to release excess pressure and prevent tank damage. If you notice any leaks or signs of a faulty valve, contact a professional for repairs or replacement.
2. Drain and Flush the Tank
Over time, sediment can build up in your water heater tank, affecting its efficiency. To remove sediment, it’s recommended to drain and flush the tank annually. This process helps maintain optimal performance and prevents corrosion or clogs. Refer to your manufacturer’s instructions or consult a professional for guidance.
3. Insulate Exposed Pipes
If your water heater is located in a cold area, insulating the exposed pipes can help prevent heat loss and reduce energy consumption. Use insulation sleeves or wraps to cover the pipes, especially in unheated spaces like basements or crawlspaces.
4. Adjust the Temperature
Consider adjusting the temperature setting on your water heater to a lower setting, around 120°F (49°C). Not only does this reduce the risk of scalding, but it also helps conserve energy by reducing standby heat loss.
5. Test the T&P Relief Valve
The temperature and pressure (T&P) relief valve is a crucial safety component of your water heater. To ensure it’s functioning properly, test it annually by lifting the lever and allowing some water to flow into a bucket. If the valve doesn’t release water or is leaking, contact a professional for inspection and repairs.
6. Inspect Anode Rod
The anode rod helps prevent corrosion inside the water heater tank by attracting corrosive elements. Inspect the anode rod annually and replace it if it’s heavily corroded or worn out. Anode rod replacement can significantly extend the lifespan of your water heater.
7. Schedule Professional Maintenance
While you can perform some maintenance tasks on your own, it’s recommended to have your water heater professionally serviced annually. A qualified technician can inspect the unit, make necessary adjustments, and identify potential issues before they become major problems.
By following these water heater maintenance tips, you can ensure your unit operates efficiently, reduce energy consumption, and save money on costly repairs. Remember that proper maintenance not only prolongs the lifespan of your water heater but also ensures your comfort and convenience.
Understanding Common Water Heater Problems
Water heaters are essential for providing hot water in our homes, but they can sometimes encounter issues that disrupt their functionality. By understanding common water heater problems, you’ll be equipped to identify and address these issues promptly and effectively. In this section, we’ll discuss the symptoms, causes, and potential solutions for each problem, empowering you to make informed repair decisions.
Poor Water Pressure
One common issue with water heaters is low water pressure. If you notice a decrease in water flow or weak water pressure, it could be due to sediment buildup or a clogged pipe. Over time, minerals and debris can accumulate in the water heater tank and pipes, restricting water flow.
To address this problem, you can try flushing the water heater tank to remove sediment and debris. You’ll need to turn off the power supply, shut off the cold water inlet valve, and attach a hose to the drain valve at the bottom of the tank. Open the valve and let the water flow until it runs clear. This process can help restore normal water pressure and improve the performance of your water heater.
Water Leaks
Water leaks can be a cause for concern and should be addressed as soon as possible to prevent further damage. Leaks can occur due to a faulty pressure relief valve, loose connections, or a damaged water tank. If you notice water pooling around the base of your water heater or dripping from pipes or valves, it’s important to act quickly.
To address a water leak, start by checking the connections and tightening any loose fittings. If the pressure relief valve is leaking, it may need to be replaced. If the water tank is damaged, you’ll likely need to replace the entire water heater. It’s advisable to consult a professional plumber for assistance with water leaks, especially if the problem persists or if you’re unsure about the cause.
No Hot Water
Another common water heater problem is a lack of hot water. If you turn on the hot water tap and only cold water comes out, there could be several reasons for this issue. It could be a malfunctioning heating element, a faulty thermostat, or a tripped circuit breaker.
To troubleshoot the problem, start by checking the circuit breaker and resetting it if necessary. If that doesn’t resolve the issue, you can test the heating elements using a multimeter to determine if they are functioning properly. If one or both elements are faulty, they will need to be replaced. If the heating elements are working fine, it may be a problem with the thermostat. In this case, you can try adjusting the thermostat settings or replacing the thermostat if necessary.
Strange Noises
If you hear strange noises coming from your water heater, such as popping, banging, or rumbling sounds, it could be a sign of sediment buildup in the tank. As minerals and debris accumulate at the bottom of the tank, they can harden and cause these noises when the water heats up.
To address this problem, you can flush the water heater tank to remove the sediment. Flushing the tank regularly can help prevent noise issues and improve the efficiency of your water heater. If the noise persists even after flushing the tank, it’s advisable to consult a professional for further evaluation.
Complete Table
| Problem | Symptoms | Causes | Potential Solutions |
|---|---|---|---|
| Poor Water Pressure | Decreased water flow, weak water pressure | Sediment buildup, clogged pipes | Flush the water heater tank to remove sediment |
| Water Leaks | Pooling water, dripping from pipes or valves | Faulty pressure relief valve, loose connections, damaged water tank | Tighten connections, replace pressure relief valve, consult a professional plumber if needed |
| No Hot Water | Only cold water comes out of hot water tap | Malfunctioning heating element, faulty thermostat, tripped circuit breaker | Check circuit breaker, test heating elements, adjust or replace thermostat |
| Strange Noises | Popping, banging, or rumbling sounds | Sediment buildup in the tank | Flush the water heater tank to remove sediment, consult a professional if noise persists |

Fixing a Faulty Water Heater Thermostat
A malfunctioning thermostat can wreak havoc on the consistency of your water temperatures, leaving you frustrated with unpredictable results. Fortunately, diagnosing and repairing thermostat issues is a relatively straightforward process that can restore optimal performance to your water heater.
When faced with a faulty water heater thermostat, follow these steps:
- Turn off the Power: Before you begin any repairs, ensure that the power to your water heater is completely shut off. Safety should always be your top priority when working with electrical appliances.
- Access the Thermostat: Locate the access panel on your water heater. The thermostat is typically situated behind this panel. Use caution and refer to the manufacturer’s instructions to remove the panel safely.
- Test the Thermostat: Use a multimeter or a volt-ohm meter to test the thermostat for continuity. This will help determine if it is functioning properly or if it needs to be replaced.
- Replace the Thermostat: If the thermostat is defective, carefully remove it from its mounting bracket and disconnect the wires. Install a new thermostat and reconnect the wires according to the manufacturer’s instructions.
- Restore Power and Test: Once the new thermostat is installed, restore power to the water heater and test the hot water. Ensure that the temperature is consistent and meets your desired setting.
Remember to exercise caution when working with electrical components and consult a professional plumber if you are unsure or uncomfortable performing repairs yourself.
If you’re unsure about diagnosing or fixing a faulty thermostat, it’s always wise to seek professional help. A trained technician can accurately diagnose the issue and ensure that all repairs are performed safely and effectively.
Pro Tip:
Regularly checking and adjusting the temperature settings on your water heater thermostat can help prevent malfunctions and optimize energy efficiency. Set your water heater to a comfortable temperature between 120-140°F (49-60°C) to prevent scalding and promote energy savings.
| Problem | Cause | Solution |
|---|---|---|
| Inconsistent water temperature | Malfunctioning thermostat | Diagnose and repair thermostat issues by following the steps outlined above. |
| No hot water | Defective heating element or thermostat | Refer to the previous section on replacing a water heater element and fixing the thermostat. |
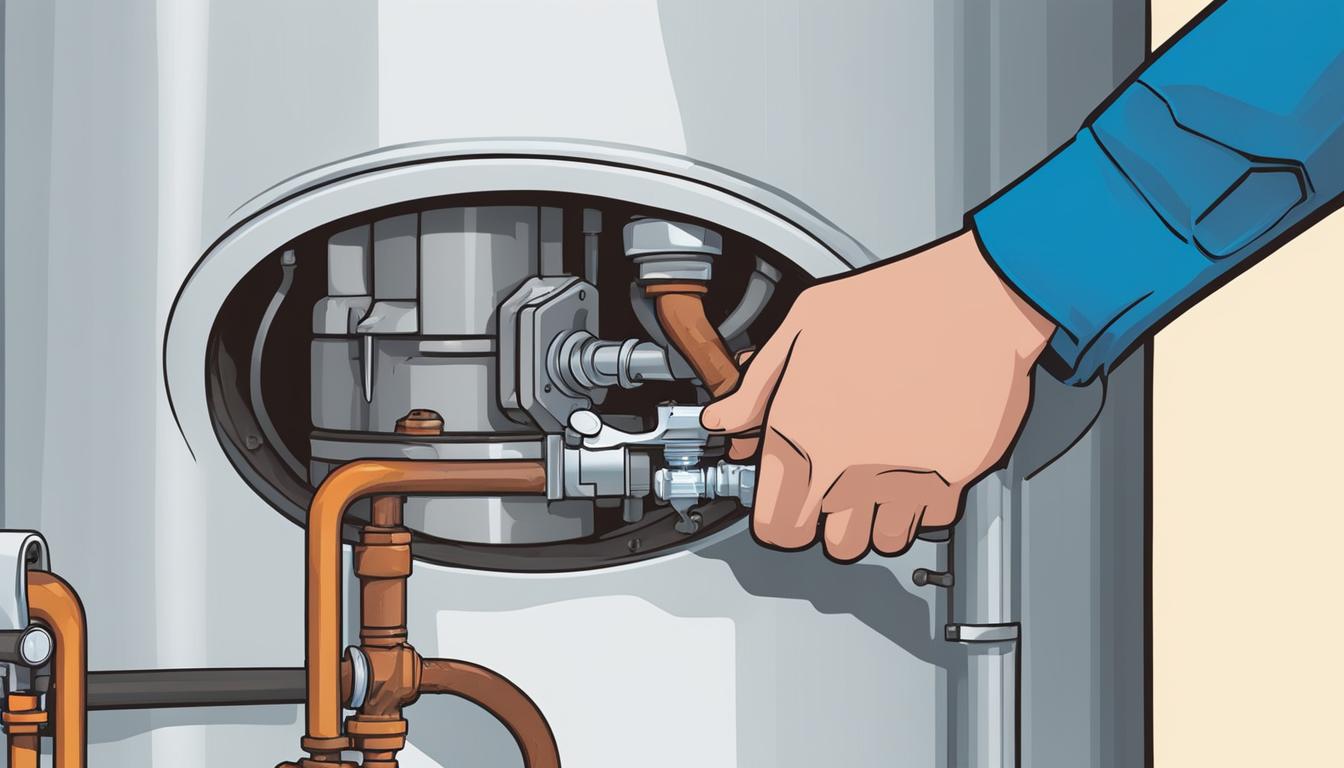
Replacing a Water Heater Element
If you’re experiencing a lack of hot water, the heating element in your water heater may be to blame. The heating element is responsible for heating the water inside the tank, and when it becomes faulty, it can lead to insufficient or no hot water. But don’t worry, replacing a water heater element is a relatively simple process that you can do yourself.
To help you get your hot water flowing again, we’ve put together a step-by-step guide on how to safely replace a water heater element. Just follow these instructions, and you’ll have your water heater back up and running in no time.
Gather the Necessary Tools and Materials
Before you begin the replacement process, make sure you have the following tools and materials:
- Adjustable wrench
- Screwdriver
- Multimeter
- New water heater element
- Teflon tape
- Gloves
Turn Off the Power Supply and Water
Prior to replacing the heating element, it’s crucial to turn off the power supply to the water heater. Locate the circuit breaker or fuse that controls the water heater and switch it off. Additionally, shut off the cold water supply to the water heater by closing the valve located on the inlet pipe.
Drain the Water Heater
Next, you’ll need to drain the water heater to prevent water from spilling out during the replacement process. Attach a garden hose to the drain valve at the base of the water heater and place the other end into a suitable drainage area. Open the valve to allow the water to drain out completely.
Remove the Old Heating Element
Once the water heater is empty, use an adjustable wrench to loosen and remove the wires connected to the heating element. Take note of the wire placement or take a picture for reference. After disconnecting the wires, use a screwdriver to unscrew the old heating element from the water heater tank.
Install the New Heating Element
Apply a layer of Teflon tape to the threads of the new heating element to ensure a tight seal. Insert the new element into the water heater tank and use a screwdriver to tighten it securely. Reconnect the wires to the new element, making sure to match the correct connections based on your reference or picture.
Test the Heating Element
Before refilling the water heater, it’s important to test the new heating element to ensure it is functioning properly. Use a multimeter to check for continuity between the terminal screws of the element. If you get a reading of zero or close to zero resistance, the element is working correctly. If not, double-check the wiring connections and repeat the testing process.
Refill and Test the Water Heater
Once you’ve confirmed that the new heating element is working, close the drain valve and slowly turn on the cold water supply to refill the water heater tank. Once the tank is full, switch on the power supply at the circuit breaker or fuse box. Allow the water heater to heat up, and then check for hot water at the faucet.
Replacing a water heater element is a cost-effective way to restore hot water in your home. However, if you’re uncomfortable with DIY repairs or encounter any difficulties during the process, it’s always best to consult a professional plumber for assistance.
Now that you know how to replace a water heater element, you’re equipped with the knowledge to tackle this common issue and restore the comfort of hot water in your home.
Addressing Leaks and Sediment Buildup
Leaks and sediment buildup are common issues that can affect the efficiency and lifespan of your water heater. Ignoring these problems can lead to higher energy bills, decreased hot water supply, and potential damage to your appliance. In this section, we will explore effective methods to address leaks and sediment buildup, allowing your water heater to operate at its best.
Identifying and Fixing Leaks
If you notice water pooling around your water heater, it is crucial to identify and fix the source of the leak promptly. Follow these steps to address the issue:
- Turn off the power: Before inspecting or working on your water heater, always turn off the power supply. This ensures your safety and prevents electric shock.
- Check the connections: Inspect the valves, pipes, and fittings for any signs of leaks. Tighten loose connections or replace faulty parts as necessary.
- Inspect the tank: Carefully examine the tank itself for any cracks or corrosion. If you identify a leak from the tank, it may be necessary to replace the water heater. Consult a professional for further guidance.
- Address pressure relief valve leaks: Leaks from the pressure relief valve may indicate excessive pressure or a malfunctioning valve. Replace the valve if necessary or consult a plumber to diagnose and fix the underlying issue.
Remember, if you are unsure or uncomfortable performing any repairs, it is best to seek professional assistance to avoid further damage or potential hazards.
Tackling Sediment Buildup
Sediment buildup inside your water heater can reduce its efficiency and impact its lifespan. Follow these steps to address sediment buildup:
- Drain the tank: Turn off the power and connect a hose to the drain valve to empty the water heater. Flush out the tank, ensuring all sediment is removed. Refer to your water heater’s manual for specific instructions.
- Clean the tank: Once drained, use a brush or sponge to clean the interior of the water heater tank. Remove any loose sediment or debris.
- Restart and monitor: After cleaning, close the drain valve and refill the tank. Turn on the power and monitor the water heater for any signs of recurring sediment buildup.
“Regular maintenance and timely repair of leaks and sediment buildup are essential for optimal water heater performance. By addressing these issues, you can extend the lifespan of your appliance and enjoy reliable hot water.”
Common Causes of Water Heater Leaks
| Cause | Description |
|---|---|
| Loose connections | Improperly secured valves, pipes, or fittings |
| Corrosion | Chemical reactions causing metal deterioration |
| Cracked tank | Structural damage to the water heater tank |
| Pressure relief valve issues | Malfunctioning valve or excessive pressure within the tank |

Taking prompt action to address leaks and sediment buildup is crucial for maintaining the performance and longevity of your water heater. Stay proactive and follow the steps outlined in this section to ensure the optimal functioning of your appliance.
Dealing with Water Heater Pilot Light Problems
One of the common problems that can disrupt your access to hot water is a pilot light that goes out. Without a functioning pilot light, your water heater won’t be able to ignite and heat the water. But don’t worry, we’re here to help you troubleshoot and relight the pilot light.
- First, ensure that the gas supply to the water heater is turned on. If the gas valve is closed, open it by turning it counterclockwise.
- Locate the pilot light assembly. It is usually found near the bottom of the water heater, behind a small access panel.
- Gently remove the access panel to expose the pilot light assembly. Check for any signs of damage or debris.
- If you notice any debris or dirt blocking the pilot light, use a small brush or compressed air to clean it. Ensure that the area around the pilot light is clear.
- Once the pilot light assembly is clean, locate the pilot light control knob. It is typically labeled “Pilot,” “On,” and “Off.”
- Turn the control knob to the “Off” position and wait for a few minutes to allow any lingering gas to dissipate.
- Next, turn the control knob to the “Pilot” position. While holding down the control knob, use a long-reach lighter to ignite the pilot light.
- Once the pilot light is lit, continue holding the control knob for about one minute to allow the thermocouple to heat up. The thermocouple is a safety device that detects if the pilot light is on.
- Release the control knob and observe the pilot light. It should remain lit. If it goes out, repeat the lighting process.
- Finally, carefully replace the access panel and ensure it is securely fastened.
In most cases, following these steps will help you successfully relight the pilot light and restore hot water to your home. However, if the pilot light continues to go out despite repeated attempts, it may indicate a deeper underlying issue. In such cases, it’s best to seek professional water heater repair services to diagnose and resolve the problem.
Remember to exercise caution when working with gas appliances. If you’re unsure or uncomfortable performing the above steps, it’s always better to err on the side of safety and call a licensed plumber or technician.
Whether you’re able to relight the pilot light yourself or need professional assistance, addressing water heater pilot light problems promptly is essential for uninterrupted access to hot water in your home.
Significance of Professional Water Heater Repair
While certain water heater problems can be resolved through DIY repairs, there are instances when it’s essential to seek the expertise of a professional plumber. Recognizing when professional water heater repair is necessary can save you time, money, and potential hazards.
Professional water heater repair ensures that the problem is accurately diagnosed and fixed, avoiding any further complications or damage to your system. Trained technicians have the knowledge and experience to tackle complex repairs and handle potentially dangerous situations with ease.
When you hire a professional for water heater repair, you can expect:
- Efficient and accurate diagnosis of the issue.
- Quality repairs using specialized tools and equipment.
- Compliance with safety and industry regulations.
- Long-term solutions that address the root cause of the problem.
- Expert advice on maintenance and prevention to avoid future issues.
Attempting to repair your water heater without the necessary skills and knowledge can lead to costly mistakes, inadequate fixes, and even personal injury. It’s important to prioritize your safety and the integrity of your water heater by entrusting repairs to qualified professionals.
Furthermore, professional water heater repair often comes with warranties or guarantees, giving you peace of mind knowing that if any issues arise after the repair, you’ll have recourse for further assistance or repairs.
When considering whether to tackle a water heater repair yourself or call in a professional, assess the complexity of the problem, your own expertise, and the potential risks involved. Remember, it’s always better to be safe than sorry.
Takeaway
Professional water heater repair is crucial for resolving complex issues, ensuring safety, and obtaining long-lasting solutions. By trusting qualified plumbers with your water heater repairs, you can have confidence in the quality of work and enjoy the convenience of hot water without the hassle of ongoing problems.
Regular Water Heater Maintenance Checklist
Prevention is better than cure. By following a comprehensive maintenance checklist, you can keep your water heater in top shape and minimize the risk of breakdowns and costly repairs. Here are some essential water heater maintenance tips to ensure your unit continues to operate efficiently:
- Check the temperature and pressure relief valve: Regularly inspect the valve for leaks and ensure it is in good working condition. Test the valve’s functionality by lifting the lever and allowing water to discharge briefly. This helps prevent excessive pressure buildup in the tank.
- Drain and flush the tank: Sediment can accumulate at the bottom of the tank over time, reducing efficiency and potentially causing damage. Drain and flush the tank annually to remove sediment and maintain optimal performance.
- Insulate exposed pipes: Insulating the hot and cold water pipes connected to your water heater can help reduce heat loss and minimize energy wastage. Use insulation sleeves or tape to cover any exposed pipes.
- Check the anode rod: The anode rod plays a crucial role in preventing corrosion inside the tank. Inspect the anode rod annually and replace it if it shows signs of heavy corrosion.
- Test the pressure relief valve: To ensure the pressure relief valve is functioning properly, perform an annual test. Carefully discharge a little water through the valve to verify that it opens and closes easily.
- Inspect the venting system: For gas-powered water heaters, the venting system is responsible for removing exhaust gases safely. Regularly inspect the vent pipes for any blockages or signs of deterioration, ensuring proper ventilation.
- Check for leaks: Routinely examine the connections and fittings for any signs of leaks. If you notice any leaks, address them promptly to prevent water damage and potential issues with the unit.
- Test the water temperature: Ensure that the water temperature is set at a safe and comfortable level. Adjust the thermostat if necessary.
- Consider a professional inspection: While regular maintenance tasks can be performed by homeowners, it’s also advisable to schedule a professional inspection once a year. A trained technician can identify potential problems early on and provide expert guidance.
By following these water heater maintenance tips, you can prolong the lifespan of your unit, improve energy efficiency, and have peace of mind knowing that your water heater is in optimal condition.
Conclusion: Key Takeaways for Easy Water Heater Repair
In conclusion, this comprehensive water heater repair guide has equipped you with the knowledge and tools necessary to tackle common water heater problems and perform basic repairs. By following the troubleshooting tips, DIY repair steps, and maintenance advice outlined in this guide, you can save time and money by resolving issues on your own.
Remember, regular maintenance is essential to extend the lifespan of your water heater and ensure continuous comfort in your home. By following the maintenance checklist provided, you can prevent future problems and keep your water heater operating at its best.
However, it’s important to note that while you can handle many repair tasks on your own, certain issues may require the expertise of a professional plumber. When in doubt or if you’re not comfortable with a specific repair, it’s always best to seek professional assistance to ensure your safety and the proper functioning of your water heater.
FAQ
How do I know if my water heater needs to be repaired?
There are a few common signs that indicate your water heater might need repairs. These include a lack of hot water, unusual noises coming from the tank, water leaking around the unit, or a noticeable decrease in water pressure. If you experience any of these issues, it’s worth investigating further to determine the cause and necessary repairs.
Can I fix my water heater myself?
Certain water heater problems can be addressed with DIY repairs. However, it’s important to consider your own skill level and safety precautions. Simple tasks like replacing a heating element or relighting the pilot light can often be done by homeowners. For more complex issues or if you’re unsure, it’s best to consult a professional water heater repair service.
How can I troubleshoot common water heater problems?
Troubleshooting common water heater problems involves understanding the symptoms and potential causes. For example, if you’re experiencing a lack of hot water, it could be due to a faulty thermostat or heating element. By identifying the problem, you can then follow specific troubleshooting steps, which may include checking electrical connections, testing the thermostat, or inspecting the heating element.
What kind of regular maintenance should I perform on my water heater?
Regular maintenance is crucial for the optimal performance and longevity of your water heater. This includes draining and flushing the tank annually to remove sediment buildup, checking for leaks or signs of corrosion, inspecting and replacing sacrificial anode rods when necessary, and testing the pressure relief valve. Additionally, it’s essential to follow the manufacturer’s maintenance guidelines outlined in the owner’s manual.
How do I replace a water heater element?
To replace a water heater element, start by turning off the power and water supply to the unit. Drain the tank and remove the access panel to access the heating element. Disconnect the electrical connections, unscrew the old element, and install the new one. Reconnect the electrical connections, refill the tank, and turn on the power and water supply. It’s important to use caution and follow the manufacturer’s instructions during this process.
What should I do if my water heater is leaking?
If you notice water leaking from your water heater, it’s important to act quickly to prevent further damage. Start by shutting off the power and water supply to the unit. Determine the source of the leak, which could be a faulty valve, a cracked tank, or loose connections. Depending on the cause, you may need to tighten connections, replace a valve, or contact a professional plumber for assistance.
How do I relight the pilot light on my water heater?
Relighting the pilot light on your water heater typically involves turning the gas control knob to the pilot position, pressing and holding the reset or ignition button, and using a long-reach lighter to ignite the pilot flame. Once the pilot flame is lit, continue to hold the reset button for a short time, then release it. If the pilot light doesn’t remain lit or relight, it may indicate a deeper problem that requires professional attention.
What are the benefits of professional water heater repair?
Professional water heater repair offers several advantages. Experienced technicians have the knowledge and tools to accurately diagnose the problem and perform repairs safely and efficiently. They can also identify any underlying issues that may have caused the problem, preventing future breakdowns. Additionally, professional repairs often come with warranties, giving you peace of mind knowing that the work is guaranteed.
How often should I perform maintenance on my water heater?
It’s recommended to perform regular maintenance on your water heater annually. This includes draining and flushing the tank, inspecting components, testing the pressure relief valve, and checking for leaks or signs of corrosion. Additionally, it’s a good idea to have a professional inspection every few years, especially as your water heater ages. Following a maintenance schedule will help prolong the lifespan of your water heater and minimize the risk of costly repairs or premature replacement.
Related Images:
Amanda Schmitt
Latest posts by Amanda Schmitt (see all)
- Fruit Infused Waters That Make Summer Hydration Fun - July 1, 2025
- Light Up Your Life: Home Lighting Decoration Ideas - June 30, 2025
- Let’s Taco Party! Easy Steps for a Perfect Taco Bar Setup - June 27, 2025