I’ve been seeing beautiful weavings and wall hangings popping up all over Pinterest and Instagram for months now. Since I’ve been dying to have one in my home, i thought I should go ahead and learn how to make one. I decided to stick to an easy yarn wall hanging that doesn’t require any weaving for my first attempt, but a weaving is next on the list. I was so happy to find out that they are really easy to make and super fun, not to mention, crazy affordable. I spent less than $10.00 on the whole project. I’m already dreaming up a whole bunch more colors and designs to try next. Just don’t tell my husband.
What You’ll Need
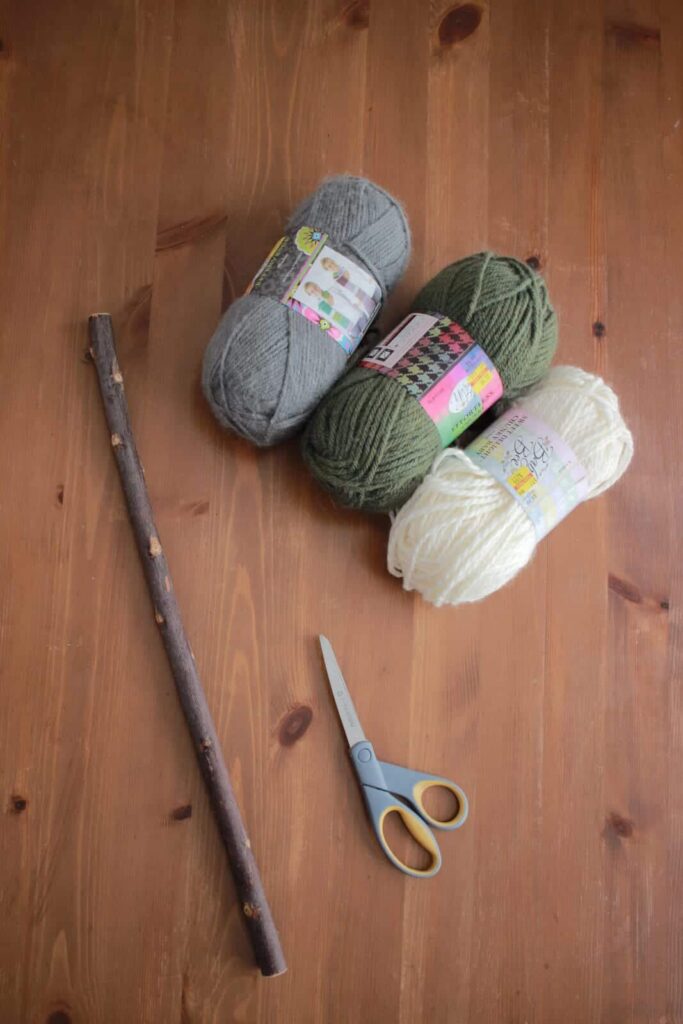
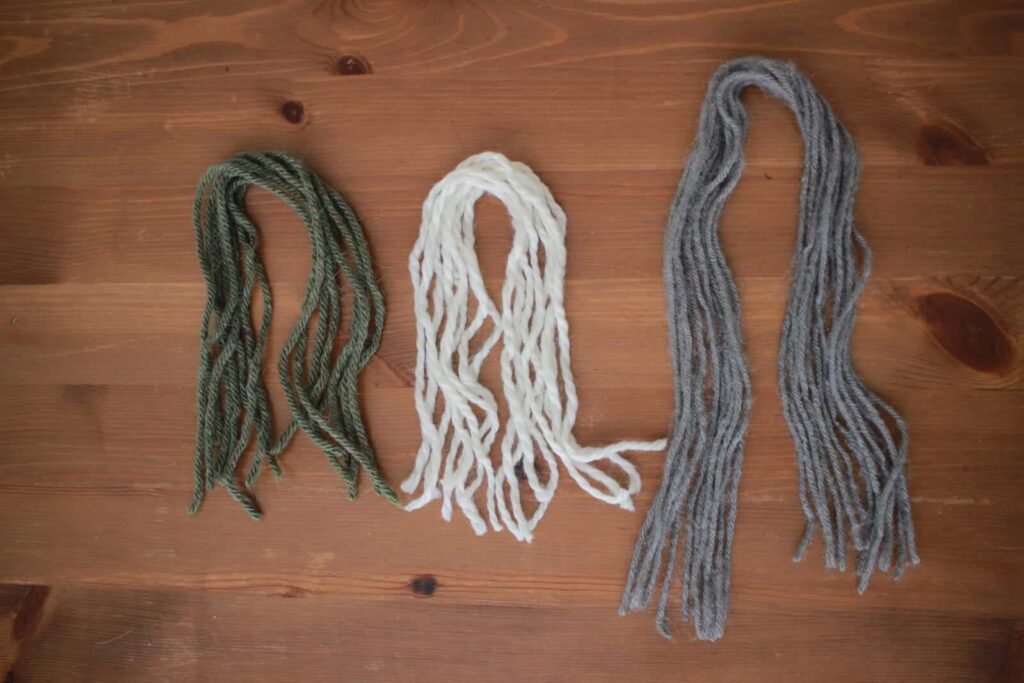
Yarn
Wooden Dowel or Stick
Scissors
Instructions
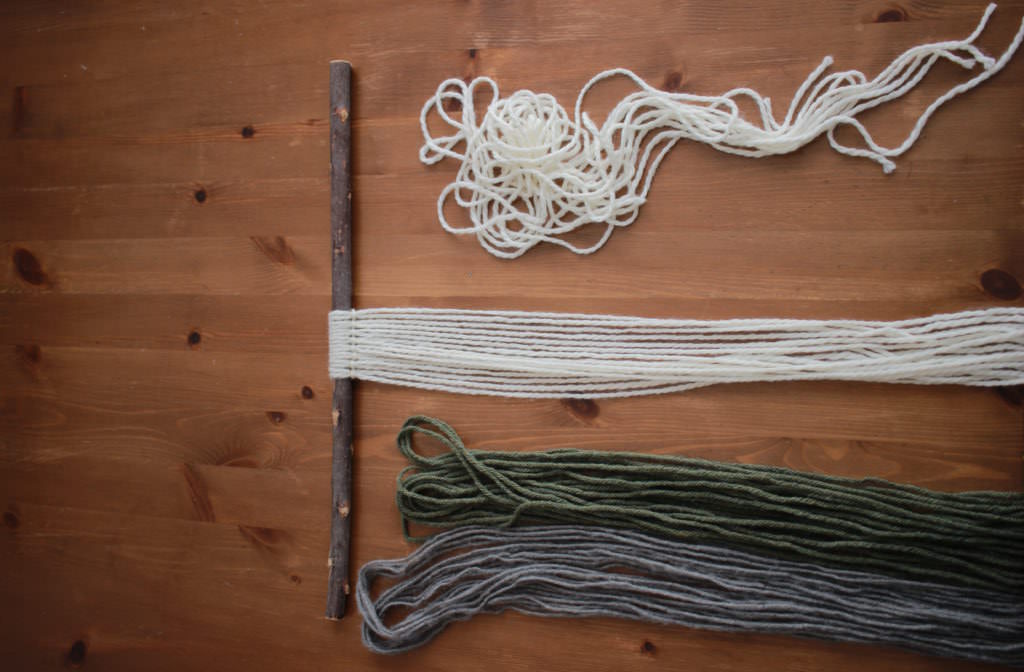
To start this project you take your wooden dowel or stick, I went with a stick as I preferred a more rustic style, and find a large flat surface to work on. I then took all the different colors of yarn I planned to include in my hanging and cut them into long strands. Whatever your desired length is, make sure to double it, you need it to be doubled in order to hang it from your dowel.
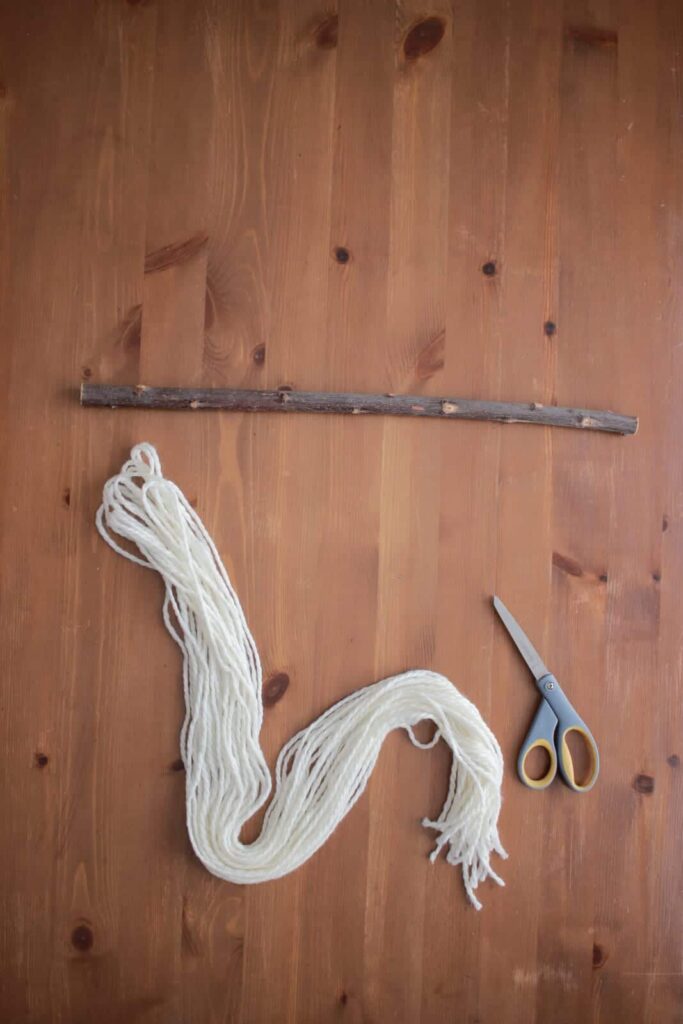
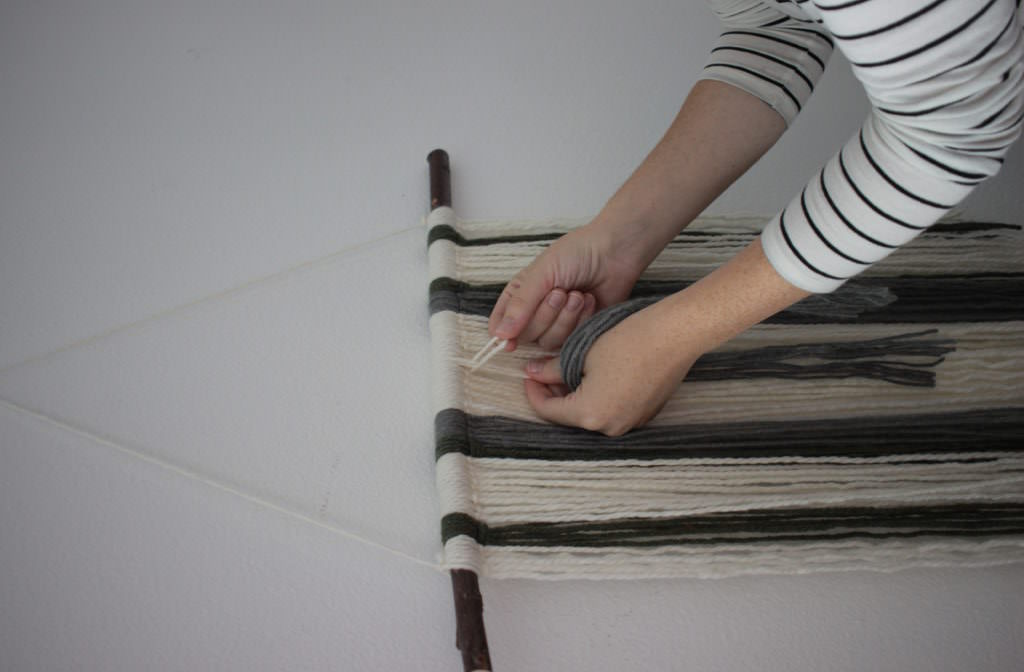
Once you have cut all your yarn to length you are ready to start attaching it to your dowel. I made up my pattern as I went along and ended up needed to cut more yarn to complete it, but no big deal. Next time I’ll probably draw out a pattern beforehand so I have a better idea of how much of each color I’d need.
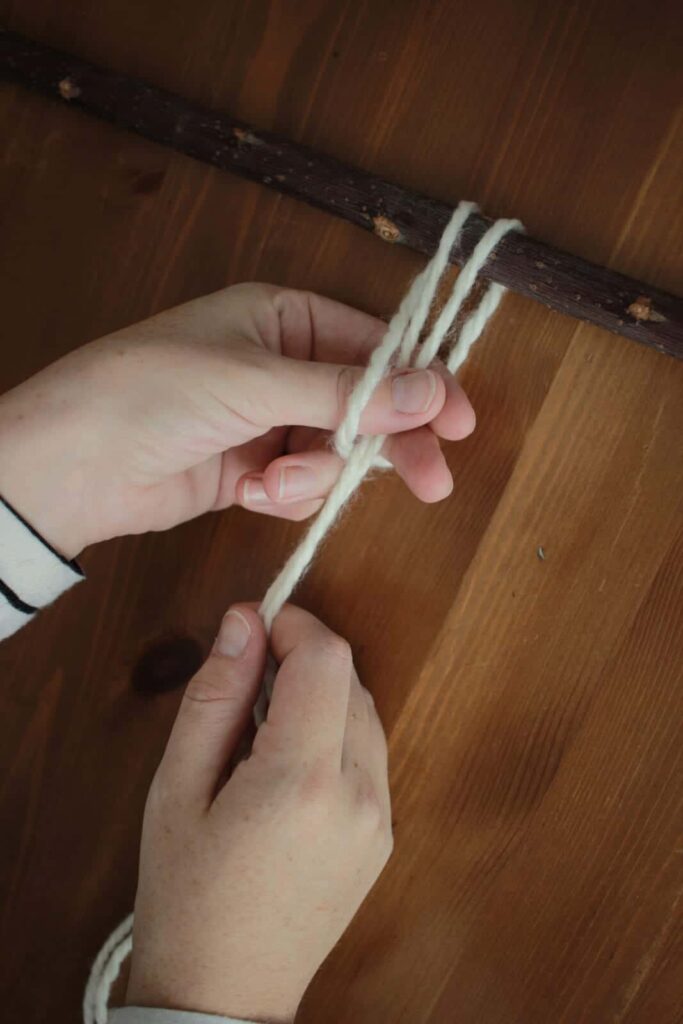
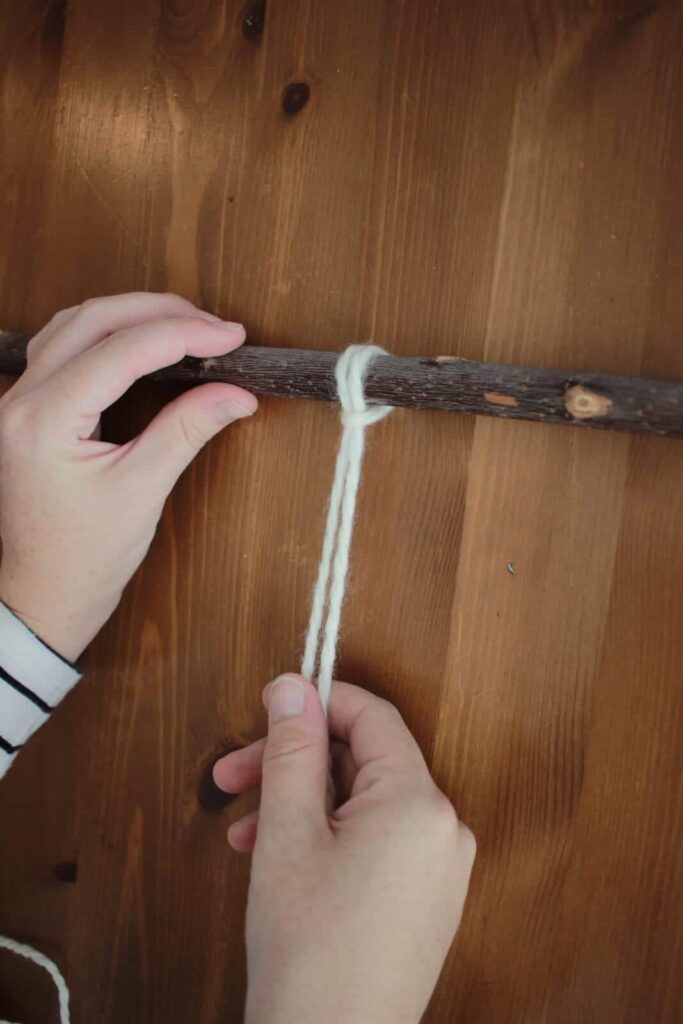
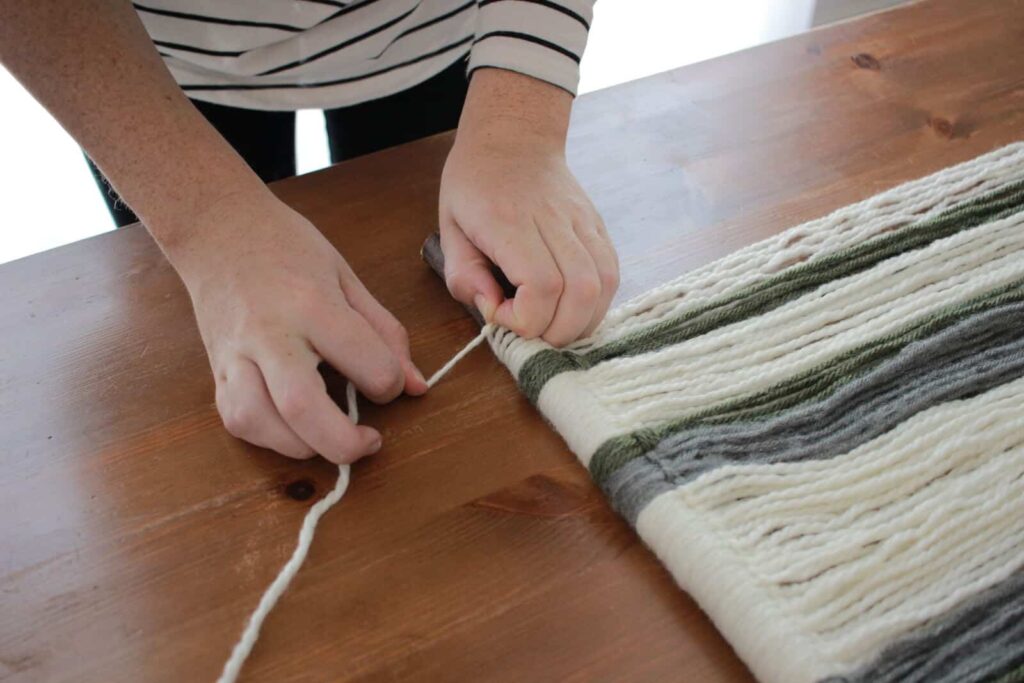
To tie the yarn onto your dowel tuck the looped end of yarn over and under your dowel and pull the loose ends of the yarn through the loop. It’s a super easy, and kinda like a slip knot – just make sure you are tying it the same way each time so the “knot” faces out, this will make it look more uniformed and even.
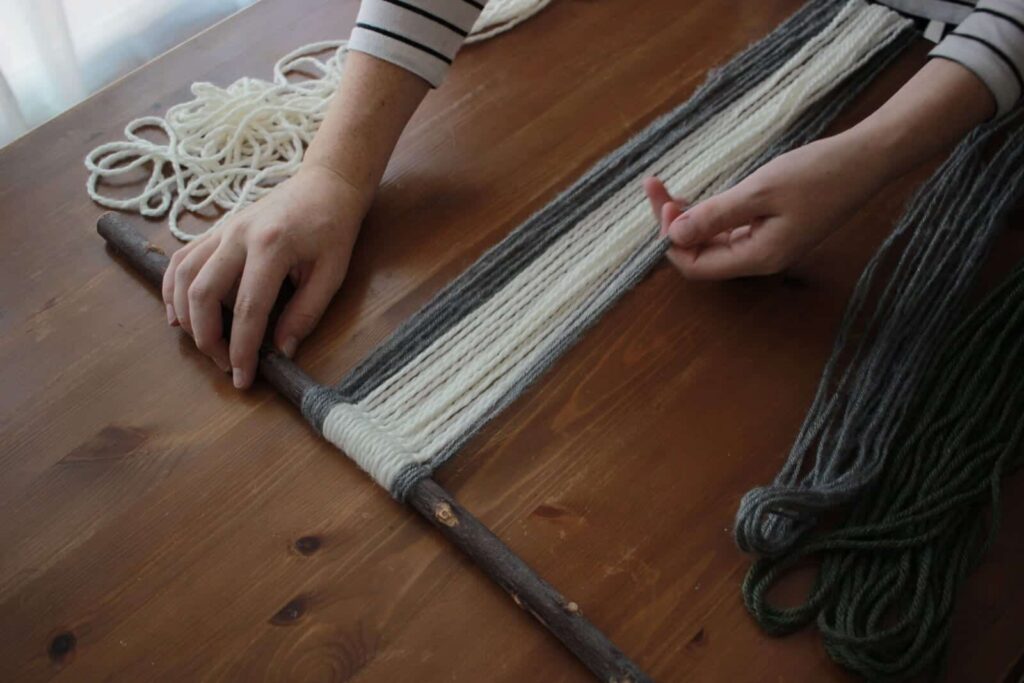
Keep adding each piece of yarn until you have your desired pattern… it should start to look something like this.
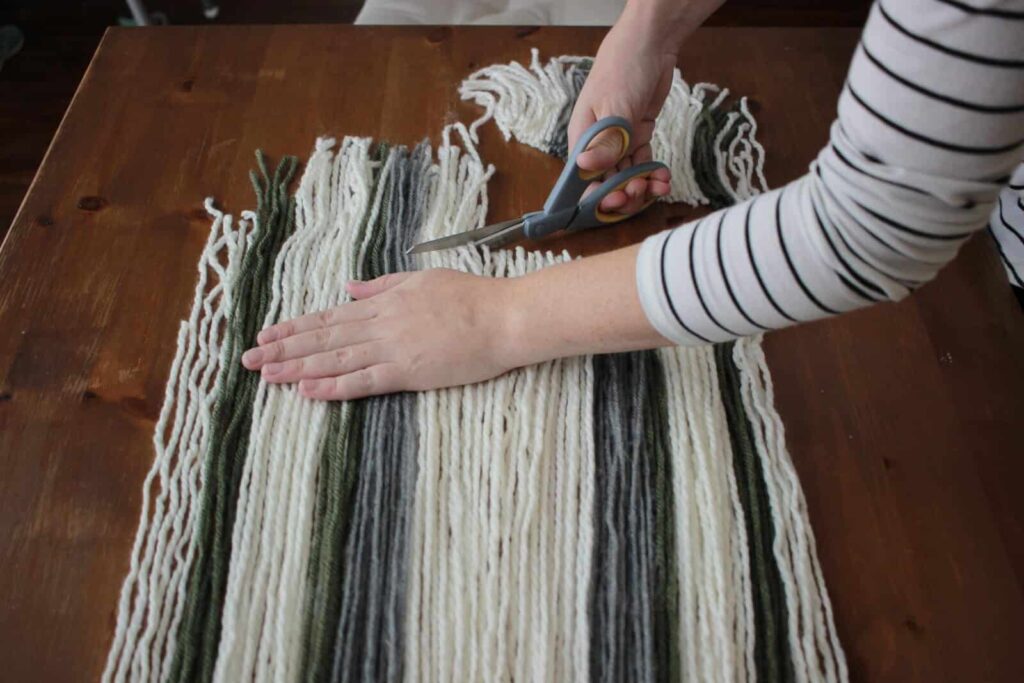
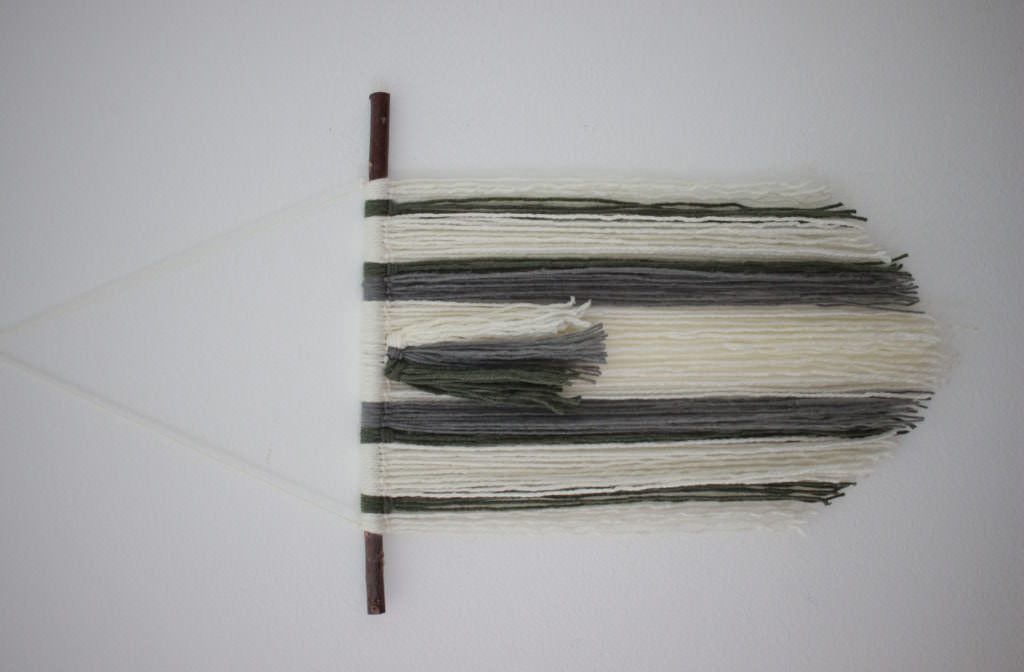
Once you have added all of your yarn it’s time to trim up the ends. You can leave it straight across if you’d like, but I wanted to add a little more interest to my hanging so I decided to cut the end into a triangle. To do this find longest piece in the centre and snip.
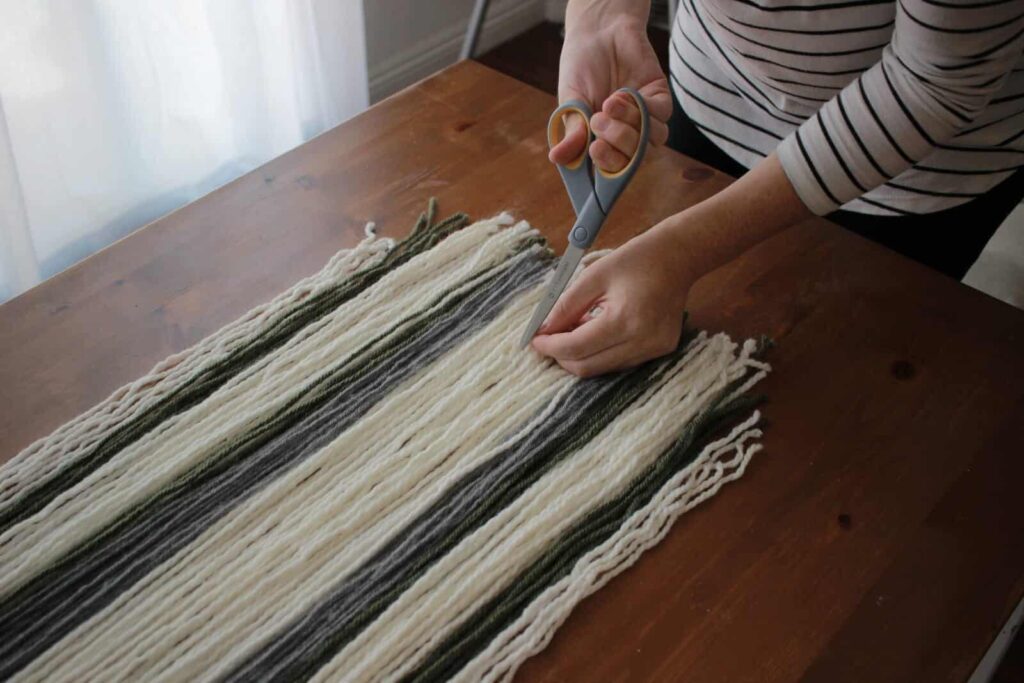
From there find find the shortest point on the side and make another snip. Do this on both sides and you should have the general shape you would like to end up with. I used my scissors to help rule a line between my two points, but you could pull our a regular ruler here to make more exact.

Once you have your three points, cut a straight line from each side down to the middle. If you didn’t get the shape quite right the first time (like me, sigh), then just adjust your points and you can trim away. That is the beauty of this craft, it does’t have to be perfect.
Next step in to hang your new or you could even use twine if you prefer, and tie it
Next up, tie on a piece of yarn (or string if you prefer), onto each side of the your dowel so you can hang it up. It should look something like this.
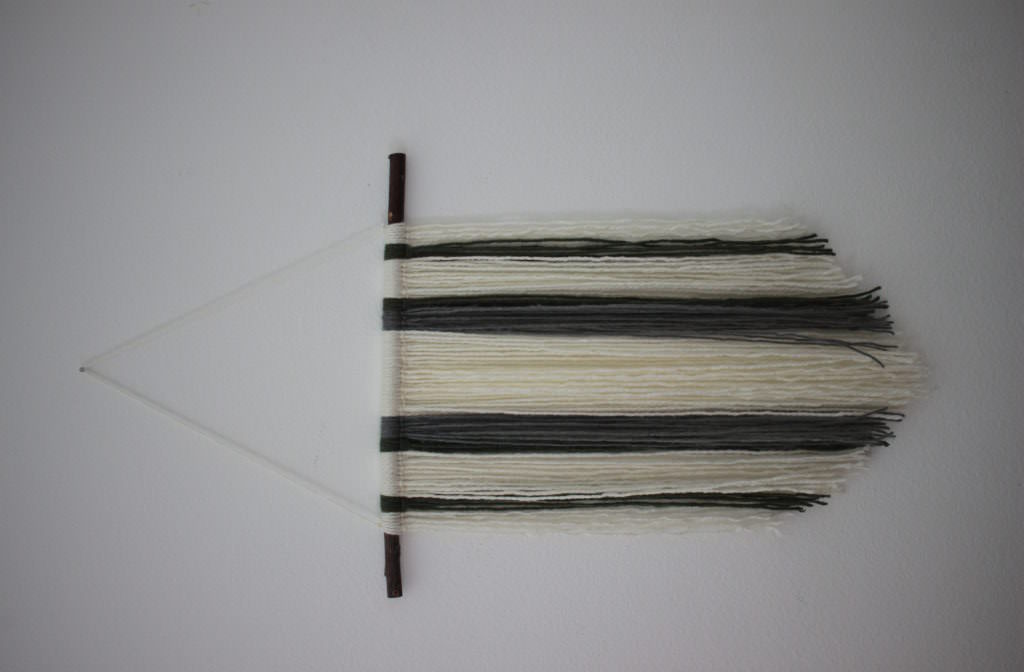
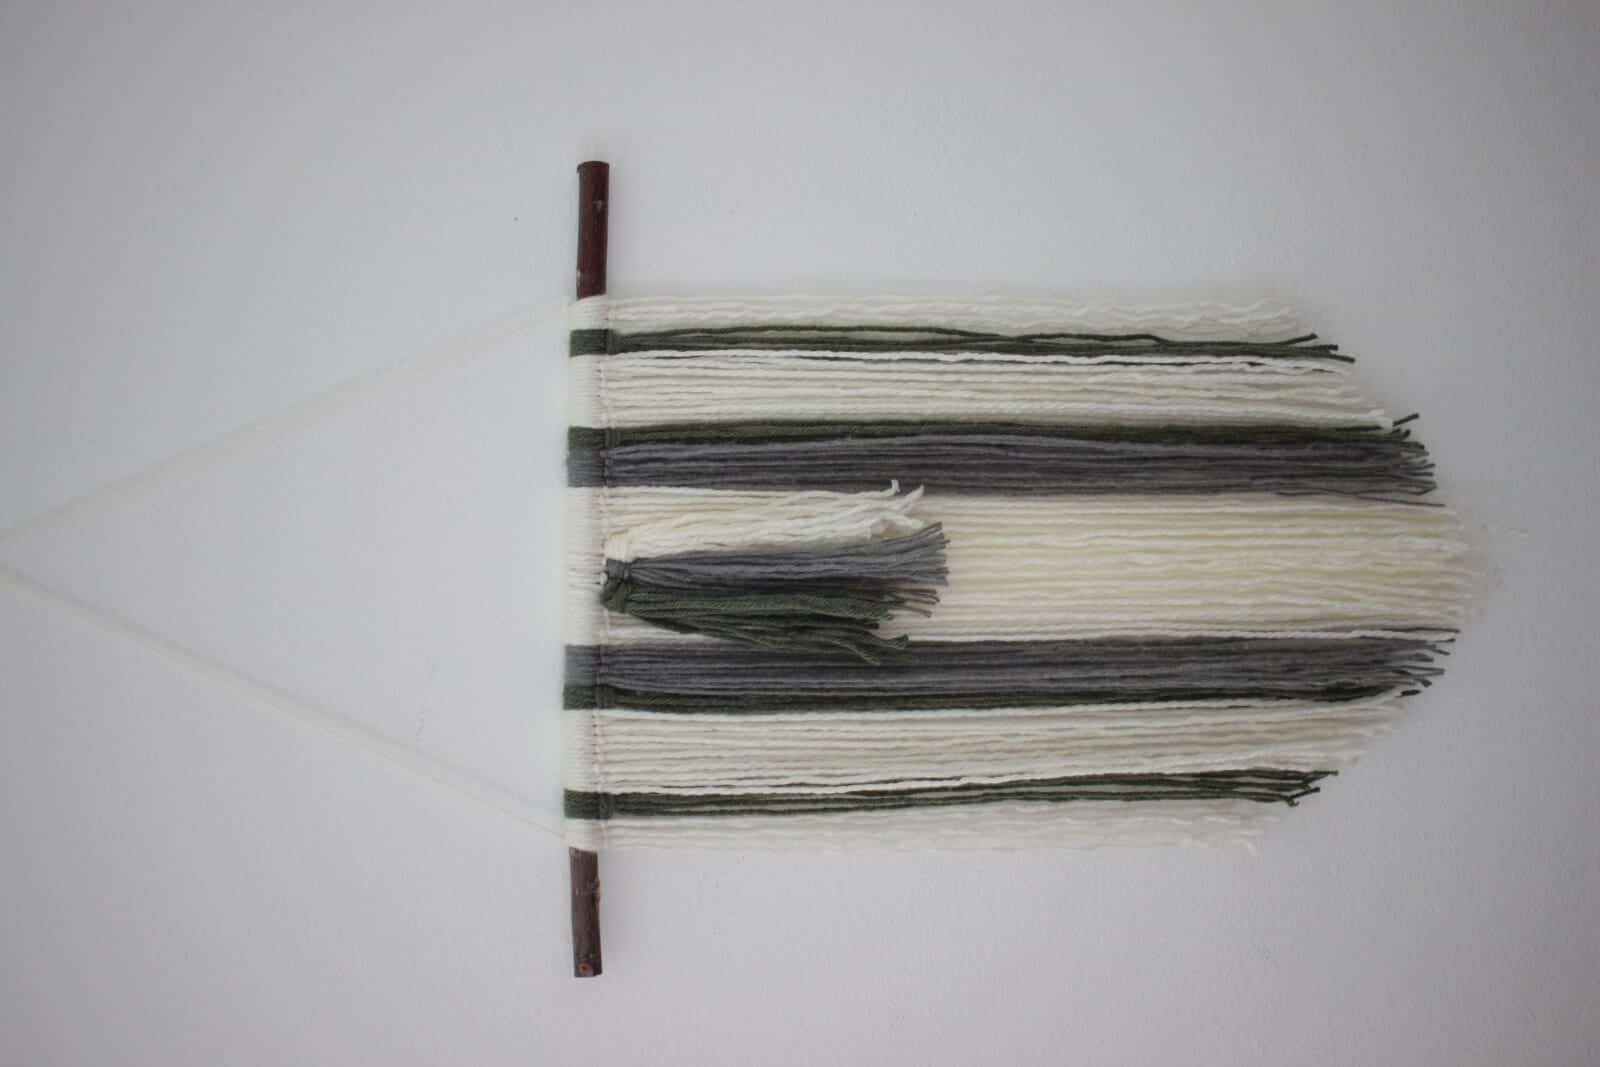
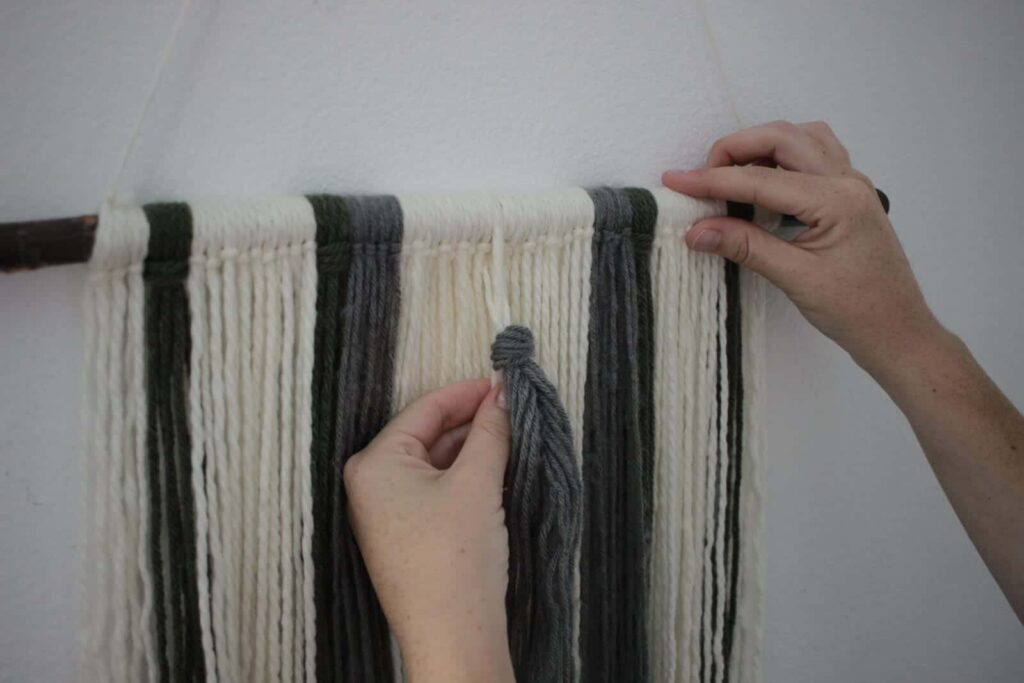
Now you can leave your wall hanging just like this is you’d like, but I prefer mine with a little more texture, so I added tassels. These are the exact same as your long pieces of yarn except you just cut more to make them fuller. I used 8 or so strands of yarn doubled over. I also wanted my wanted my tassels to be slightly different lengths so I cut them all differently, you can always trim them once their tied on, too.
Then find the middle of the hanging for your first tassel and loosen the knot by pulling down. Tie your tassel to that centre piece of yarn the same way you did on the dowel. Tuck the looped end through the space and pull the loose ends back though the loop to create a knot. Once you have the first one in place you can attach the rest. I kept them in a group of three and loved how it turned out.
And voila, you are done! It’s perfectly boho inspired and totally handmade and it can be hung proudly in your home.

Ellice Vargas
Latest posts by Ellice Vargas (see all)
- 9 Delicious Christmas Candy Recipes - November 6, 2018
- 10 Fabulous Fall Porch Decor Ideas - August 7, 2018
- Why The DockATot Is My Favorite Baby Product - June 1, 2017
Related Images:
Ellice Vargas
Latest posts by Ellice Vargas (see all)
- 9 Delicious Christmas Candy Recipes - November 6, 2018
- 10 Fabulous Fall Porch Decor Ideas - August 7, 2018
- Why The DockATot Is My Favorite Baby Product - June 1, 2017