Welcome to our DIY guide on how to make a kitchen cart easily. If you’re looking to add functionality and style to your kitchen, a kitchen cart is the perfect solution. Whether you need extra storage space, a portable workspace, or a convenient serving station, a DIY kitchen cart allows you to customize it to fit your needs perfectly.
By following our step-by-step guide, you’ll be able to create a kitchen cart that not only meets your requirements but also adds a touch of personalization to your kitchen. Let’s get started on this exciting project!
Key Takeaways:
- Building a DIY kitchen cart is a great way to add functionality and style to your kitchen.
- Creating a kitchen cart allows you to customize it according to your specific needs.
- Follow our step-by-step guide to easily make your own kitchen cart.
- Personalize and customize your kitchen cart to make it unique.
- A kitchen cart provides extra storage space, a portable workspace, or a convenient serving station.
Planning and Designing Your Kitchen Cart
Before you begin the construction process, it’s essential to plan and design your kitchen cart. This step will ensure that the final product meets your specific needs and complements the overall aesthetic of your kitchen. To inspire your creative process, here are some innovative kitchen cart design ideas:
- Minimalistic and Sleek: Create a cart with clean lines and a minimalist color palette to add a touch of modern elegance to your kitchen. Opt for sleek materials like stainless steel or laminated wood for a contemporary look.
- Rustic and Vintage: Embrace the charm of vintage kitchens with a rustic-inspired cart. Incorporate reclaimed wood, distressed finishes, and antique hardware to achieve a nostalgic, farmhouse ambiance.
- Industrial and Functional: If you prefer an edgier design, consider an industrial-style cart. Use metal frames, exposed bolts, and reclaimed wood to create an urban-inspired piece that adds character to your kitchen.
- Colorful and Playful: Inject some personality into your kitchen space with a vibrant and playful cart. Paint the cart in bold colors, incorporate quirky patterns, or add playful accessories to achieve a fun and lively atmosphere.
- Multi-functional and Space-saving: For compact kitchens, opt for a cart that offers multi-functional features and efficient use of space. Look for designs with built-in storage, foldable surfaces, or adjustable shelves to maximize functionality.
Remember, your kitchen cart should not only be aesthetically pleasing but also serve as a practical addition to your cooking area. Take into account factors such as the size of your kitchen, the available storage options, and the tasks you want your cart to assist with. By carefully planning and designing your kitchen cart, you can create a custom piece that perfectly blends style and functionality.
“The kitchen cart is a versatile piece of furniture that can enhance the functionality and style of your kitchen. Take the time to explore different design ideas and consider how they align with your personal preferences and the overall theme of your kitchen.”
Gathering the Materials and Tools
Before you can start building your kitchen cart, you’ll need to gather the necessary materials and tools. Here’s a list of what you’ll need:
Materials:
- Wood – Choose a sturdy and durable wood, such as oak or birch, for the frame and shelves of your cart.
- Screws and Nails – Select screws and nails that are appropriate for woodworking projects.
- Wheels – Decide on the type of wheels you want for your cart. Consider the weight capacity and mobility requirements.
- Handles – Choose handles that are comfortable to grip and complement the overall design of your cart.
- Wood Glue – Use wood glue to reinforce joints and ensure stability.
- Finishing Materials – Prepare sandpaper and wood stain or paint to finish your cart.
Tools:
- Measuring Tape – Accurate measurements are crucial for a well-built cart.
- Saw – A circular saw or miter saw will help you cut the wood to the desired dimensions.
- Screwdriver and Hammer – These basic tools will be used to drive screws and nails into place.
- Drill – A drill with appropriate drill bits will make it easier to create holes for screws.
- Clamps – Clamps will assist in holding pieces of wood together while you fasten them.
- Sander – A sander will help smooth rough edges and surfaces.
- Paintbrushes or Rollers – Use these tools to apply the finishing touches to your cart.
Now that you have a comprehensive list of materials and tools, you’re ready to move on to the next step of the process. In the next section, we’ll provide you with recommended woodworking plans to guide you through the building process.
Preparing the Wood and Cutting the Pieces
Before you assemble your custom kitchen cart, it’s crucial to properly prepare the wood and cut the pieces according to your chosen design. This step is essential for achieving precise cuts and ensuring the structural integrity of your cart.
To get started, gather the following materials and tools:
- Wood of your choice
- Measuring tape
- Pencil
- Square or T-square
- Circular saw or table saw
- Clamps
- Safety goggles
Once you have everything you need, follow these steps:
1. Measure and Mark
Measure and mark the dimensions of each piece of wood according to your kitchen cart design. Use a measuring tape and a pencil to ensure accurate measurements. Consider the overall size and shape of your cart, as well as any additional shelving or compartments you plan to incorporate.
2. Secure the Wood
Secure the wood to a workbench or sawhorses using clamps. This will prevent the wood from moving during the cutting process and ensure cleaner cuts.
3. Make the Cuts
Using a circular saw or table saw, carefully cut along the marked lines. Follow the manufacturer’s instructions for your specific saw to ensure safe and accurate cutting. Take your time and apply steady pressure to achieve smooth, even cuts. Wear safety goggles to protect your eyes from any flying wood chips or debris.
4. Check for Accuracy
After making each cut, use a square or T-square to check for accuracy. Ensure that the angles are straight and the dimensions match your design specifications. Make any necessary adjustments before proceeding to the next piece.
5. Sand the Edges
Once all the pieces are cut, use sandpaper or a sanding block to smooth out any rough edges. This will prevent splinters and create a polished look for your custom kitchen cart.
“Accurate measuring and precise cutting are the foundations of a well-built kitchen cart.” – Carpenter’s Magazine
By following these steps, you’ll be well on your way to creating a properly prepared and accurately cut set of pieces for your custom kitchen cart. Take your time and pay attention to detail to ensure a successful construction process.

| Materials | Tools |
|---|---|
| Wood | Measuring tape |
| Pencil | Square or T-square |
| Clamps | Circular saw or table saw |
| Safety goggles |
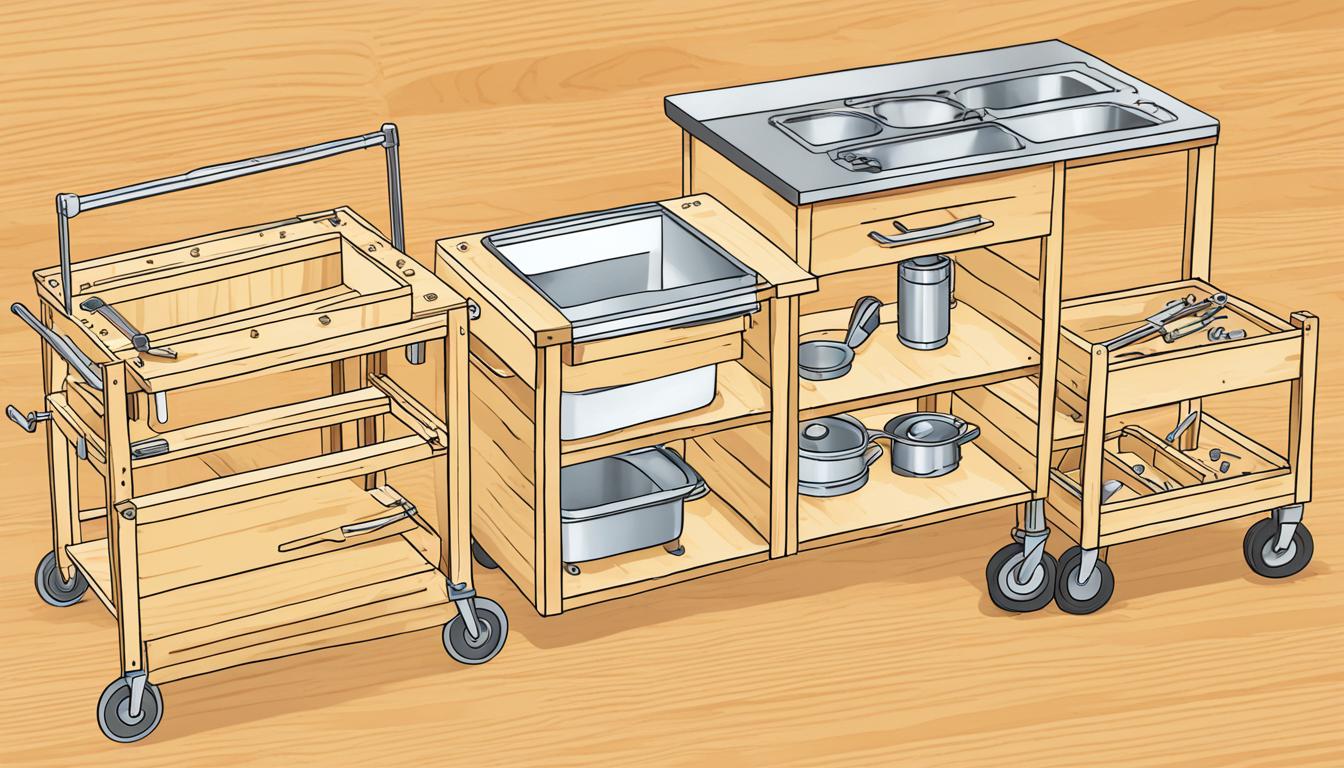
Building the Framework and Shelves
Now that you have your pieces cut, it’s time to start building the framework and shelves of your kitchen cart. This step is crucial in ensuring the stability and functionality of your cart.
Follow this step-by-step guide to assemble and secure the different components:
- Step 1: Begin by placing the four vertical posts on a flat surface, forming a square or rectangular shape. Make sure the posts are aligned and evenly spaced.
- Step 2: Use screws or nails to secure the posts together at each corner. This will create the basic framework for your cart.
- Step 3: Measure and mark the desired height for your shelves on each post. This will depend on your specific needs and the items you plan to store on the cart.
- Step 4: Cut the shelf pieces according to your measurements. These pieces will form the horizontal sections of your cart.
- Step 5: Attach the shelves to the posts using screws or nails. Ensure that they are level and secure.
- Step 6: If desired, add additional support brackets or braces to reinforce the shelves.
- Step 7: Double-check that all components are securely fastened and the cart is sturdy.
With the framework and shelves of your kitchen cart successfully built, it’s time to move on to the next step: adding wheels and handles for extra functionality. Stay tuned!
“The framework and shelves are the foundation of your kitchen cart. Take your time to ensure proper alignment and secure fastening for a sturdy and reliable cart.”
| Pros of Building the Framework and Shelves | Cons of Building the Framework and Shelves |
|---|---|
| Provides a sturdy foundation for the cart | Requires precise measurements and assembly |
| Allows customization to fit your specific needs | May require additional support brackets for heavy loads |
| Enables easy assembly of other components | Can be time-consuming depending on the complexity of the design |
Adding Wheels and Handles
In order to make your kitchen cart mobile and easy to move around, you’ll need to add wheels and handles. This will allow you to conveniently transport your cart from one area of the kitchen to another, making it a versatile and practical addition to your cooking space. Additionally, the right choice of wheels and handles can enhance the overall design and functionality of your cart.
Choosing the Right Wheels
When selecting wheels for your cart, consider the following factors:
- Size and Type: Choose wheels that are suitable for your cart’s size and weight capacity. There are various types available, including fixed, swivel, and locking wheels. Swivel wheels provide 360-degree movement, allowing you to easily maneuver the cart in any direction. Locking wheels can secure the cart in place, preventing any unwanted movement.
- Material and Surface: Pick wheels that are durable and appropriate for your kitchen environment. Rubber or polyurethane wheels work well on most surfaces, as they provide good traction and won’t damage floors. Consider the flooring in your kitchen and choose wheels that are gentle on the surface.
Adding Handles for Convenience
Handles make it easier to push and pull your kitchen cart, especially when it’s fully loaded. Here are some factors to consider when choosing handles:
- Style and Design: Handles come in a variety of styles and finishes to match your kitchen decor. You can choose from sleek and modern handles or opt for more traditional designs. Consider the overall aesthetic of your cart and select handles that complement the style.
- Comfort: Look for handles that are comfortable to grip and ergonomic in design. They should provide a secure and comfortable grip to ensure easy maneuvering of your cart.
By selecting the right wheels and handles, you can enhance the functionality and mobility of your kitchen cart while adding a touch of style. Now, let’s move on to the next section, where we’ll discuss sanding and applying finishing touches to your cart.
| Benefits of Adding Wheels and Handles | Considerations for Choosing Wheels and Handles |
|---|---|
|
|
Sanding and Finishing Touches
Once the construction of your DIY kitchen cart is complete, it’s time to add the final touches that will give it a smooth and professional finish. Sanding and finishing not only enhance the appearance of your cart but also protect it from wear and tear.
Before you start sanding, make sure to remove any dust or debris from the surface of the cart. Use a damp cloth or vacuum cleaner to ensure a clean workspace.
- Choose the right sandpaper: Use 120-grit sandpaper to smooth out any rough edges or imperfections in the wood. Follow up with a finer 220-grit sandpaper to achieve a surface that’s smooth to the touch.
- Sand in the direction of the grain: When sanding the wooden surfaces of your kitchen cart, always go with the grain of the wood. This will prevent scratching or damaging the surface and ensure an even finish.
- Start with rough sanding: Begin with the coarser 120-grit sandpaper to remove any blemishes or uneven spots on the wood. Use steady, even strokes, applying light pressure to avoid over-sanding.
- Switch to fine sanding: Once you’ve achieved a smooth surface with the rough sandpaper, switch to the finer 220-grit sandpaper for a final sanding. This will give your cart a polished look and feel.
- Don’t forget the corners and edges: Pay close attention to the corners and edges of your kitchen cart. Use a sanding block or folded sandpaper to reach these areas and ensure they are smooth and well-finished.
After sanding, clean off any sanding dust from the cart using a brush or cloth. Once the surface is clean and dry, you can proceed with applying a protective finish to seal and protect the wood.
Tip: Always wear protective gloves and a mask when sanding to avoid inhaling sawdust and protect your hands from rough surfaces.
Now that your kitchen cart is sanded and prepared, it’s time for the finishing touches. Applying a protective finish will not only enhance the beauty of the wood but also provide resistance against moisture, stains, and scratches.
Table:
| Finishing Option | Description |
|---|---|
| Polyurethane | A durable and long-lasting finish that provides excellent protection against water and heat. Available in gloss, semi-gloss, and matte finishes to suit your preference. |
| Danish oil | Offers a natural and warm look to the wood while protecting it from moisture. It requires regular reapplication but provides a rich finish. |
| Wax | Creates a soft and smooth finish on the wood surface while enhancing its natural beauty. Requires periodic reapplication to maintain the protective layer. |
| Shellac | Provides a glossy and protective finish that’s easy to apply. Perfect for enhancing the wood grain and giving your kitchen cart a polished look. |
Choose a finish that aligns with your desired look and level of protection. Apply the finish according to the manufacturer’s instructions, ensuring even coverage on all surfaces. Allow the finish to dry completely before handling or using the kitchen cart.
“Sanding and finishing are the final steps that transform a simple DIY kitchen cart into a beautiful and functional piece of furniture. Take your time, follow the steps carefully, and enjoy the process of creating something unique for your kitchen.”
Applying a Protective Finish
Once you have built your DIY kitchen cart, it’s crucial to apply a protective finish to ensure its longevity and durability. A protective finish not only enhances the appearance of your cart but also shields it from moisture, stains, and daily wear and tear. In this section, we will guide you through the process of choosing and applying a suitable finish for your kitchen cart.
Choosing the Right Finish
The first step in applying a protective finish is selecting the right type for your kitchen cart. There are various options available, each with its unique qualities and benefits. Consider the following finishes:
- Polyurethane: A popular choice for its water-resistant properties, polyurethane provides a durable protective coat that withstands spills and regular use. It comes in both water-based and oil-based forms, allowing you to choose based on the desired level of shine and ease of application.
- Varnish: Varnish offers excellent protection against scratches and stains, making it ideal for high-traffic areas like the kitchen. It enhances the natural beauty of the wood and provides a glossy or satin finish, depending on your preference.
- Wood oil: If you prefer a more natural look, wood oil is a great choice. It penetrates the wood fibers, enhancing its color and grain while providing a protective layer against moisture. Wood oils are easy to apply and maintain, making them suitable for regular touch-ups.
Preparing for Application
Prior to applying the protective finish, ensure that your kitchen cart is clean and free from dust and debris. Use a mild cleanser or wood cleaner to gently remove any dirt or grease. Once cleaned, allow the cart to dry completely before moving on to the next step.
Applying the Finish
When applying the protective finish, it’s important to follow the manufacturer’s instructions for optimal results. Generally, the process involves these steps:
- Sanding: Start by sanding the surface of your kitchen cart with fine-grit sandpaper. This smooths out any imperfections and provides a better surface for the finish to adhere to.
- Stirring: If using a finish that requires stirring, thoroughly mix the product to ensure an even application.
- Application: Use a high-quality brush, foam brush, or clean cloth to apply the finish in smooth, thin coats. Work in the direction of the grain to achieve an even finish. Allow each coat to dry according to the manufacturer’s instructions before applying the next.
- Sanding between coats: For an extra smooth finish, lightly sand the surface between coats with fine-grit sandpaper. This helps to remove any raised grain or imperfections.
- Final coat: Apply a final coat of finish and allow it to dry completely. This last coat provides added protection and a beautiful, polished look to your kitchen cart.
Protective Finish Comparison
To help you make an informed decision, here’s a comparison table of the different protective finishes:
| Finish | Pros | Cons |
|---|---|---|
| Polyurethane | Water-resistant, durable, available in different sheens | Can be challenging to apply without brush marks, may have a strong odor |
| Varnish | Excellent protection, enhances wood’s natural beauty, glossy or satin finish options | Long drying time, may require multiple coats for desired result |
| Wood oil | Enhances wood’s color and grain, penetrates and nourishes the wood | Requires regular maintenance, may need multiple coats for optimal protection |
“A protective finish not only enhances the appearance of your kitchen cart but also shields it from moisture, stains, and daily wear and tear.”
By applying a protective finish to your DIY kitchen cart, you’ll extend its lifespan and keep it looking beautiful for years to come. Choose the right finish for your needs and follow the application steps carefully to achieve a flawless result. Your kitchen cart is now ready to serve you for countless meals and gatherings.
Personalizing Your Kitchen Cart
Now that your kitchen cart is built, it’s time to add those personal touches that will make it truly unique. Here are some creative ideas for customizing your cart:
Add Hooks
Installing hooks on the sides or underneath the shelves can provide additional storage and organization options. Hang your favorite kitchen tools, towels, or even small pots and pans for easy access.
Create Shelves
If you need extra storage space, consider adding adjustable shelves to your kitchen cart. This allows you to customize the cart’s interior based on your specific needs. Use the shelves to store cookbooks, spice jars, or decorative items that reflect your personal style.
Add a Chalkboard Surface
A chalkboard surface can be a fun and practical addition to your kitchen cart. Use it to write down recipes, grocery lists, or reminders. It’s a great way to keep things organized and add a touch of whimsy to your cart.
Quote
“Personalizing your kitchen cart is all about making it reflect your personality and needs. Don’t be afraid to get creative and think outside the box!”
Once you’ve added these personalized touches, step back and admire your handiwork. Your custom kitchen cart is now ready to enhance your cooking experience and become a stylish focal point in your kitchen.
| Customization Idea | Description |
|---|---|
| Add Hooks | Install hooks on the sides or underneath the shelves for extra storage and organization. |
| Create Shelves | Add adjustable shelves to customize the cart’s interior and accommodate your storage needs. |
| Add a Chalkboard Surface | Create a fun and practical chalkboard surface for writing down recipes, grocery lists, and reminders. |
Organizing and Styling Your Kitchen Cart
Now that your kitchen cart is complete, it’s time to turn it into the functional and stylish centerpiece of your kitchen. With some careful organization and thoughtful styling, you can make your cart not only a practical storage solution but also an aesthetically pleasing addition to your space. Here are some kitchen cart design ideas to inspire you:
1. Utilize Vertical Space
Maximize the storage capacity of your kitchen cart by utilizing vertical space. Install hooks or racks on the sides or back of the cart to hang utensils, oven mitts, or dish towels. This not only makes these items easily accessible but also adds a decorative element to your cart.
2. Divide and Conquer
Divide your cart into sections or zones to keep different items organized. Use storage baskets or bins to separate utensils, spices, and other kitchen essentials. Label each section to make it easy to find what you need quickly.
3. Display Glassware
If your kitchen cart has open shelves, use them as a display area for your favorite glassware. Arrange glasses in a neat and organized manner, showcasing their colors and shapes. This adds a touch of elegance to your cart and allows you to easily reach for a glass when needed.
4. Incorporate Plants
Add some greenery to your kitchen cart by incorporating small potted herbs or succulents. Not only do plants add a refreshing and natural element to the cart, but they also purify the air in your kitchen. Choose plants that thrive in bright, indirect light and require minimal maintenance.
5. Personalize with Decorative Accessories
Make your kitchen cart truly unique by adding decorative accessories that reflect your personal style. Consider placing a small decorative tray with candles or a vase of flowers on top of the cart. You can also hang a small piece of art or a chalkboard to add a creative touch.
6. Coordinate Colors and Themes
If you want your kitchen cart to seamlessly blend into your kitchen decor, coordinate the colors and themes. Choose accessories, such as storage containers or linens, that match the color palette or theme of your kitchen. This creates a cohesive and visually pleasing look.

With these kitchen cart design ideas, you can transform your cart into both a functional and visually appealing element in your kitchen. Experiment with different organizing techniques and decorative elements to find a style that suits your taste. Remember, a well-organized and stylish kitchen cart not only enhances your kitchen’s functionality but also adds charm to your space.
Budget-Friendly Tips and Alternatives
Building a kitchen cart doesn’t have to break the bank. With some clever tips and budget-friendly alternatives, you can create a stylish and functional cart without overspending. Here are some cost-effective strategies to consider:
- Upcycle and repurpose: Look for old furniture or items that can be repurposed into a kitchen cart. An old bookshelf, bar cart, or even a small dresser can be transformed with a fresh coat of paint and some added shelves or wheels.
- Use affordable materials: Instead of expensive hardwood, opt for more affordable options like plywood or medium-density fiberboard (MDF). These materials can still provide stability and durability while being more budget-friendly.
- Shop for discounts: Keep an eye out for sales, discounts, and clearance items at your local home improvement stores or online retailers. You may find discounted lumber, hardware, or even pre-made cart kits at a fraction of the original price.
- DIY hardware: Instead of buying expensive handles and knobs, consider making your own. Repurpose old drawer pulls, leather straps, or even rope to add a unique and personalized touch to your kitchen cart.
- Repurpose leftover materials: If you’ve recently completed a home improvement project, check if you have any leftover materials that can be used for your kitchen cart. This can include scrap wood, screws, paint, or varnish.
- Consider open shelving: Open shelving designs require fewer materials and can give your kitchen cart a modern and minimalist look. Plus, it can be a great opportunity to showcase your stylish kitchenware.
By implementing these budget-friendly tips and alternatives, you can create a beautiful and functional kitchen cart without breaking the bank. Let your creativity shine and enjoy the satisfaction of building a cart that fits perfectly within your budget and style.
Conclusion
In conclusion, this DIY guide provides a simple and effective way to create a kitchen cart that perfectly suits your needs and style. By carefully planning your design, gathering the necessary materials and tools, and taking your time during the construction process, you can build a cart that will be a great addition to your kitchen.
Remember that the key to a successful kitchen cart project is attention to detail and precision. It’s important to follow the step-by-step instructions provided in this guide and make accurate measurements and cuts for a professional-looking result.
Once your kitchen cart is complete, don’t forget to add your personal touches to make it truly unique. Whether it’s hooks, shelves, or a chalkboard surface, let your creativity shine through. Lastly, take the time to organize and style your cart in a way that is both functional and visually appealing.
We hope you have enjoyed this DIY journey and that your kitchen cart brings you joy and convenience in your daily cooking adventures. Happy cart-making!
FAQ
How long does it take to make a kitchen cart?
The time it takes to make a kitchen cart will depend on your skill level, the complexity of the design, and the availability of materials. On average, it can take anywhere from a few hours to a few days to complete the construction and finishing touches.
Can I customize the size of my kitchen cart?
Yes, you can customize the size of your kitchen cart to fit the available space in your kitchen. Keep in mind that modifying the dimensions might require adjusting the design and measurements of the different components.
What types of wood are suitable for making a kitchen cart?
Hardwoods like oak, maple, and birch are popular choices for making a kitchen cart due to their durability and strength. However, other types of wood, such as pine or plywood, can also be used depending on your budget and design preferences.
Do I need advanced woodworking skills to make a kitchen cart?
While some basic woodworking skills are helpful, you don’t necessarily need advanced skills to make a kitchen cart. With the right tools, instructions, and patience, even beginners can successfully complete this project.
How much does it cost to make a kitchen cart?
The cost of making a kitchen cart will vary depending on the materials you choose, the size of the cart, and any additional features or accessories you decide to include. However, you can expect to spend anywhere from $50 to $200, depending on your budget and preferences.
Can I paint or stain my kitchen cart?
Yes, you can paint or stain your kitchen cart to match your kitchen decor or personal style. Before applying any finish, make sure to sand the surface to create a smooth and even base for the paint or stain.
Are there any safety precautions I should take when building a kitchen cart?
Yes, safety should always be a top priority when working with tools and woodworking materials. Make sure to wear appropriate safety gear such as safety goggles and gloves, and follow the manufacturer’s instructions for each tool. Additionally, take your time and work in a well-ventilated area to minimize any potential hazards.
Can I add additional features or accessories to my kitchen cart?
Absolutely! You can customize your kitchen cart by adding features like hooks for utensils, shelves for storage, or a chalkboard surface for writing notes or grocery lists. Get creative and make your cart functional and personalized.
How can I maximize the functionality of my kitchen cart?
To maximize the functionality of your kitchen cart, consider its purpose and your specific needs. Add hooks for hanging utensils or towels, include shelves for storing cookbooks or spices, and choose a design that allows for easy movement and access to all sides of the cart.
Related Images:
Amanda Schmitt
Latest posts by Amanda Schmitt (see all)
- Fruit Infused Waters That Make Summer Hydration Fun - July 1, 2025
- Light Up Your Life: Home Lighting Decoration Ideas - June 30, 2025
- Let’s Taco Party! Easy Steps for a Perfect Taco Bar Setup - June 27, 2025