If you’ve been on Pinterest lately, and let’s all be honest who can stay away from Pinterest for longer than a day, you’ve probably seen those beautiful woven wall hangings. For months now I have coveted those beauties, but seeing the cost of them has prevented me from buying one. I also don’t have the time or money to learn how to weave to make my own. So, I decided to make my own without actually weaving the yarn. It doesn’t create the exact same product, but it’s still woven-like and I love the end result.
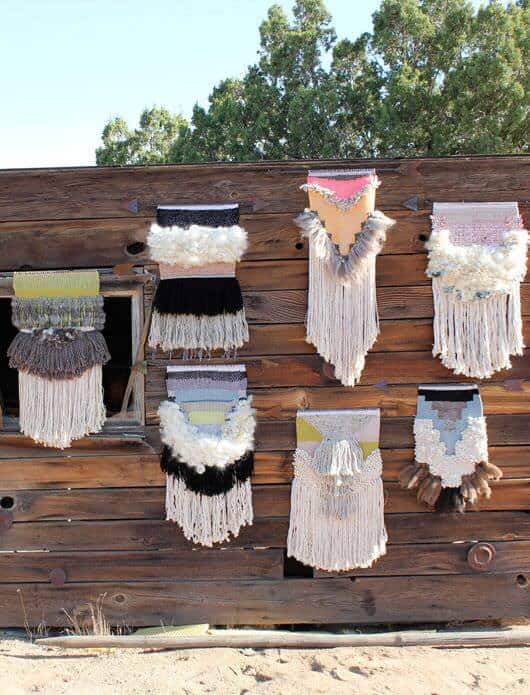
Here are some woven pieces I loved that served as my inspiration.
Aren’t they absolutely beautiful? If you want to make one of your own here’s a list of what you’ll need to create your own woven-like wall hanging:
Yarn in varying sizes and colors
Scissors
Stiff Plastic Canvas
Wooden Dowel
Twine
Knife
Thread (the thicker the better)
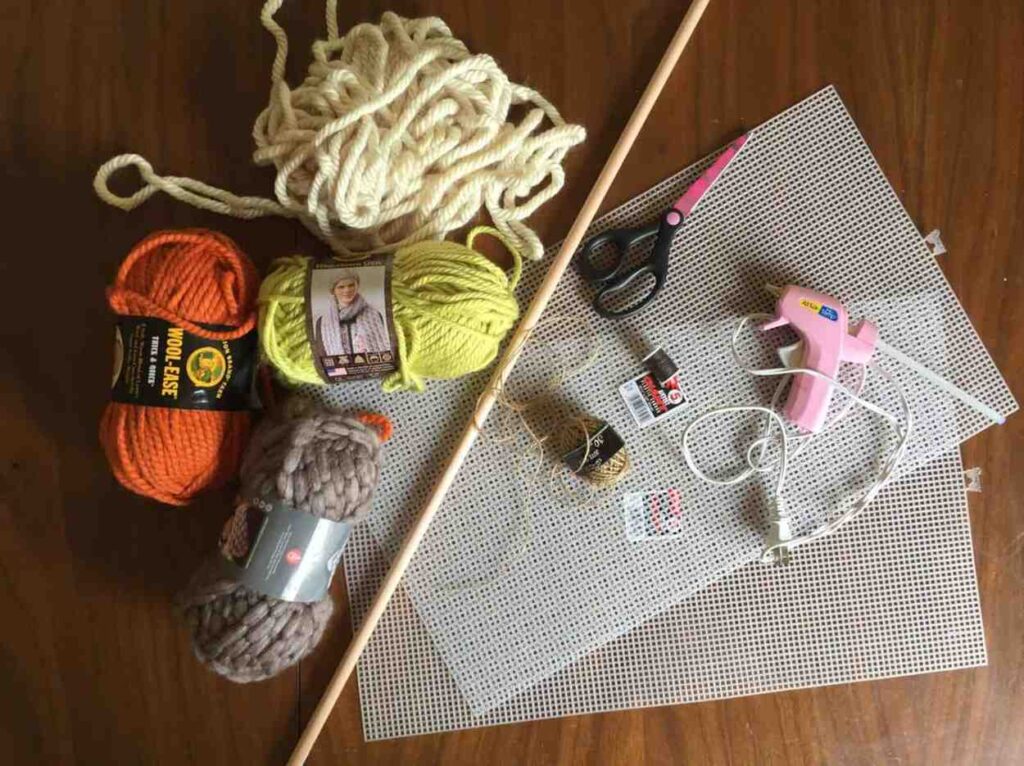
(Note: I thought I would need a glue gun for this project, so that’s why it’s pictured above, but I didn’t end up needing it after all. I also have 2 mesh plastic canvas’ pictured, but only used 1.)
I spent about $20 total on this craft. I bought 4 new packs of yarn for the gray, orange and green layers. I already had cream yarn so I didn’t need to buy that. I also already had the twine, so all I really had left to buy was the plastic mesh canvas and the wooden dowel. Woven wall hangings can range anywhere from $100 to much more, so I’d say this was a pretty successful, inexpensive craft!
Before you actually start creating your art piece, the first thing you need to do is decide what you want your art to look like. I scoured Pinterest for hours looking for ideas and inspiration.
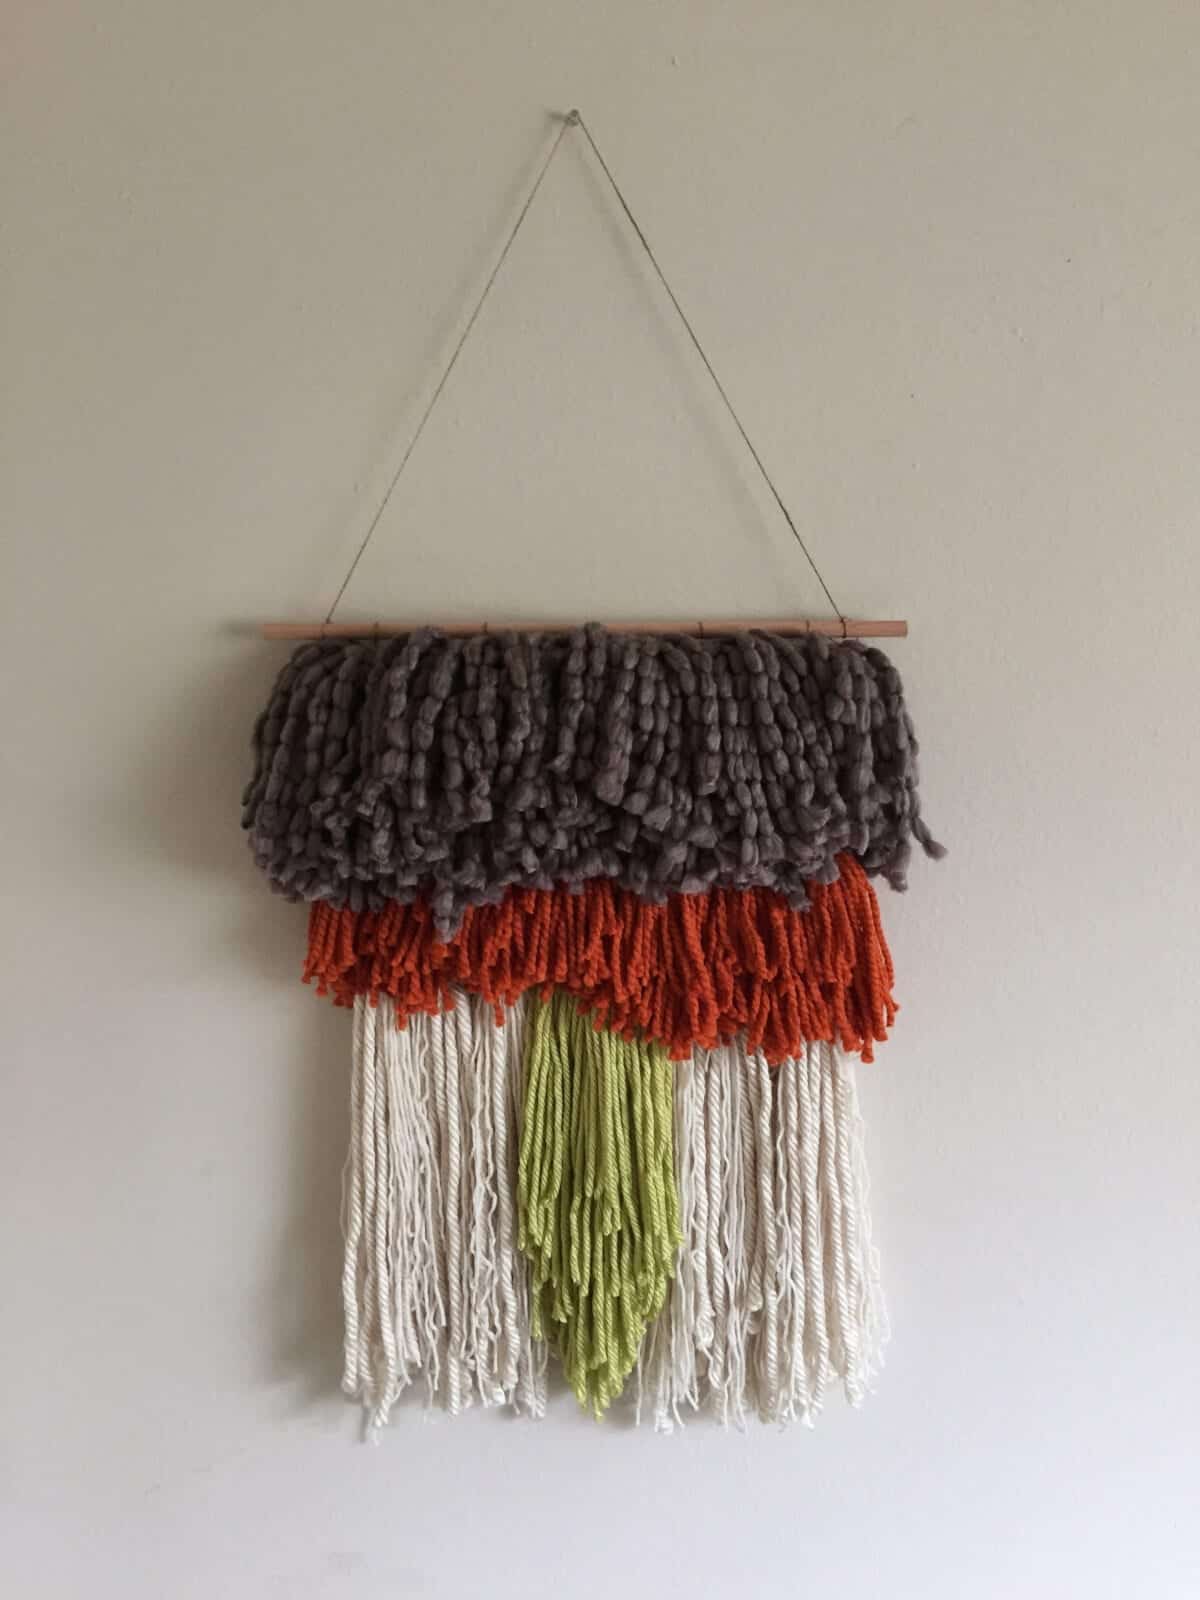
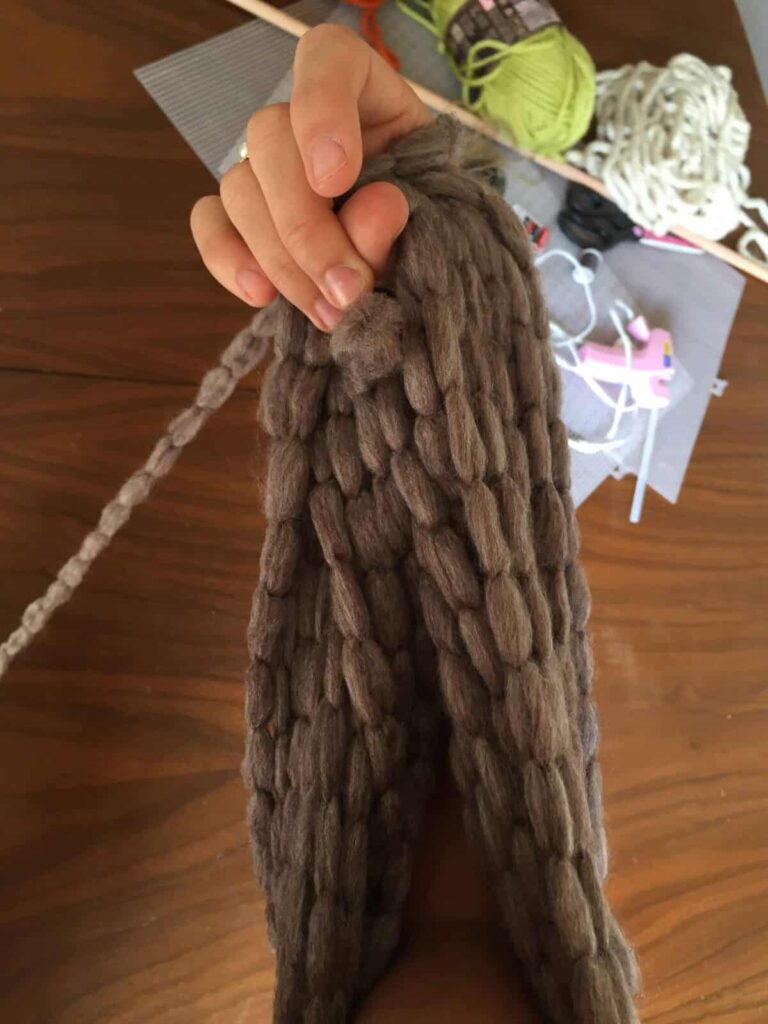
Once you’ve got an idea of how you want it to look, head to your local craft store and buy all your supplies. The first thing you’ll want to do is start making tufts with the yarn. You can do this by wrapping the yarn around your arm and hand. It’s easiest to start with the yarn you want as the top layer, then work your way down. For the gray layer at the top, I wrapped the yarn around my arm 20 times. Once looped around, I tied a piece of thread around each end, then cut the yarn halfway between the ties to create 2 tufts. The more times you wrap the yarn around your arm, the thicker your tuft will be. I created 7 tufts for the gray yarn layer.
For the smaller tufts in orange I wrapped the yarn around my hand to create the loops, then tied a piece of thread only at one end and cut the yarn on the other end of the loops to make 1 tuft. I made 8 small tufts for the orange row.

For the cream and green yarn I wrapped the yarn around my arm again, but instead of tying and cutting both sides to create 2 tufts, I only tied and cut it at one end to create 1 large, long tuft.
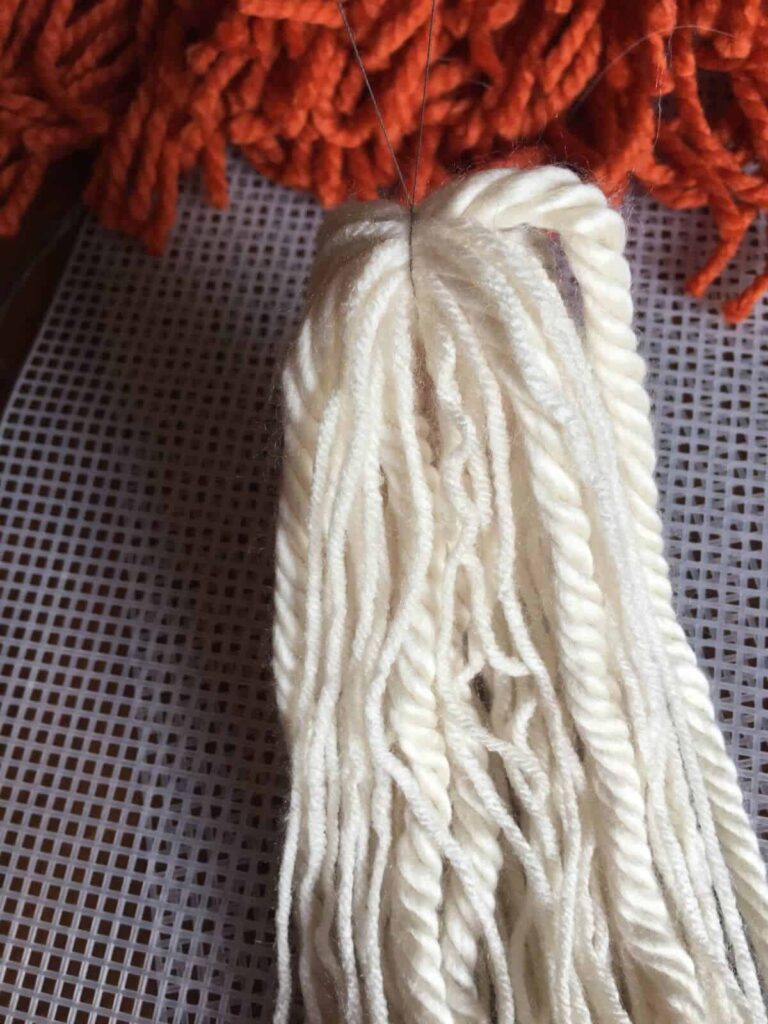
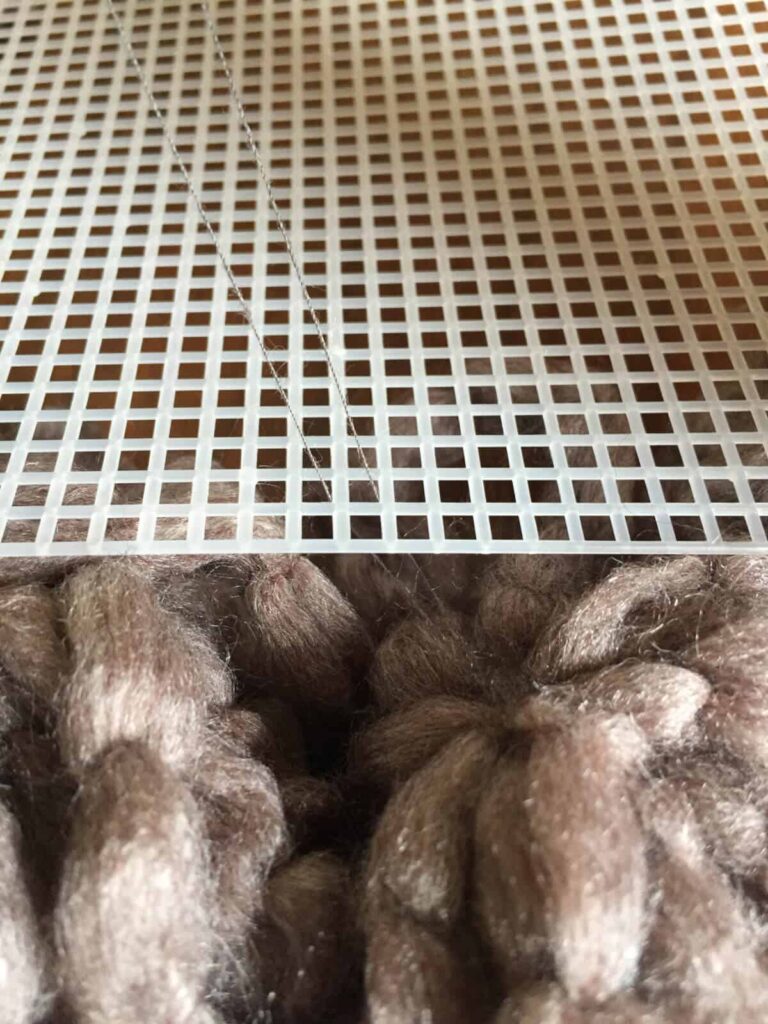
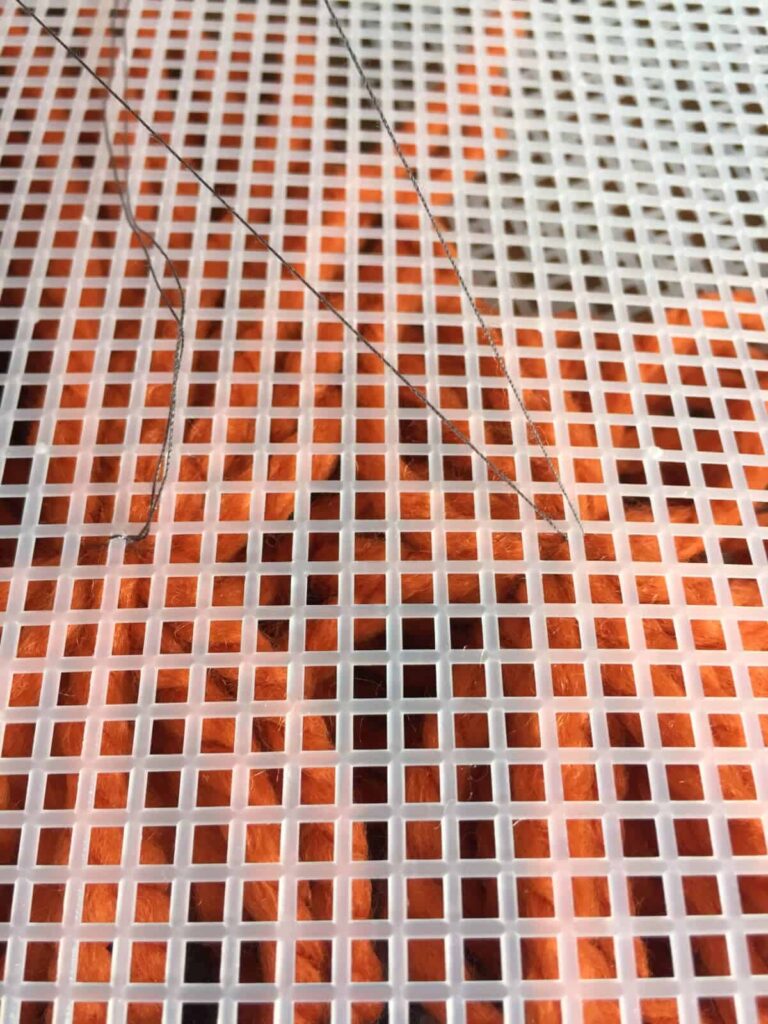
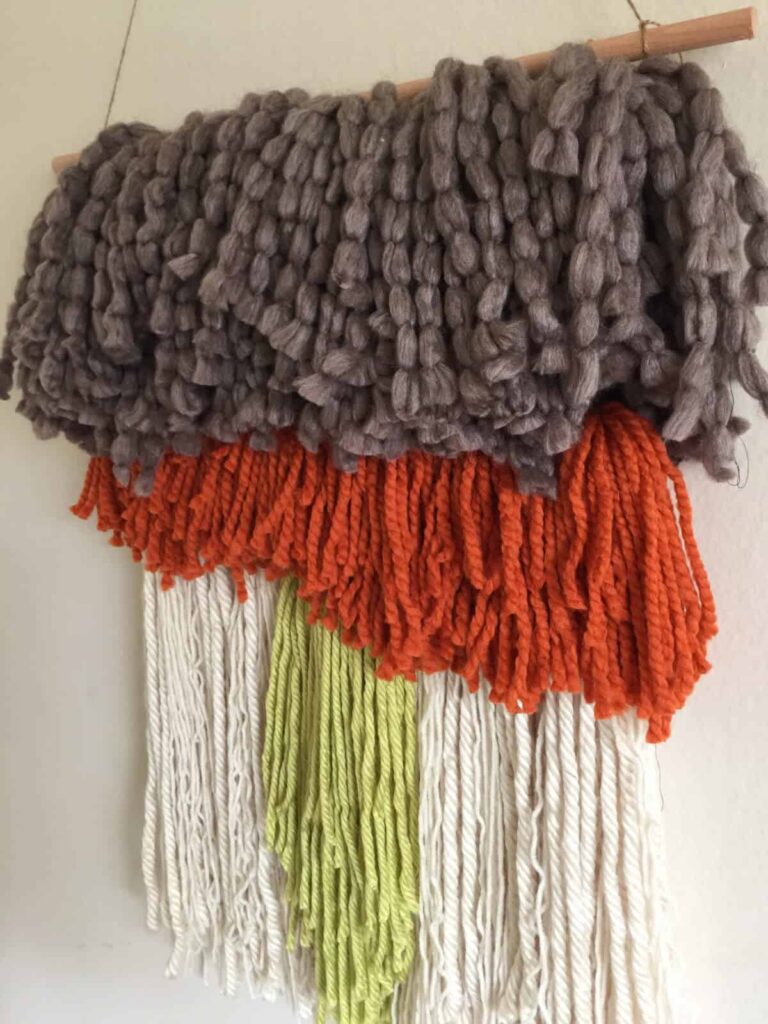
Once you have all the yarn cut and tied off with your thread you can start attaching the tufts to the mesh. Simply take the leftover thread on the yarn, feed it through to the back of the mesh and tie it securely to the mesh. The top layer can be tied to the top row of the mesh. Once that is layer is all tied on, start the next layer by tying it on under the first layer with enough overlap so the mesh doesn’t show through.
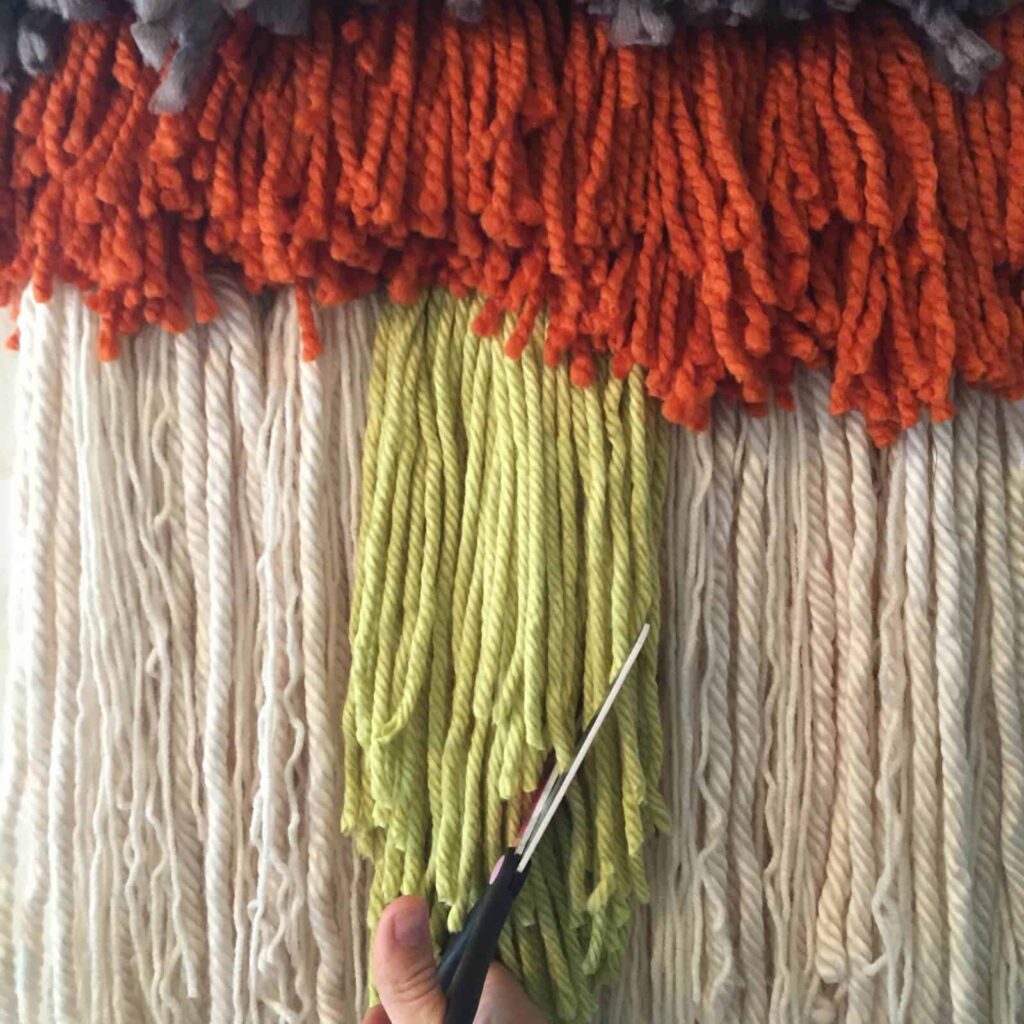
Once all the yarn is tied on, you can trim the pieces to be the length and shape you want. I wanted mine to be uneven and random, so I didn’t try to make it look too perfect.
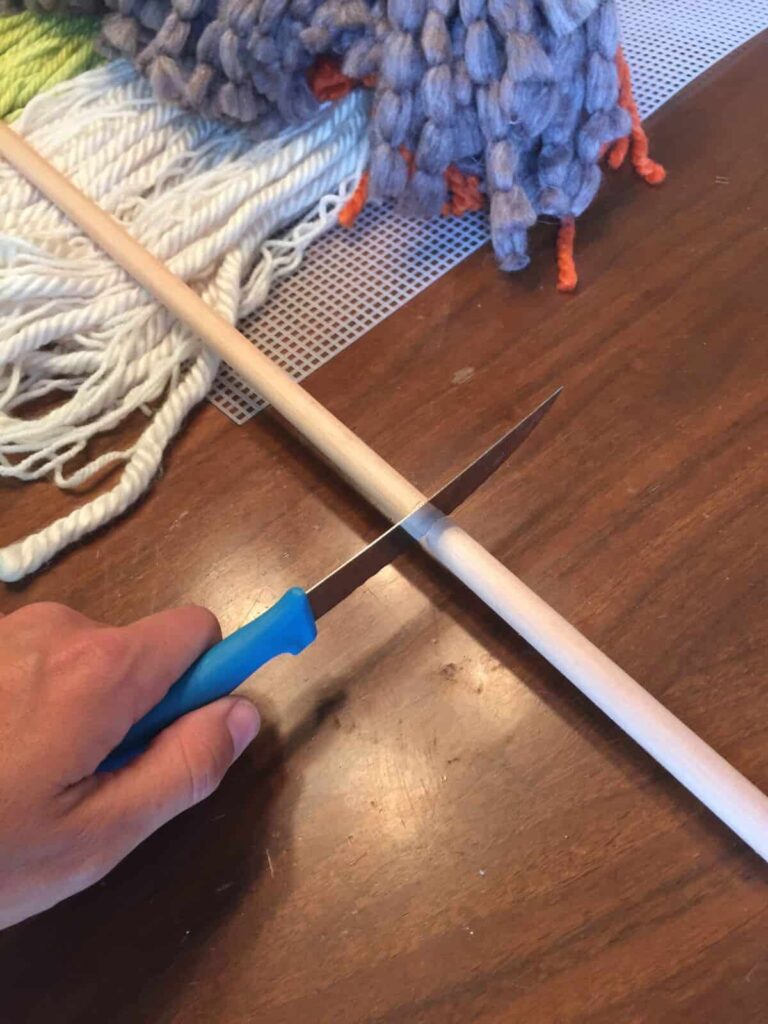
Next you’ll want to attach the wooden dowel to the mesh, but before you do you may have to cut the dowel to a smaller size. Simply lay the dowel over the mesh to see how long you want it to be. Once you have an idea of where to cut it, get an old knife out of the kitchen that you don’t use too often. If you have a saw of this, great, if not, you can simply use a knife to cut the dowel.

The last step is to attach the wooden dowel to the mesh. Take the twine and thread it through the top row on each end then tie it around the dowel to secure it. I also secured it in a few other places so that the mesh didn’t sag in the middle. Then, take some more twine tie it on one end, then leave some slack before you tie it onto the other end, so you have a large enough piece to hang on it from the wall.

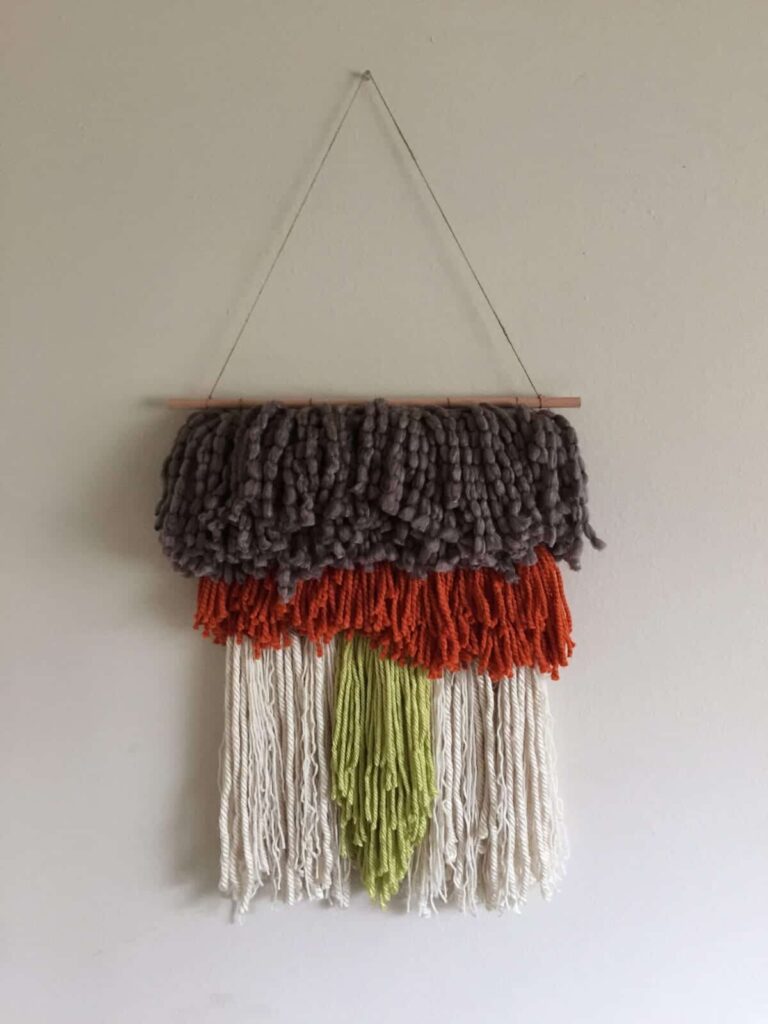
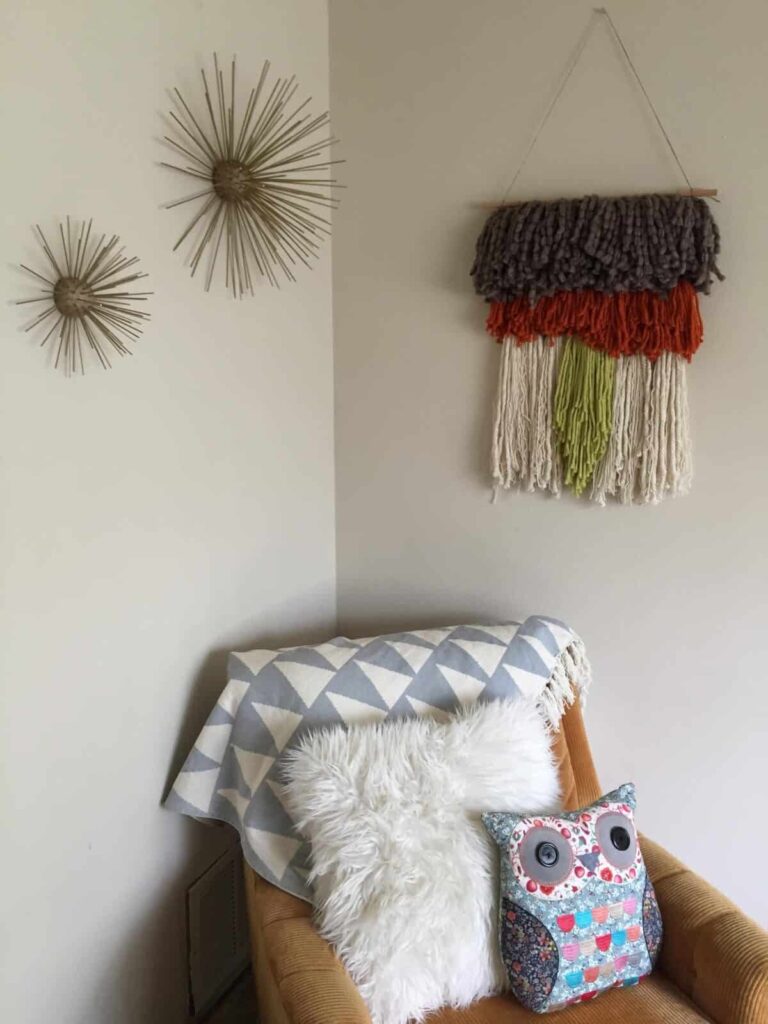
Then, put a nail in the wall and hang your new non-woven wall hanging. Enjoy and have fun!
Related Images:

Mary Mulroney
Latest posts by Mary Mulroney (see all)
- 5 Easy Changes To A Healthier You - October 12, 2020
- 7 Great Resources For Affordable And Beautiful Rugs - October 12, 2020
- Switching to a Dairy Free Diet? 15 Tips to Make It Easy - September 29, 2020