Table of Contents
Easy Home Repairs for Women: Simple Fixes Every Woman Should Know
There are days when I feel like my whole house has turned on me. A toilet overflows, a wall gets dinged, the faucet starts dripping, or a door squeaks at me every single time I open it. Whether you own a home, rent an apartment, or are simply the go-to person when something goes wrong, learning a few easy home repairs for women can save you time, money, and a whole lot of frustration.
You don’t need to be a professional to feel confident taking care of your home. Knowing how to handle little annoyances before they turn into bigger issues can help you keep things running smoothly. Plus, small repairs can save money, and understanding how things work makes it easier to spot problems before they become expensive emergencies.
From fixing a running toilet and clearing a slow drain to patching nail holes and silencing squeaky doors, these are practical home repair and maintenance skills almost anyone can learn.
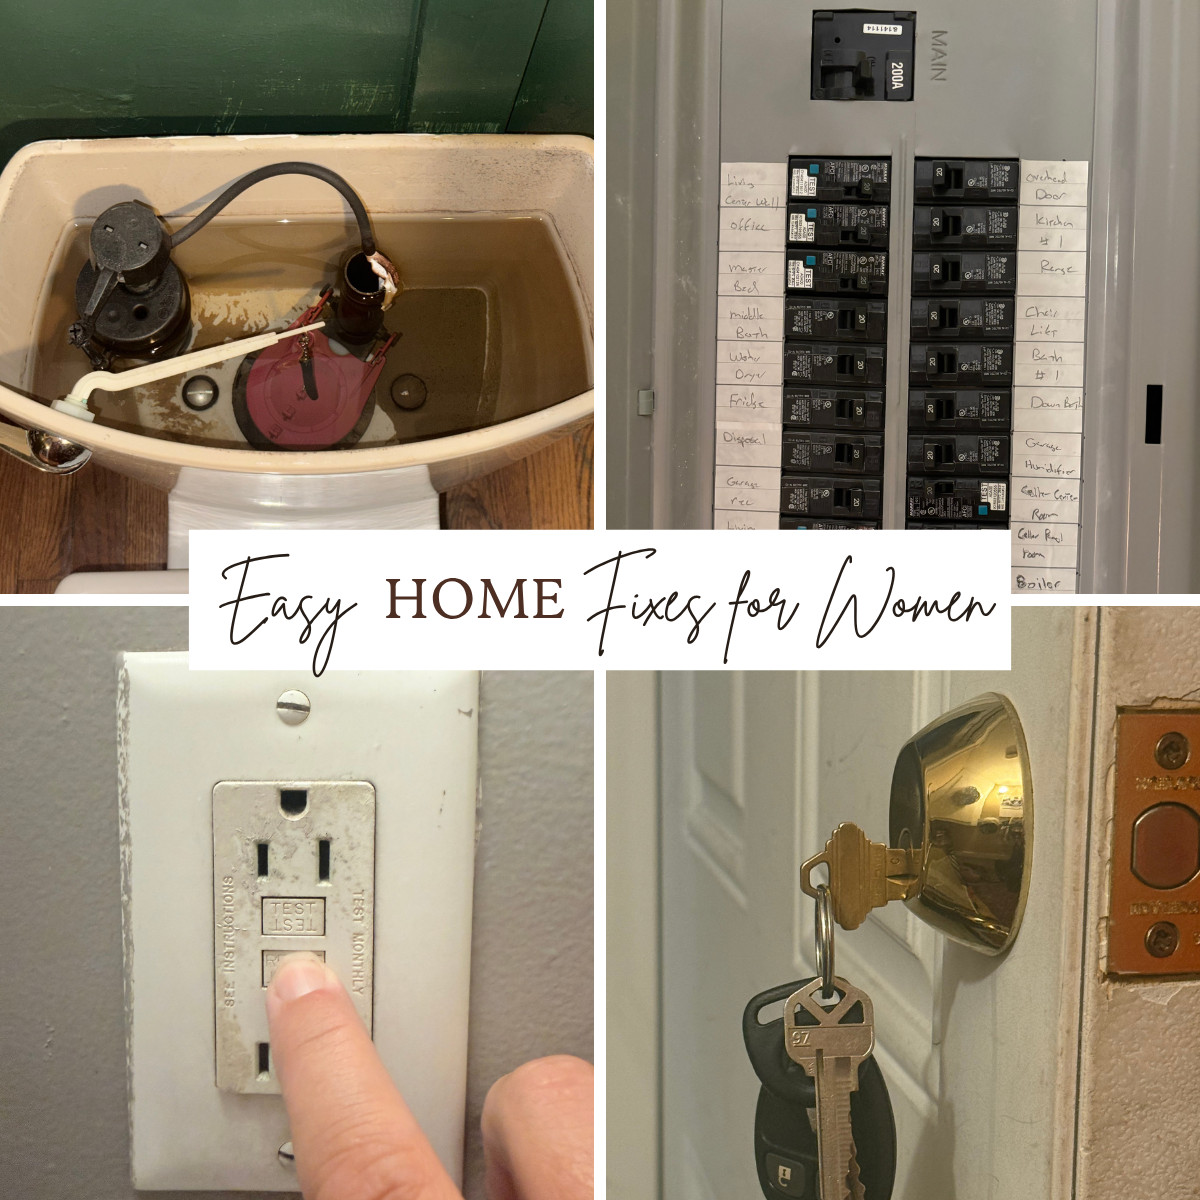
Build a Basic Home Repair Toolkit
You don’t need a fully stocked workshop to handle simple problems around the house. A few carefully selected tools will prepare you for many of the common repairs that pop up in every household.
Here are my must-haves:
- Hammer: A simple 16 oz. claw hammer is perfect for hanging pictures, fixing loose baseboards, and making minor household repairs.
- Screwdriver: Really, you need multiple screwdrivers, but the number one most-used tool in my house is this screwdriver. It has four tip sizes – two Phillips and two flat – and works with a simple flip. No extra pieces and no extra storage space!
- Electronics screwdrivers: Tiny screwdrivers are handy for remotes, computers, toys, and all sorts of other electronics.
- Adjustable wrench: A wrench with a thumbscrew that allows you to adjust it to fit a variety of nuts.
- Pliers: Basic pliers, including slip-joint and needle-nose pliers, can help with everything from pulling a door pin to clearing hair trapped in a drain.
- Tape measure: Nothing fancy! A basic tape measure with a locking mechanism will do.
- Level: This makes hanging pictures, shelves, and other items much easier. A small one is plenty for most household projects.
- Utility knife: A sturdy utility knife with a retractable blade is a must-have in any home.
- Drill: A basic cordless drill with a bit and screwdriver set can save you a lot of time and energy.
- Stud finder: A stud finder helps ensure that whatever you’re hanging has a solid place to grab onto.
- Flashlight or headlamp: A flashlight is good – a headlamp is even better. You may feel goofy wearing it, but having both hands free is worth it when you’re trying to fix a leaky sink!
- Plunger: Ideally, have two – one for toilets and one for sinks – or a 2-in-1 plunger where the flap folds in for sinks and tubs and folds out for toilets.
- Caulk gun: A basic caulk gun with a cutter and piercing arm is perfect for caulking everything from molding to tubs.
- Putty knife set: A putty knife can help patch walls, scrape windows, remove stickers, repair wood, and remove peeling paint.
- Drain zip tool: This little gadget can slip down into a tight drain and pull out all sorts of nastiness.
Home Maintenance and Safety Basics Every Woman Should Know
Grandma always said, “An ounce of prevention is worth a pound of cure.” Knowing your house and preventing problems is just as important as knowing how to fix them.
Find and Label Your Shut-Off Valves
Knowing where your major and minor shut-off valves are can prevent a disaster.
Years ago, we had a fire inside our dryer. It was a gas dryer, and my first instinct was to leave. The first thing the fire department did was shut off the gas to the dryer, and the fire went out.
If I had known where that shut-off was, I could have saved myself some of the fear and anxiety of waiting for the fire department to arrive.
Besides helping with basic repairs, knowing where your shut-offs are can save you major headaches and a whole lot of money.
Make sure you can locate:
- Main water shutoff: If a pipe bursts, a water heater fails, or you have another major plumbing issue, turning off the main water supply can prevent thousands of dollars in damage.
- Toilet shutoff: Usually located toward the back and bottom of your toilet. Turning this off can stop an overflowing toilet from continuing to fill.
- Sink shutoffs: Knowing how to stop the water supply under your sinks is essential if a faucet or pipe fails – or if you want to replace a faucet yourself.
- Washing machine shutoffs: A burst supply hose can release a surprising amount of water very quickly. The supply knobs are generally located right behind your washer.
- Gas supply: If you have gas appliances in the kitchen or laundry room, know where the gas shutoff is located.
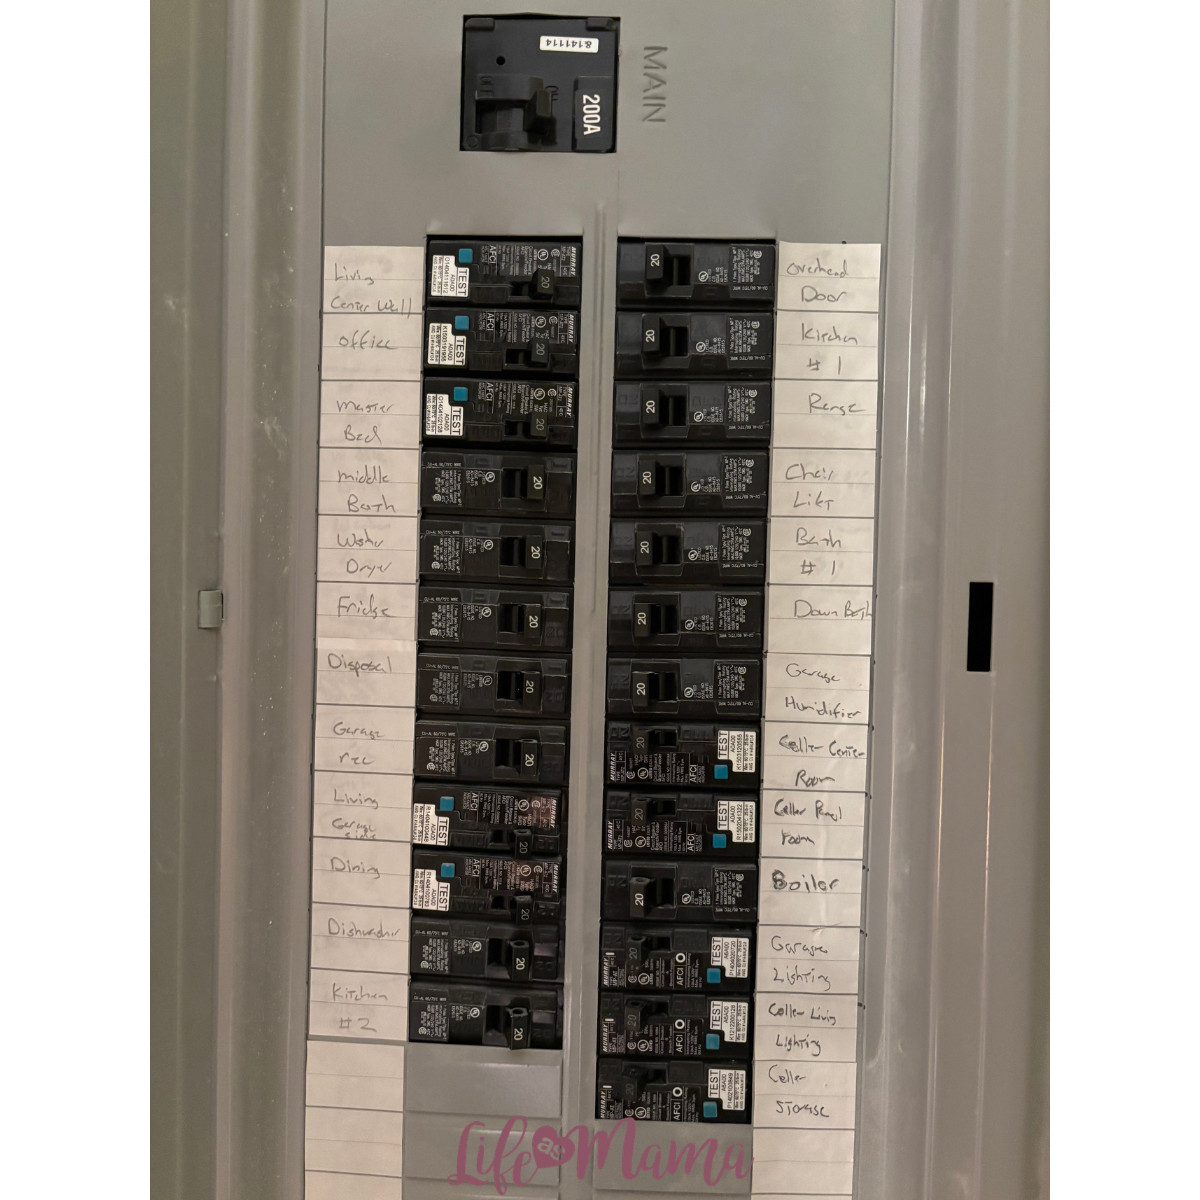
Label Your Electrical Panel
Knowing which breaker supplies power to each room and fixture is important – not only for resetting a tripped breaker but also for safely turning off power before certain repairs.
If your electrical panel isn’t labeled, use the buddy system. Video call a friend or family member and have them stand in different rooms while you flip each breaker. They can tell you which lights, outlets, and appliances lose power.
Know How to Reset a GFCI Outlet
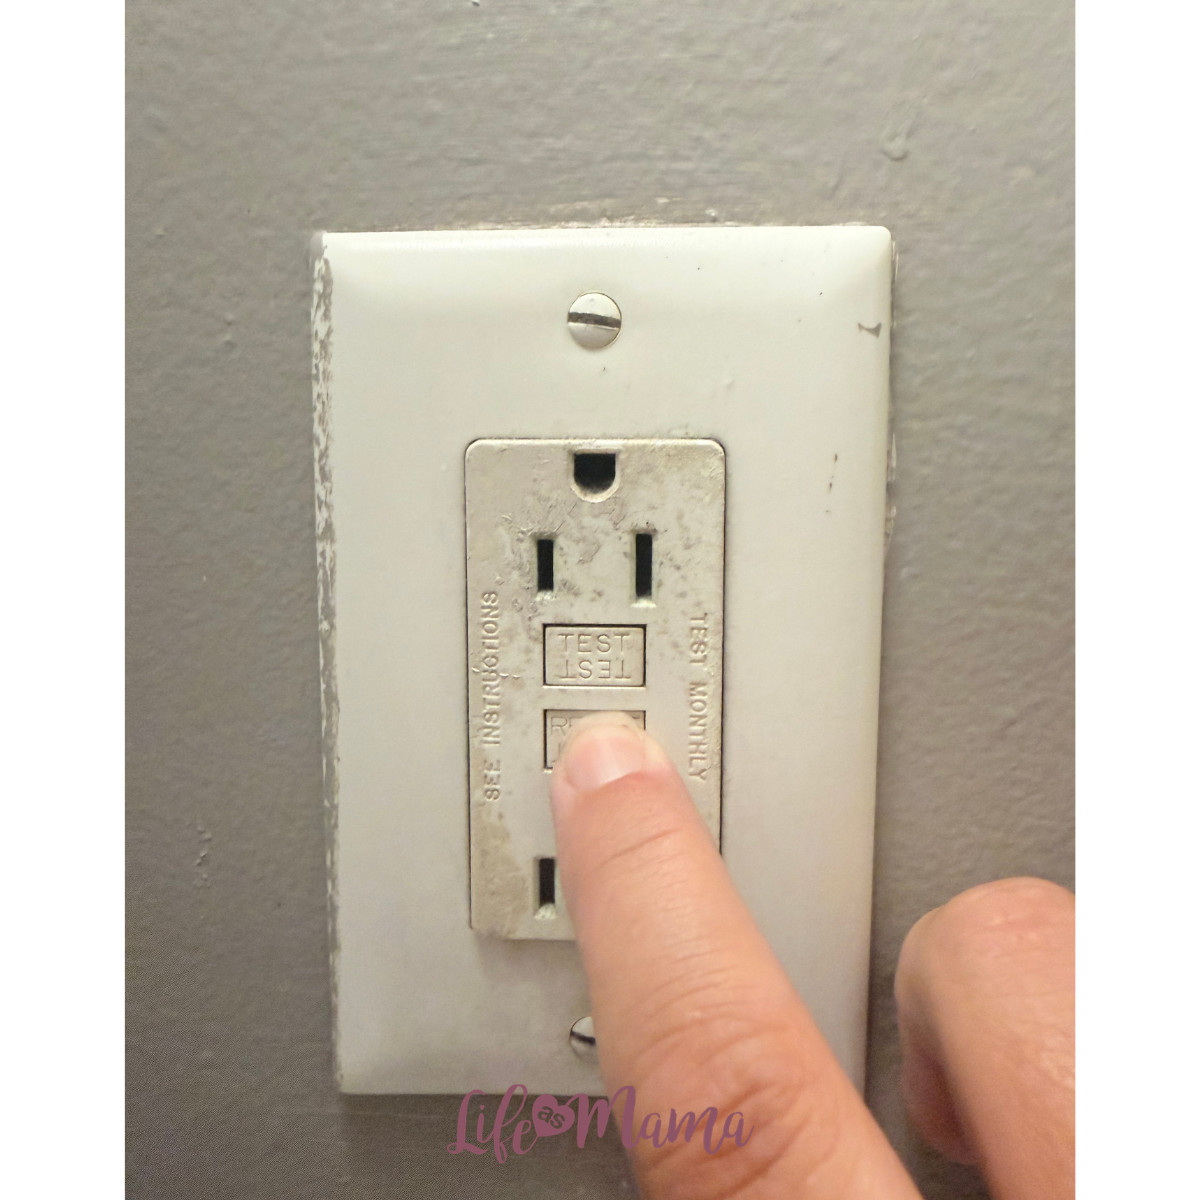
A GFCI outlet, or ground-fault circuit interrupter, is designed to cut power when it detects an unsafe electrical current. You’ll commonly find them in kitchens, bathrooms, laundry rooms, garages, and outdoor areas.
Keep in mind that the outlet that stops working isn’t necessarily the one that tripped.
At my mom’s house, we were stumped when the retractable awning stopped working. As it turned out, that switch was tied to a GFCI outlet in the bathroom. We discovered it when someone went to use the restroom and noticed the outlet had tripped.
She was ready to call an electrician to fix the awning switch!
A simple push of the reset button, and everything was back on track.
Replace and Clean Household Filters
Filters help appliances and home systems run efficiently. When they become clogged, they can reduce performance and sometimes contribute to bigger problems.
Some common filters you should know how to clean or replace include:
- Furnace filters: Usually slide out from the front of the furnace. The replacement size is typically printed right on the filter.
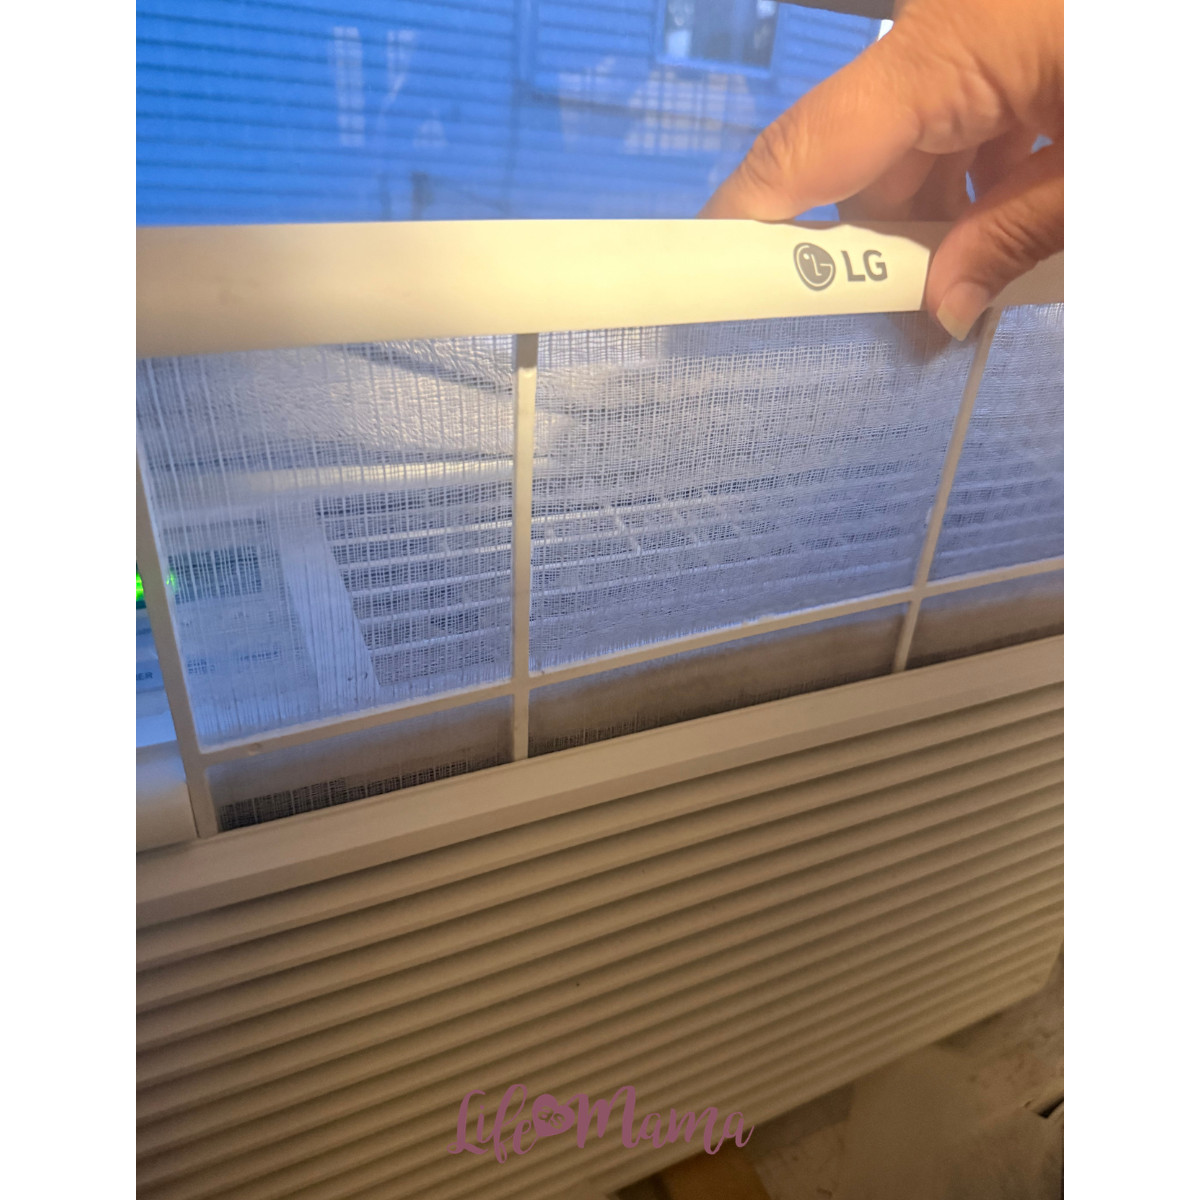
- Window AC filters: These generally slide out and can be rinsed. Let them dry thoroughly before putting them back.
- Dehumidifier filters: These are often cleaned similarly to AC filters.
- Dishwasher filters: Usually located at the bottom of the appliance. Many twist and pull out so you can remove debris and rinse them clean.
Always check your appliance’s owner’s manual for instructions specific to your model.
Test Smoke and Carbon Monoxide Detectors
Smoke and carbon monoxide detectors are easy household maintenance tasks to overlook, but a detector with a dead battery, expired sensor, or poor placement can’t do its job when every second counts.
Smoke detectors should generally be installed inside bedrooms, outside sleeping areas, and on every level of the home. Carbon monoxide detectors should be placed near sleeping areas and on each floor.
Avoid placing detectors too close to bathrooms, kitchens, or air vents, where steam, cooking fumes, or drafts may cause false alarms.
Check your detectors regularly and replace batteries according to the manufacturer’s recommendations. If you live somewhere that observes daylight saving time, the time changes can serve as an easy reminder to test your alarms.
Easy Plumbing Repairs You Can Do at Home
Water is an everyday necessity that can also cause some very big problems. Understanding how basic plumbing fixtures work – and knowing a few simple fixes – is a valuable skill for any homeowner or renter.
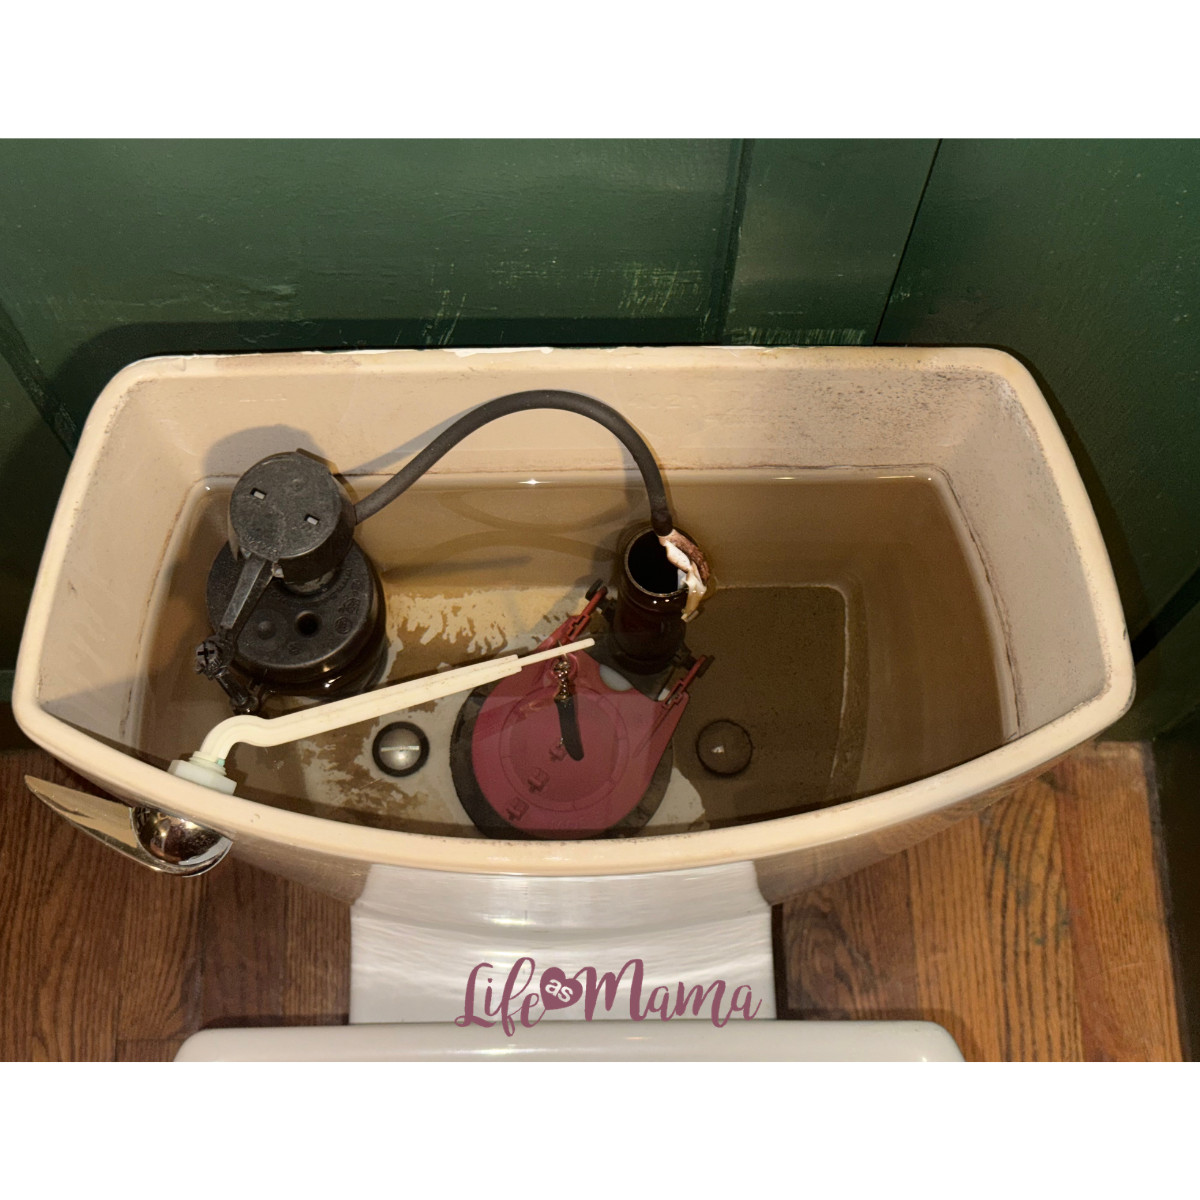
How to Fix a Running Toilet
A toilet is one of those things that just works…until it doesn’t.
Maybe a little one fills the bowl and flushes, or you suddenly hear water trickling and have no idea why. Luckily, most toilets work using the same basic parts. Understanding what each part does can make troubleshooting much easier.
The Tank
The tank is the upper portion of the toilet. It holds the water used to flush as well as the working parts of the toilet.
The Flush Handle, Lift Chain, and Flapper
These three components work together. When you press the handle, it lifts a chain inside the tank. The chain lifts the flapper, allowing water to rush into the bowl and flush the toilet.
The Fill Valve
The fill valve does exactly what it sounds like – it sends water back into the tank after a flush.
The Float
The float rises as the water level increases. Once the tank is full, the float tells the fill valve to stop supplying water.
Common Toilet Problems and Easy Fixes
If your toilet starts acting up, remove the tank lid and watch what happens when you flush. You may be able to spot the problem immediately.
Problem: The Toilet Keeps Running
Solution: Check the flapper.
Take the top off the toilet tank and flush while watching the parts work. The flapper should lift when you flush and then fall back down and create a seal.
If the flapper is worn, cracked, dirty, or not aligning correctly, it may not create a tight seal. Water then slowly leaks from the tank into the bowl, causing the fill valve to keep running as it tries to replace the lost water.
Turn off the water supply to the toilet and flush to remove the water from the tank. Wipe the flapper with a clean cloth and remove any scaling or debris.
Turn the water back on and allow the tank to refill. Give it a test flush and see whether the flapper seals properly.
If cleaning it doesn’t solve the problem, you may need to replace the flapper. Fortunately, this is usually an inexpensive replacement part available at home improvement stores.
Problem: The Toilet Won’t Flush
Solution: Check the chain.
Over time, the chain can come loose or break. You may simply need to reattach it, move it to a different link, or replace a broken chain.
Problem: The Toilet Tank Doesn’t Refill
Solution: Check the fill valve.
A clogged or worn fill valve can prevent water from entering the tank. Make sure the fill valve is connected, check for leaks or broken clips, and look for debris that could be blocking the water.
How to Fix a Slow Sink or Tub Drain
Slow drains are something almost everyone deals with at some point – especially in a household with long hair!
And yes, a slow drain technically still drains, which makes it very tempting to ignore. But it’s much easier to deal with it now than after it becomes completely clogged.
Start by using a drain zipper tool to pull out hair and gunk that may be building up near the top of the drain.
For ongoing drain maintenance, regularly removing visible hair and debris can help prevent bigger clogs from developing.
How to Use a Plunger Correctly
Whether you’re dealing with a sink clog or a toilet clog, knowing how to use a plunger is one of the most useful basic home repair skills.
Plunging a Toilet
For toilet clogs, use a plunger with a flange at the bottom.
Place the plunger in the bowl at a slight angle so that it creates a tight seal. Then use a steady up-and-down motion until the clog dislodges and the toilet drains normally.
Plunging a Sink or Tub
For sink and tub clogs, fold the flange inward so the bottom of the plunger is flat.
Here’s the key: If your sink or tub has an overflow opening, cover it with a rag while plunging. This helps create the suction needed to remove the clog.
How to Fix a Leaky Faucet
A leaky faucet is more than an annoying dripping sound – it can also waste water. Fortunately, the fix is sometimes surprisingly simple.
Step 1: Figure Out Where the Faucet Is Leaking
If water is:
- Dripping from the spout: You may have a worn washer, cartridge, or valve seat.
- Leaking around the handle: You could have a loose packing nut or worn O-ring.
- Spraying unevenly: The aerator or mesh filter may be clogged with mineral deposits.
Step 2: Turn Off the Water
Before taking anything apart, shut off the water using the supply valves under the sink.
I told you knowing where those valves are would come in handy!
Step 3: Start With the Easiest Fix
Before replacing anything:
- Pop off covers and tighten loose handle screws.
- Remove and clean the aerator at the tip of the faucet.
- Check for visible cracks or damaged parts.
Step 4: Replace Worn Parts
If the faucet still drips, you may need to replace:
- A washer, which is common in older faucets
- An O-ring
- A faucet cartridge, which is common in newer faucets
Take a picture before disassembling anything so you can reference it when putting everything back together.
You can also bring the old part to the hardware store to make sure you purchase the correct replacement.
And if you’re leaving the sink apart while you head to the store, put a sign on it so no one tries to use it while you’re gone!
Clean a Clogged Shower Head
Shower heads inevitably collect mineral deposits over time.
A simple fix is to fill a plastic bag with white vinegar and secure it around the shower head. Let it soak for about an hour, then use an old toothbrush to gently clean away the loosened deposits.
Easy Repairs for Doors, Drawers, and Cabinets
We use our cabinets, drawers, and doors every single day, so even small problems can become a big pain.
Make Sticky Drawers Move Smoothly
Whether you live in an older home or a brand-new build, drawers can sometimes get a little sticky.
Newer Drawers
Modern drawers often use metal roller or ball-bearing slide systems. Dirt, crumbs, and everyday wear can eventually slow them down.
Remove the drawer if possible and vacuum loose debris from inside the cabinet and along the tracks. Wipe the tracks with a damp cloth and let everything dry thoroughly before reinstalling the drawer.
While you have everything apart, check for loose screws. Drawer slides can loosen over time, especially with frequent use. Inspect the screws holding the slides to both the drawer and cabinet and tighten anything that seems loose.
Older Drawers and Windows
Here’s a tip that has saved my sanity: If you live in an older home – or have older furniture – and things aren’t sliding smoothly, try running a bar of soap or candle wax along the track.
This can lubricate the surface and help everything move more smoothly.
Fix Loose Handles and Hinges
If a hinge screw or cabinet pull is loose because the screw hole has become stripped, grab a few wooden toothpicks.
Remove the screw, break off toothpicks to approximately the depth of the hole, and insert them into the hole. When you replace the screw, the threads have fresh wood to grip.
Silence Squeaky Doors and Floors
If your door is squeaking, start by checking and tightening the hinge screws. A lubricant designed for hinges can also help reduce friction and quiet the noise.
Squeaky wood floors can have several causes. If the squeak is persistent, determining whether the floorboards, subfloor, or fasteners are moving can help you decide on the right repair.
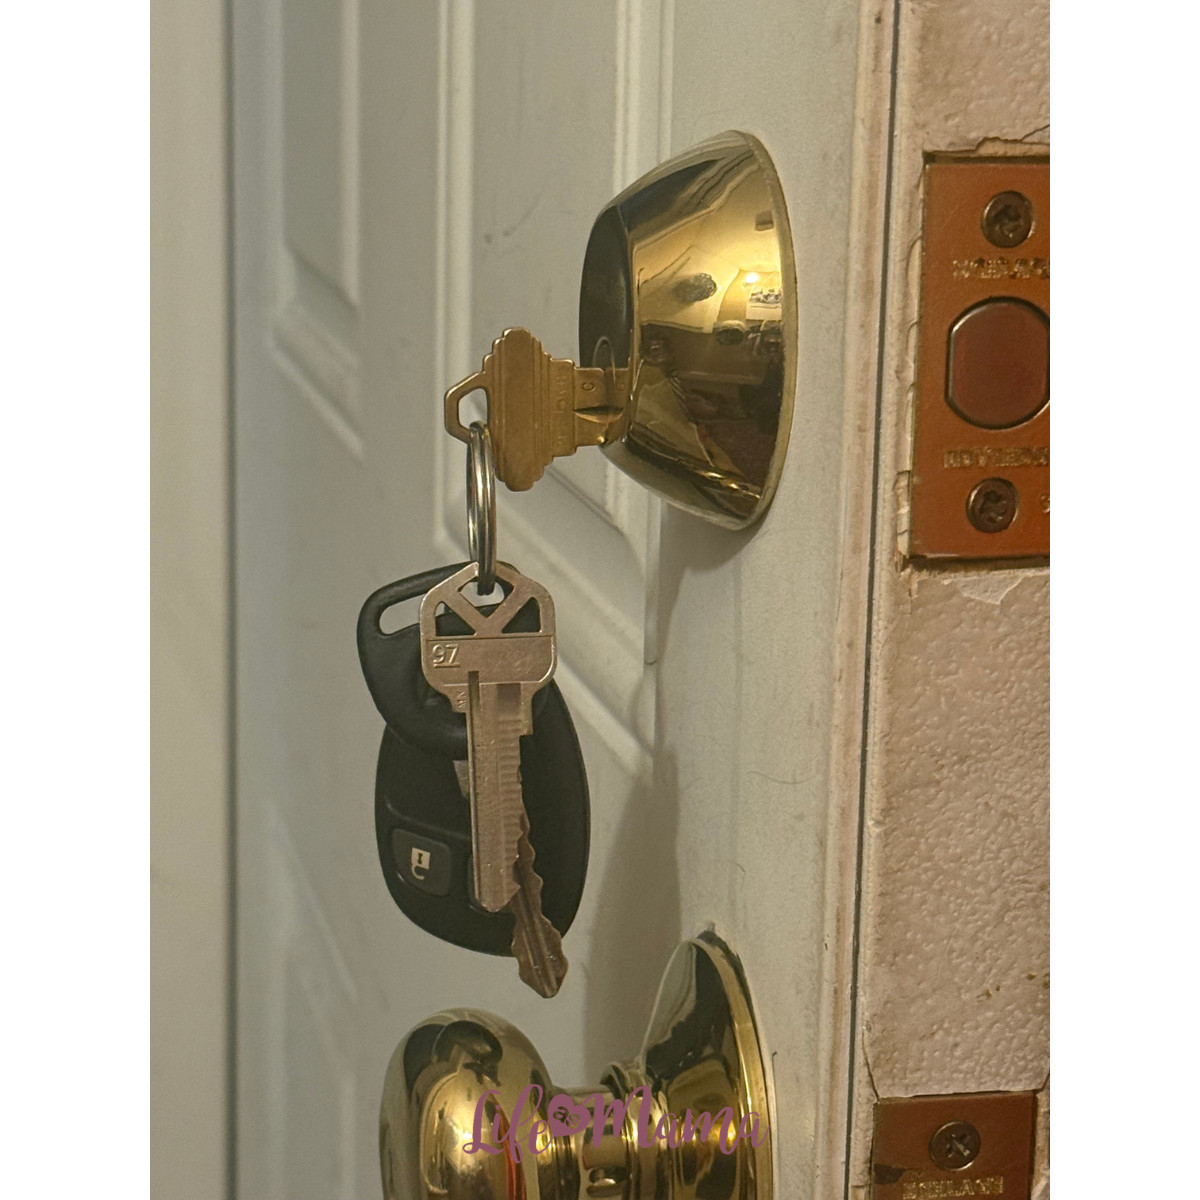
Fix a Sticky Lock
If it’s nearly impossible to get your key into a lock – or the key is difficult to turn – don’t wait until you find yourself locked out.
Step 1: Clean and Inspect the Key
A dirty or gummy key can affect your lock.
Before assuming the lock is the problem:
- Wipe dirt and debris from the key.
- Check for bent or damaged teeth.
- Try a spare key if you have one.
This can help you determine whether the problem is the key or the lock.
Step 2: Lubricate the Lock
Locks collect dust and grime over time. Use a graphite lock lubricant or another dry lubricant specifically designed for locks.
Insert the key several times and turn it gently to distribute the lubricant.
You may be tempted to reach for lubricating oil, but oil can attract dirt and dust over time. A dry lubricant is generally a better long-term choice.
Easy Wall and Paint Repairs
You don’t have to repaint an entire room every time your wall gets a ding. These easy home repairs can make walls, trim, and furniture look much better without taking on a huge project.
Patch Nail Holes, Dents, and Dings
We’ve all been there. You move a piece of furniture and discover a dent in the wall, or decide to move a picture and are left staring at an ugly nail hole.
Luckily, these little annoyances are usually a quick fix.
Use quick-drying patching compound and a small putty knife to smooth over the damaged area. Because some compounds shrink while drying, you may need more than one coat.
Once the repair is completely dry, use fine sandpaper to smooth the patch. Then touch up the paint.
It’ll look like the hole was never there!
Touch Up Paint Like a Pro
Touching up paint is something we all have to do eventually. You don’t want to repaint an entire room, but you also don’t want your repair to scream, “I touched up the paint here!”
First, use a degreaser or grease-cutting dish soap to clean the area thoroughly and allow it to dry.
Once dry, I like to use a cheap, loose-bristled brush, such as a chip brush or art brush, to lightly crosshatch the paint over the repair.
Feather the paint beyond the repaired area to blend it into the surrounding wall. Several thin coats with drying time between them will usually blend better than one thick coat of paint.
Seal Bleeding Knots and Stains Before Painting
Sometimes when we paint wood, natural knots can bleed through the new paint over time.
The good news? They’re relatively simple to seal and repaint.
Look for a stain-blocking or sealing primer. Paint a thin coat over the knots and allow it to dry completely according to the product directions.
Once the primer has dried, repaint the area.
Repair Small Scratches and Dents in Wood Furniture
Small scratches and dents can make furniture show its age, but a few simple repairs can help keep wood furniture looking great.
Repairing Small Dents in Wood
For dents in unfinished or appropriately finished wood, moisture and gentle heat may sometimes help compressed wood fibers expand. Because finishes and veneers react differently to heat and moisture, test any technique in an inconspicuous area first.
Repairing Scuffs and Scratches
For noticeable scratches, a wax repair crayon is an inexpensive solution. They come in a variety of wood tones, making it easy to blend scratches on tables, cabinets, and furniture.
For very small scratches, matching furniture markers or touch-up products can also make the damage much less noticeable.
When NOT to DIY a Home Repair
There is absolutely nothing wrong with calling in the pros!
They’re professionals for a reason, and attempting a repair you aren’t comfortable or qualified to handle can sometimes cause more harm than good.
Being confident about home repairs also means knowing your limits.
Consider calling a qualified professional for:
- Gas leaks or suspected gas problems
- Major electrical work
- Structural issues
- Roof repairs
- Major water damage
- Mold issues
- Repairs requiring permits or specialized equipment
- Any project you don’t feel comfortable completing safely
Learning these easy home repairs for women isn’t about being able to fix absolutely everything yourself. It’s about understanding your home well enough to handle the little things, recognize when something isn’t right, and know when you need additional help.
I hope these tips and tricks give you the confidence to look at your home and say, “I’ve got this.”
Knowledge is power, and knowing how to fix and maintain the place you call home can help you feel safer, more secure, and more at ease.
FAQs About Easy Home Repairs for Women
What are some easy home repairs women can do themselves?
Many basic household repairs are beginner-friendly, including fixing a running toilet, clearing a slow drain, tightening loose cabinet hardware, patching nail holes, touching up paint, cleaning a clogged shower head, and troubleshooting simple faucet problems.
What home maintenance skills should every woman know?
Some of the most valuable skills include knowing where your water and gas shutoffs are, understanding your electrical panel, resetting a GFCI outlet, using a plunger correctly, changing household filters, testing smoke and carbon monoxide detectors, and recognizing when a problem requires a professional.
What tools should I have for basic home repairs?
A basic home repair toolkit can include a hammer, multi-tip screwdriver, adjustable wrench, pliers, tape measure, level, utility knife, cordless drill, stud finder, flashlight or headlamp, plunger, caulk gun, and putty knife.
You don’t need to buy everything at once. Start with the basics and add tools as you take on more projects.
How can I learn to do basic home repairs?
Start small. Owner’s manuals, reputable online tutorials, local workshops, and classes offered by home improvement stores can all help you learn new skills. Focus on understanding how something works before taking it apart, and take pictures along the way so you can reference them when putting everything back together.
When should I hire a professional instead of doing a repair myself?
Call a qualified professional when a repair involves gas, major electrical work, structural problems, significant water damage, mold, roofing, or anything you don’t feel comfortable handling safely. DIY confidence includes knowing when a project is beyond your experience level.
Related Images:

Colleen Rosenthal
Latest posts by Colleen Rosenthal (see all)
- How to Organize a Pantry (and Keep It That Way) - October 13, 2026
- Cheap Crockpot Meals the Whole Family Will Actually Eat - October 11, 2026
- How to Declutter Your Home: A Simple Room-by-Room Guide for Busy Moms - October 4, 2026
