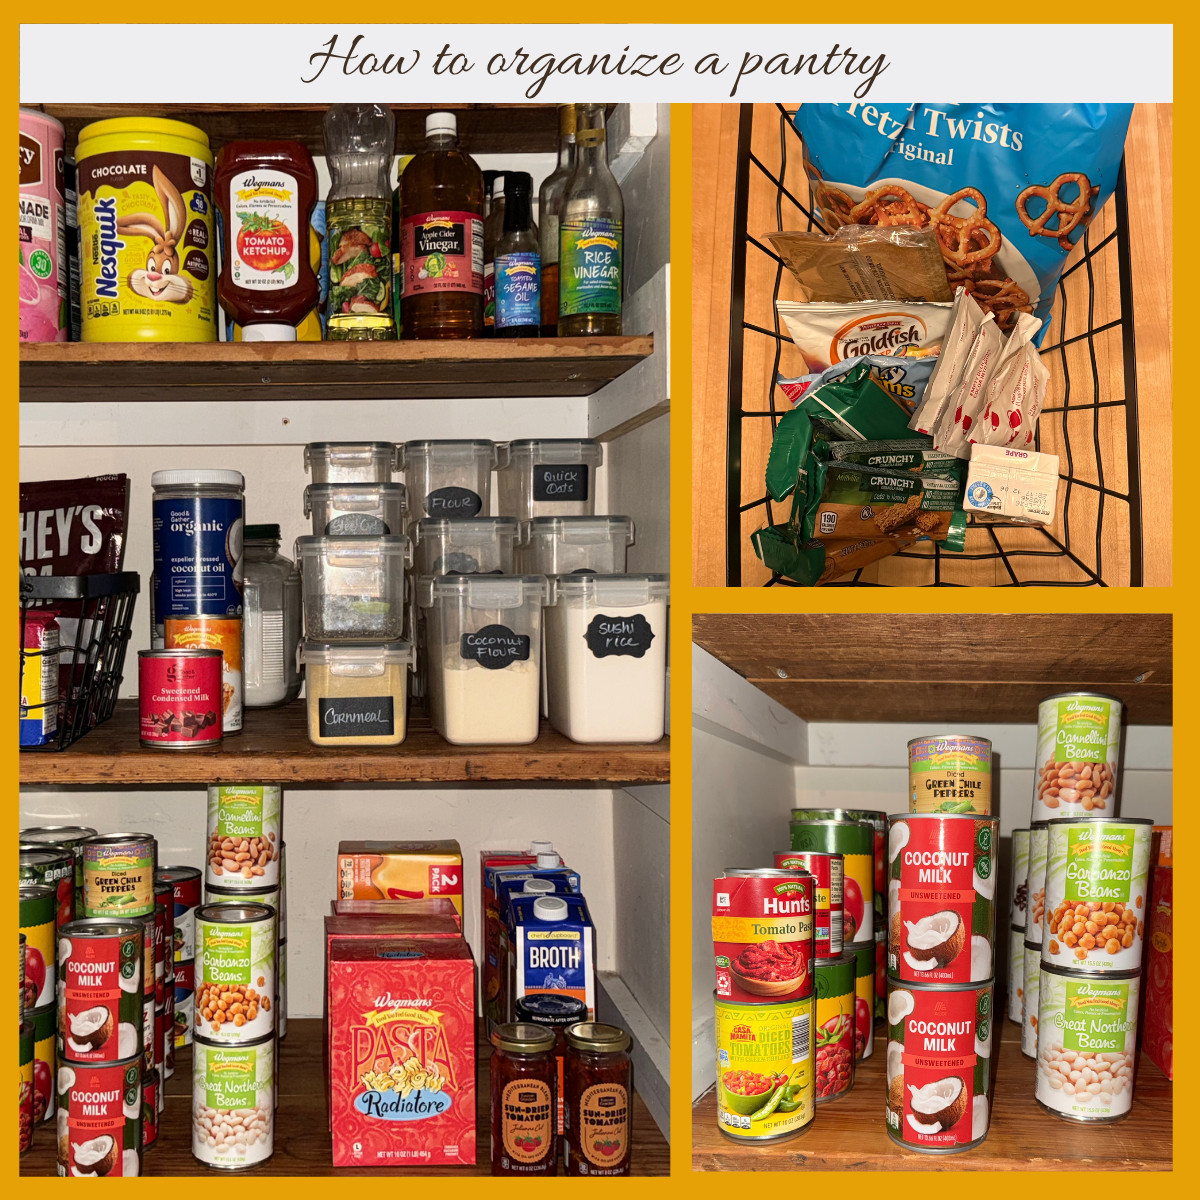
We have all been there. You get back from the grocery store, start putting things away, and find duplicate products and nowhere to put everything. Or you can’t find what you need. Because no matter how hard you try to put things where they belong, life happens. Busy mornings and late evenings make reliable systems seem like a social media dream we’ll never achieve. Well, I hope these ideas put the pantry pandemonium to an end for good!
There aren’t really cookie-cutter pantries, so there’s no one-size-fits-all solution. But if you look at the big picture, learning how to organize a pantry comes down to a few simple steps that work for everything from a small cabinet pantry to a big walk-in. Below, I’ll walk you through clearing it out, setting up zones, choosing bins and labels, tips by pantry size, and the habits that keep it organized long-term, all without spending a fortune.
Step 1: Clear It All Out and Start Fresh
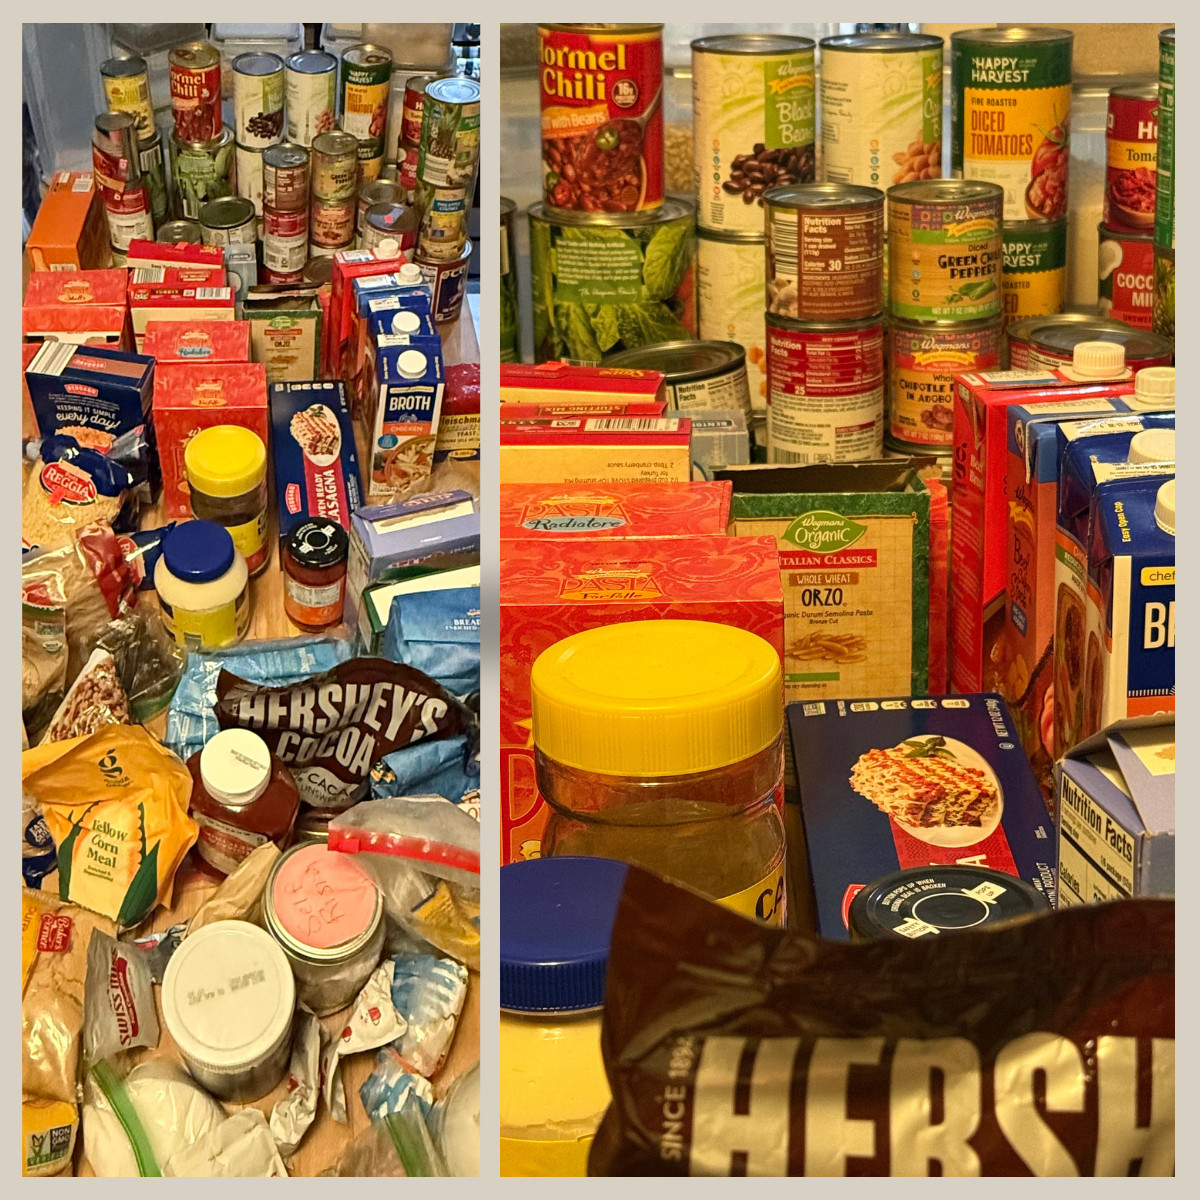
Let’s start with a clean slate. Literally clear everything out of the pantry. You can try to rearrange shelves with everything still inside, but the truth is you need to look at what you have with fresh eyes. Here’s the plan, step by step:
- Take measurements: Before buying any pantry storage, measure the height, depth, and width of your shelves. The last thing you want is to clear out the pantry and then discover you bought the wrong size containers.
- Empty every shelf: Move everything to your counters, the table, or even a portable table set up right where you’re working.
- Check expiration dates and open packages: Throw away anything expired or stale. If you have items you meant to use but know you won’t, local charities and food pantries need unexpired nonperishable and canned goods, so keep a donation box handy.
- Deep clean the surfaces: Once the shelves are bare, wipe them down with a warm, soapy cloth. Pay close attention to spots where something leaked, like syrup, honey, or oil. Noticing these areas tells you which bottles and jars need a tray or bin of their own. Fresh, clean shelves are a great motivator!
Step 2: Create Zones in Your Pantry
For me, a zone-based system works best. Choose zones that match the way you cook, and group items so they’re easy to find and easy to put away. Label shelves or zones so your family can find (and put back) things too!
Here are some zone ideas that work well, but you know your home and your life best. Think of this as an inspiration list:
- Breakfast zone: Oats, cereal, pancake mix, syrup, and peanut butter together, at eye level or on an easy-to-reach shelf to speed up busy mornings.
- Grab-and-go snack zone: Lower shelves for kid-friendly snacks like granola bars, fruit snacks, pretzels, and crackers. Open containers let kids grab their own snacks without turning the whole pantry upside down.
- Baking zone: Dedicated containers for flour, sugar, baking soda, chocolate chips, and extracts keep messy powders in one area.
- Canned goods and soups: Group vegetables, beans, sauces, and soups, and line them up so you can see your inventory at a glance.
- Dinner prep and grains: Space for pasta, rice, quinoa, boxed sides, and jarred sauces.
- Spices, seasonings, oils, and vinegars: A dedicated area for these makes cooking on a busy night so much easier.
Step 3: Choose the Best Bins and Containers
Once you’ve figured out your zones, choose containers that will help you turn this project into a routine you can keep up. Think about visibility, space, accessibility, and how far the pantry is from your work area. Here are the pantry storage ideas that make the biggest difference:
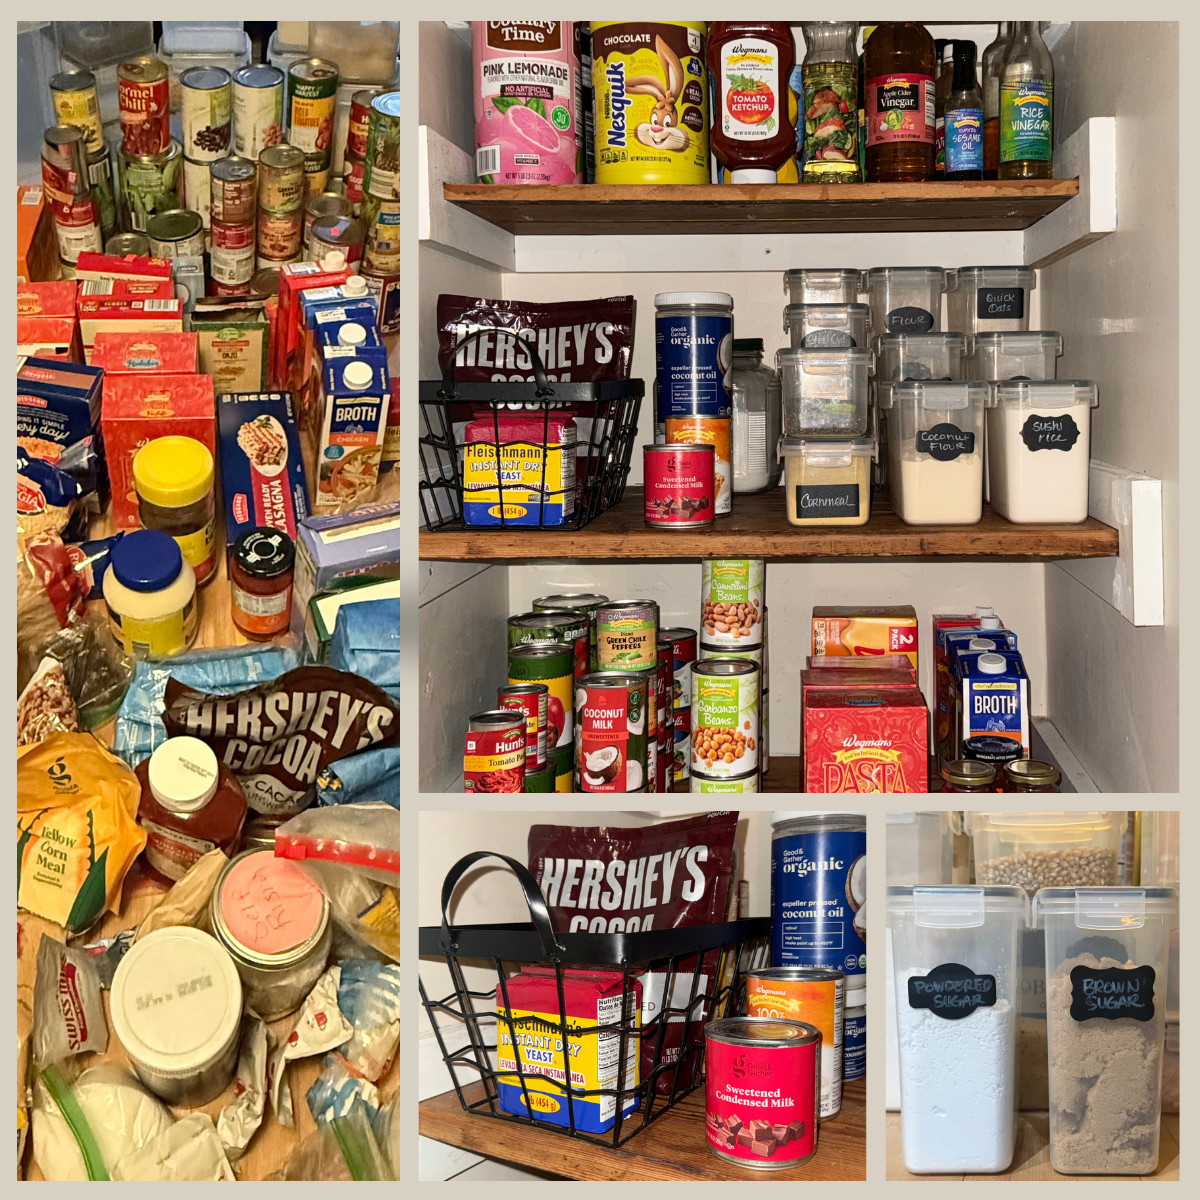
- Clear bins and containers: Clear acrylic bins are a fabulous choice. Being able to see what’s in your pantry makes your system so much easier to maintain, and when you can see what you have at a glance, you’re less likely to buy duplicates. Use them for packaged snacks, grain pouches, pasta boxes, and baking essentials.
- Airtight canisters for bulk staples (or items that come in odd packages!): Moving flour, sugar, rice, oats, and coffee into airtight canisters or glass jars keeps them fresh, easy to grab, and less likely to spill. Because let’s face it, a spilled bag of flour isn’t something any of us wants to deal with! These pantry canister organization ideas have lots of options.
- Turntables and lazy Susans: A lazy Susan is a lifesaver for tight spaces, corners, and deep shelves. They’re great for oils, vinegars, and salad dressings (the things that get lost in the back), plus spices, condiment jars, and canned goods. Instead of reaching through and knocking over everything in your path, just give Susan a spin and grab what you need.
- Shelf risers: Another great choice for cans and spices. Stacking items up lets you see what’s behind the front row instead of losing cans in the back. These are perfect in a cupboard where space is at a premium.
- Shop your home for storage: Simple wicker or wire baskets you already have, clearly labeled, can help you organize without spending much at all. These cheap organization hacks have more budget ideas.
Step 4: Why Labels Are Non-Negotiable
You can spend all you want on storage, but if you’re the only one who knows the system, you’re setting yourself up for heartache!
Labels tell your whole family where to find things and, more importantly, where to put them back. They’re what keep your zones working. Make them movable, since maybe you have more pasta in the winter or more snacks in the summer. I’m not saying you can’t be flexible. I’m telling you labels will save your sanity, especially if you decant food out of its original packaging. (Tip: cut out the cooking instructions and expiration date and tape them to the back of the container.)
How to Organize a Pantry by Size
Every home is different, and the best kitchen pantry organization adapts to the space you have.
Small Pantry Organization Ideas
If you have limited space for food storage, making the most of every inch is key. These small pantry organization ideas help you maximize what you have without things feeling like they’re overflowing:
- Maximize vertical space: Use stackable clear drawers or shelf risers to double your storage.
- Use uniform canisters: Square or rectangular containers fit snugly together and take full advantage of the space.
- Use pull-out bins: In small cabinets, it’s hard to reach the back. Using bins like drawers lets you pull everything out at once and grab what you need instead of digging.
Walk-In Pantry Organization Ideas
Larger pantries offer more space, but that can quickly turn into a problem without a system to keep it organized.
- Heavy and bulk items on low shelves: Cases of water, bins of potatoes and onions, and other bulk items belong on the lower shelves, safely out of the way.
- Everyday items at eye level: Store daily high-traffic items, like dinner staples, daily snacks, and cereal, between waist and eye level.
- Create an overflow or backstock basket: Keep one basket for things that don’t fit your current system, seasonal foods, or those extra snacks you grabbed on sale. This keeps one big grocery haul from undoing all your hard work.
Looking for style inspiration for your space? Browse these creative pantry organization ideas, from farmhouse to modern.
Don’t Forget the Door
If your pantry door has room, the inside of the door is space people forget about. Adding hooks or an over-the-door rack gives you extra storage you might not have thought of. Use it for a spice rack, plastic wrap and foil storage, or corralling reusable grocery bags. It expands your space without using any shelf space. An old spice rack works great here too; check out these genius ways to repurpose a spice rack.
Pantry Organization Mistakes to Avoid
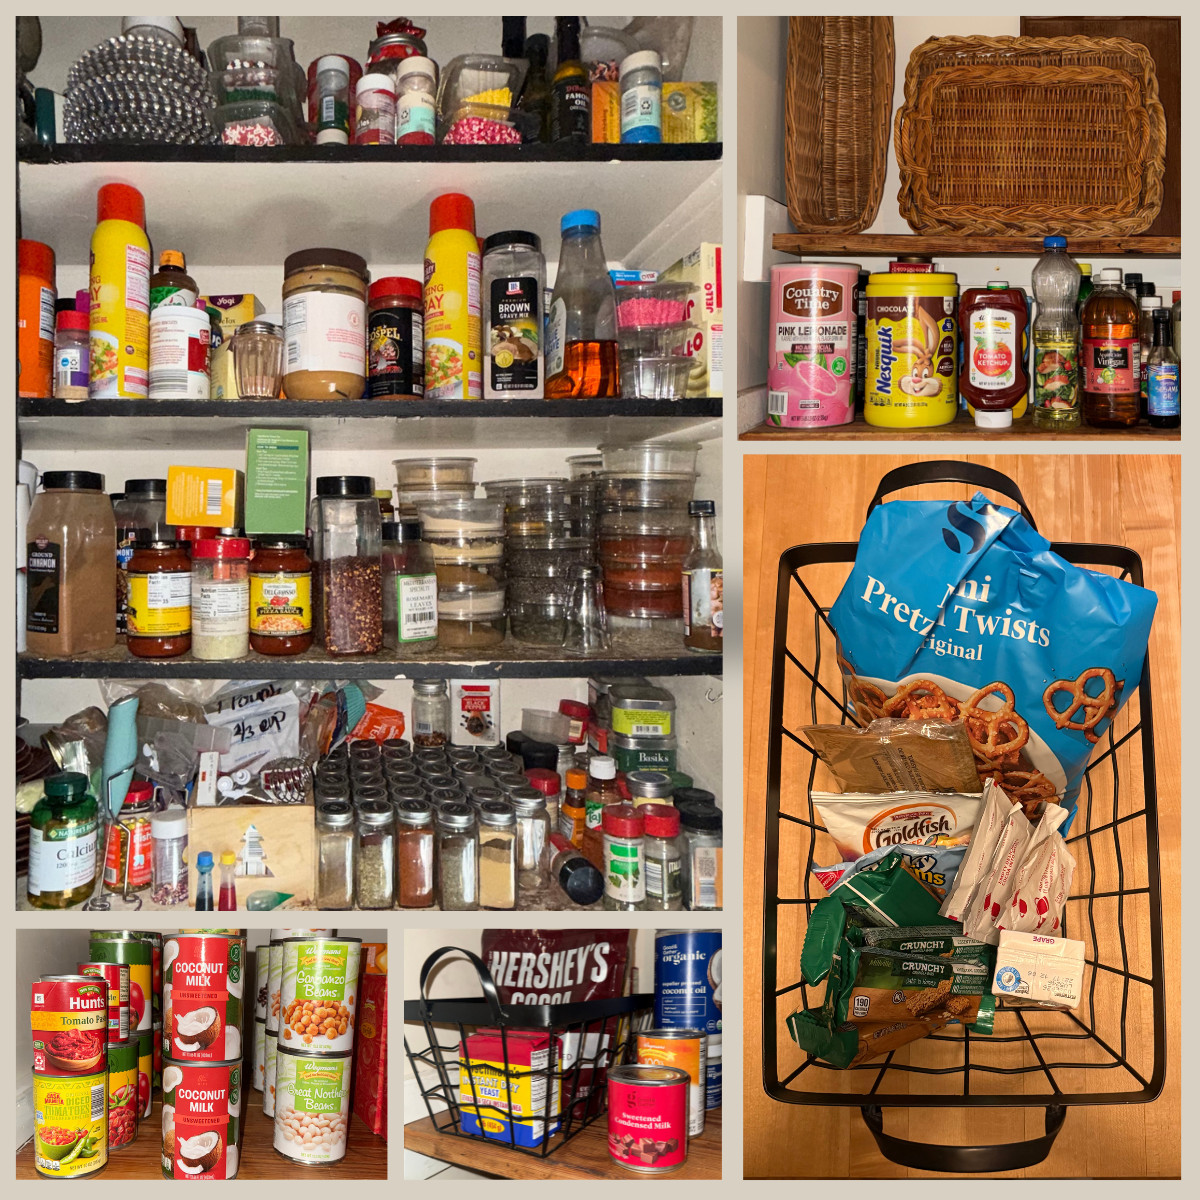
It’s easy to overcomplicate a pantry overhaul and set yourself up for disappointment. A few quick things to remember:
- Buying containers before measuring: It’s easy to fall for the cute bins at the home store, but if they don’t fit your shelves, they won’t fit your system, and they just bring more clutter into your home.
- Creating too many categories: I’m sure this article already has the wheels turning with all the categories you could make. Keep it simple; it’ll be easier to maintain long-term.
- Storing everyday items on hard-to-reach shelves: If you need a step stool for something you use every day just because it fits that shelf better, you’ll get frustrated fast. Set up your zones around the way you actually prepare meals.
How to Keep Your Pantry Organized Long-Term
Setting up your pantry is only half the journey. Keeping it that way takes a few simple, intentional habits:
- Keep a running list: Hang a clipboard with a pen and paper in the pantry. When someone uses the last of something, they write it down, so your grocery list is basically done for you!
- Try the First In, First Out (FIFO) method: It’s a trick used in professional kitchens to cut food waste. When you come home with groceries, move older items to the front and put new purchases behind them. Using older stock first helps make sure food gets eaten before it expires.
- Use a reset routine: Daily, weekly, or monthly, set a time to straighten loose items, check your inventory so you don’t buy duplicates, and combine half-empty boxes or bags. Mini resets mean you never have to completely reorganize the pantry again.
- Create an “anti-pantry”: Not everything needs to be hidden away. A bowl of fresh fruit, a basket for potatoes and onions, or a pretty bottle of oil by the stove can add to your decor, keep those items in easy reach, and free up pantry space.
For more ways to make your kitchen work harder for you, try these genius kitchen organization hacks.
Frequently Asked Questions
How long does it take to organize a pantry?
Most cabinet pantries take about 1 to 2 hours, while a full walk-in pantry can take 3 to 4 hours including cleaning and sorting. Measuring and buying containers ahead of time is the biggest time saver. If you’re short on time, tackle one shelf or one zone per day.
Should I take everything out of its original packaging?
No, you don’t have to decant everything. It’s most helpful for bulk staples like flour, sugar, rice, and cereal, and for bags that are easy to spill. Boxed and canned items can usually stay in their packaging inside a labeled bin, which saves time and money.
How do I organize a pantry if I don’t have one?
Choose one or two kitchen cabinets as your “pantry” and use the same zones, just on a smaller scale. A rolling cart, a freestanding shelf, or an over-the-door rack can add a lot of food storage in a small kitchen. Shelf risers and pull-out bins help you use every inch of cabinet space.
How can I keep bugs out of my pantry?
Store flour, grains, cereal, and pet food in airtight containers, and wipe up crumbs and spills when you notice them. Check new bags of dry goods before putting them away. If you ever spot pantry moths or weevils, throw out the affected food, vacuum and wipe the shelves, and keep everything sealed going forward.
How often should I reorganize my pantry?
With a good system and a regular reset routine, you shouldn’t need a full reorganization more than once or twice a year. Many families like to do a bigger refresh at the start of a new season or before the holidays, when baking supplies take over. Quick weekly tidies handle the rest.
Wrap It All Up
Fair warning: organizing your pantry may feel overwhelming when the counters are covered with food and the trash is overflowing with all the expired things you forgot were shoved in there. But taking the time to set up simple categories and storage routines will help your days and nights run smoother and feel less chaotic. Feeding a family is a big job, and simple storage and organization hacks make it less daunting while teaching the whole family habits that will help them for life. Happy pantry organizing! You’ve got this!
Related Images:

Colleen Rosenthal
Latest posts by Colleen Rosenthal (see all)
- How to Organize a Pantry (and Keep It That Way) - October 13, 2026
- Cheap Crockpot Meals the Whole Family Will Actually Eat - October 11, 2026
- How to Declutter Your Home: A Simple Room-by-Room Guide for Busy Moms - October 4, 2026