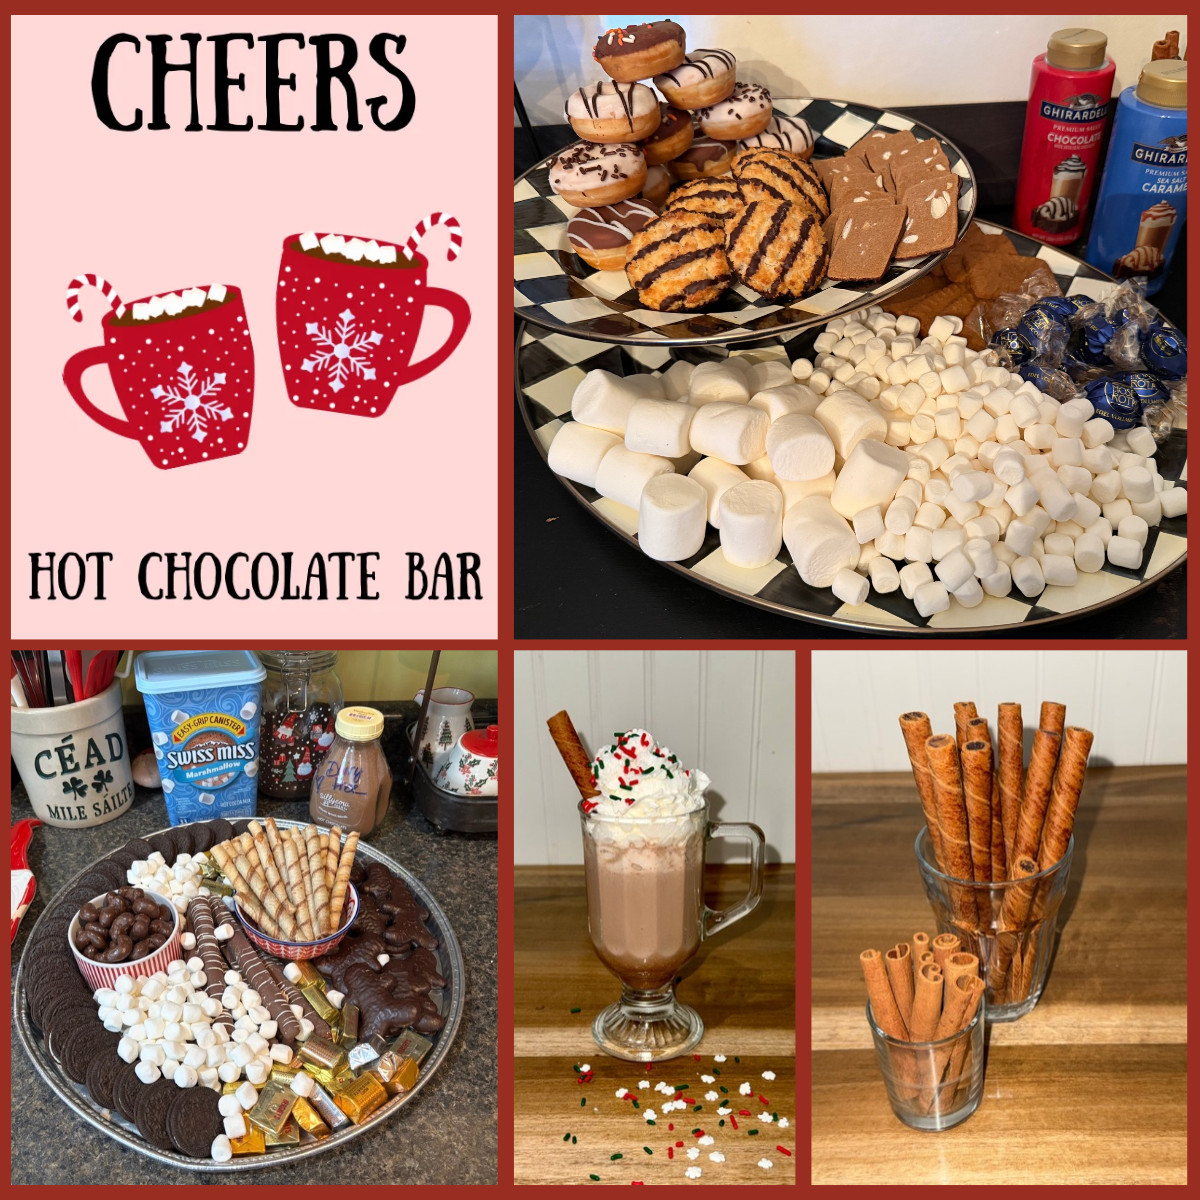
Every year I host a cookie decorating party at our house. Kids, cookies, friends, and food! Last year I wanted to add a little extra whimsy, so on a whim I threw together a hot chocolate bar. To say it was a smash hit is an understatement. Everyone LOVED it, and the kids asked me to do it again on Christmas morning! I mean, can you blame them? There is something magical about a cozy cup of cocoa.
Learning how to build a hot chocolate bar is easier than you’d think. Below you’ll find a simple supply checklist, a four-step setup, two slow cooker recipes (classic and dairy-free), how much to make per guest, a big toppings list, and a few safety tips for little ones. You can keep it as simple or as fancy as you want and make it work for any age!
What You Need to Build a Hot Chocolate Bar
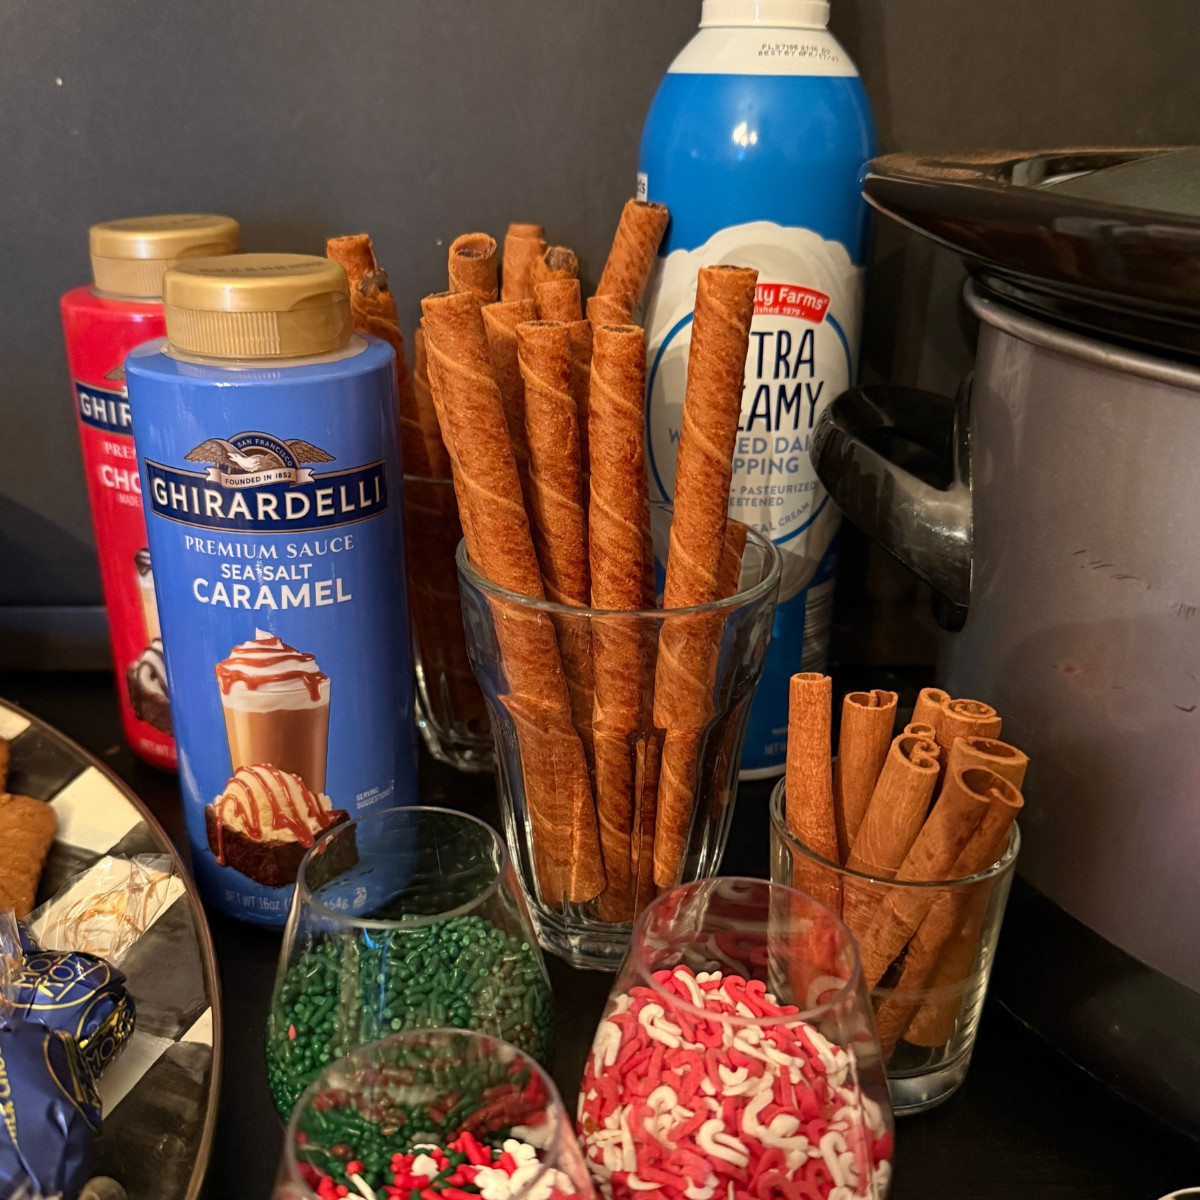
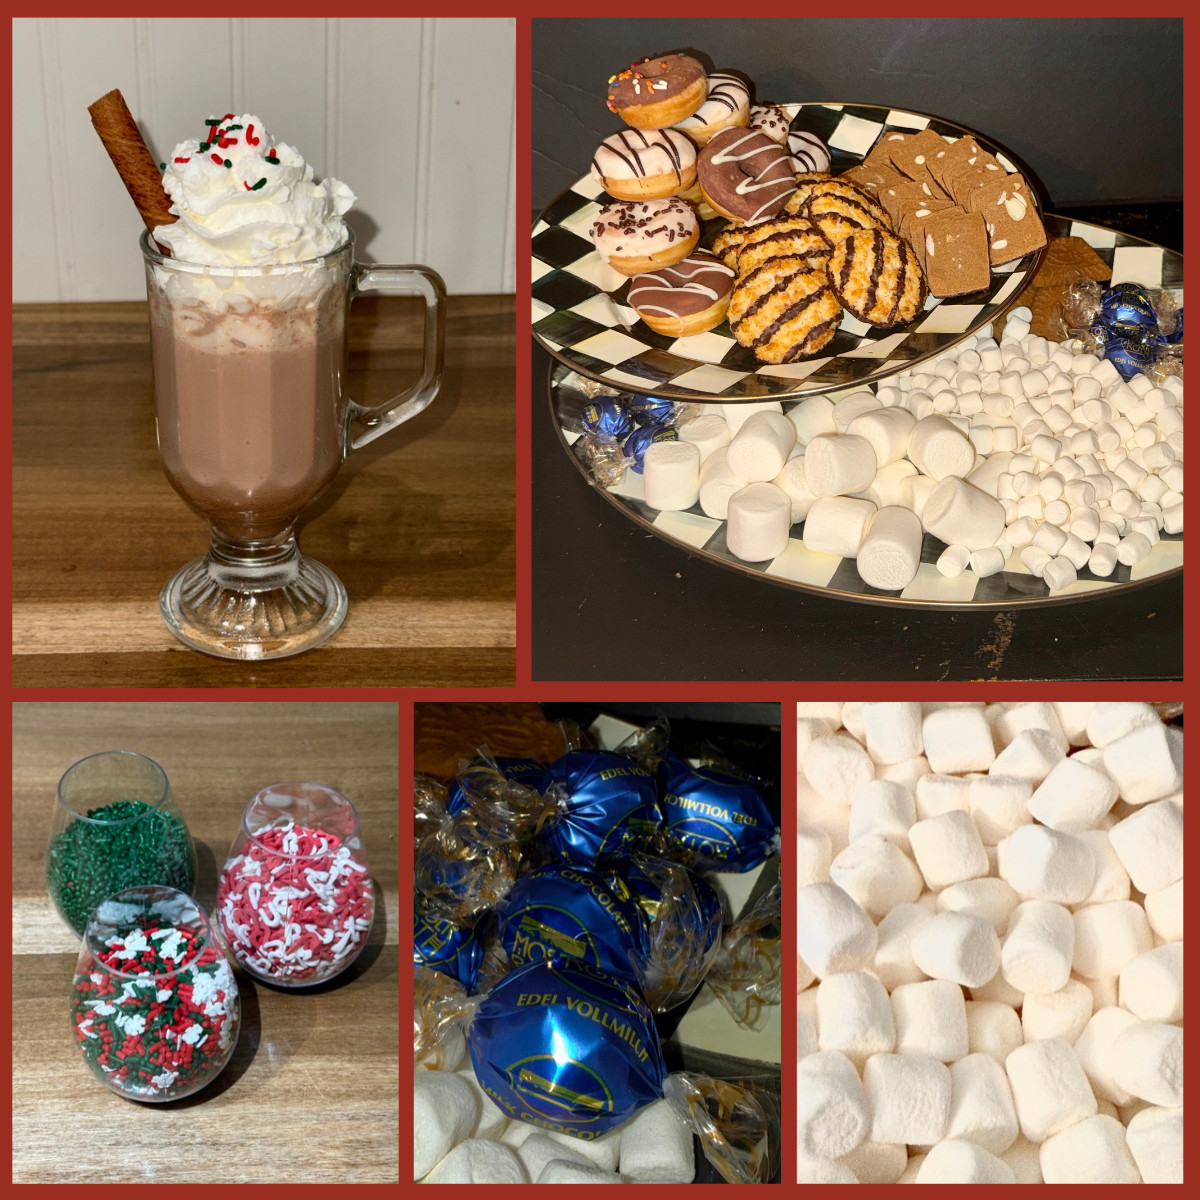
Here’s the thing: setting up your own hot chocolate bar doesn’t have to be complicated or expensive! You probably already have most of the setup items around your house. I always say shop at home first! Then all you have to grab are the goodies.
Here’s a quick checklist for a cozy cocoa setup. These are suggestions, so make it fit your event and your home. And I know the holiday season is hectic, so if you want a done-for-you shopping list and signs, grab our free printable hot chocolate bar signs and shopping checklist at the bottom of this post!
The Setup
- A slow cooker (Crock-Pot) or insulated urn for making or serving the hot cocoa
- A ladle
- A tray, platter, tiered tray, or bar cart for treats and add-ons
- Small bowls or jars for marshmallows, toppings, and stir-ins (a muffin tin works great for easy cleanup!)
- Squeeze bottles for syrups
- Spoons and napkins
- Mugs or disposable hot cups (we love using festive options from our roundup of festive Christmas mugs every holiday lover will adore)
The Star of the Show
- Homemade slow cooker hot chocolate (my favorite, recipes below) or a good hot cocoa mix
- A dairy-free option for guests who need it
Toppers
- Marshmallows in different sizes
- Whipped cream
- Sprinkles
- Crushed peppermints
- Syrups and sauces
Stirrers
- Cinnamon sticks
- Peppermint sticks or candy canes
- Chocolate spoons
- Rolled wafer cookies or pretzel rods
Extras
- Chocolate kisses or other candy
- A variety of cookies
- Labels or tent cards for each topping
How to Build a Hot Chocolate Bar Step by Step
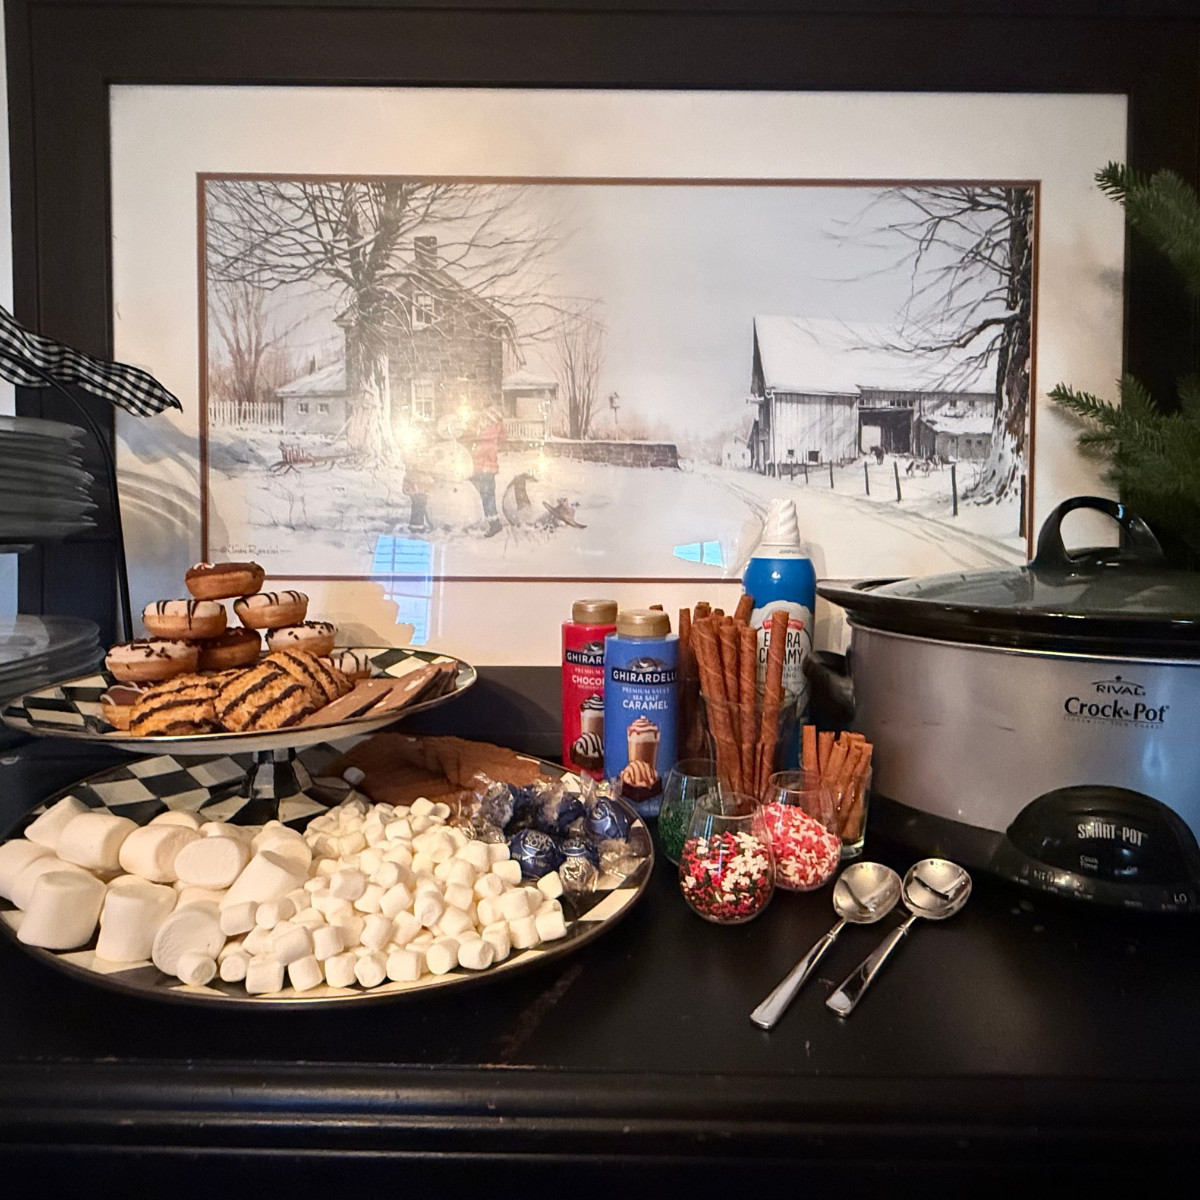
To build a hot chocolate bar, keep a big batch of cocoa warm in a slow cooker, then set out mugs, toppings, stirrers, and signs in the order guests will use them. For example, put mugs first, then the cocoa, then marshmallows, whipped cream, and crushed peppermint, with candy canes or cinnamon sticks at the end.
Step 1: Pick Your Spot and Display
As always, location, location, location! Choose a spot that everyone can reach without causing a traffic jam. A kitchen counter, a small side table, or a corner of the dining room are all great choices. Keep it out of the way of your work area and your main activity. I can tell you from experience that all the topping choices will make people linger and become the hot chocolate artists they always wanted to be!
Make sure there’s an outlet nearby for the slow cooker. Push it toward the back of the table and tuck the cord where little hands can’t tug it. A tiered tray or bar cart gives you extra height for toppings without crowding the table.
Step 2: Make the Hot Chocolate Base
The secret to a stress-free party is keeping the cocoa hot without tending the stove all night. Your slow cooker makes a big batch you can set up ahead of time and then leave for everyone to help themselves. Plus the pots and pans are cleaned up before the party starts!
Classic Slow Cooker Hot Chocolate
Makes about 9 cups, enough for 9 to 12 mugs (6 to 8 ounces each). Fits a 4-quart or larger slow cooker.
Ingredients:
- 8 ounces semi-sweet chocolate bar, coarsely chopped
- 1/4 cup unsweetened natural cocoa powder
- 2 cups heavy cream
- 6 cups whole milk
- 1/2 cup granulated sugar
- 2 teaspoons vanilla extract
Directions:
- Add all the ingredients to your slow cooker and whisk for 1 to 2 minutes, until the cocoa powder is fully mixed in.
- Cook on LOW for 2 to 2 1/2 hours, whisking every 30 minutes, until the chocolate is melted and the cocoa is steaming. Milk can scorch on high, so low and slow is the way to go.
- Once the party starts, switch the slow cooker to WARM and give it a stir now and then.
Dairy-Free Slow Cooker Hot Chocolate
Makes about 9 cups, enough for 9 to 12 mugs.
Ingredients:
- 8 cups extra creamy oat milk
- 1/2 cup cocoa powder
- 1/3 cup cane sugar
- 1 1/2 cups dairy-free chocolate chips
- 1 tablespoon vanilla extract
- 1/4 teaspoon salt
Directions:
- Add the cocoa powder, cane sugar, and salt to the bottom of the cold slow cooker.
- Add about 1 cup of the oat milk and whisk until a smooth paste forms with no dry clumps. Pour in the remaining oat milk and the vanilla, and whisk well.
- Stir in the dairy-free chocolate chips.
- Heat on LOW for 2 hours, stirring well halfway through to melt the chips. Then switch to WARM.
Double-check the chocolate chip label if you’re serving guests with allergies, since some dairy-free chips are made in facilities that also process nuts.
Troubleshooting: If a skin forms on top, just whisk it back in. If the cocoa gets too thick as it sits, stir in a splash of warm milk (or oat milk).
Want more flavors? Try one of our hot chocolate recipes to keep you warm this winter or these flavorfully fun hot chocolate recipes for a second pot.
Step 3: Set Out the Toppings
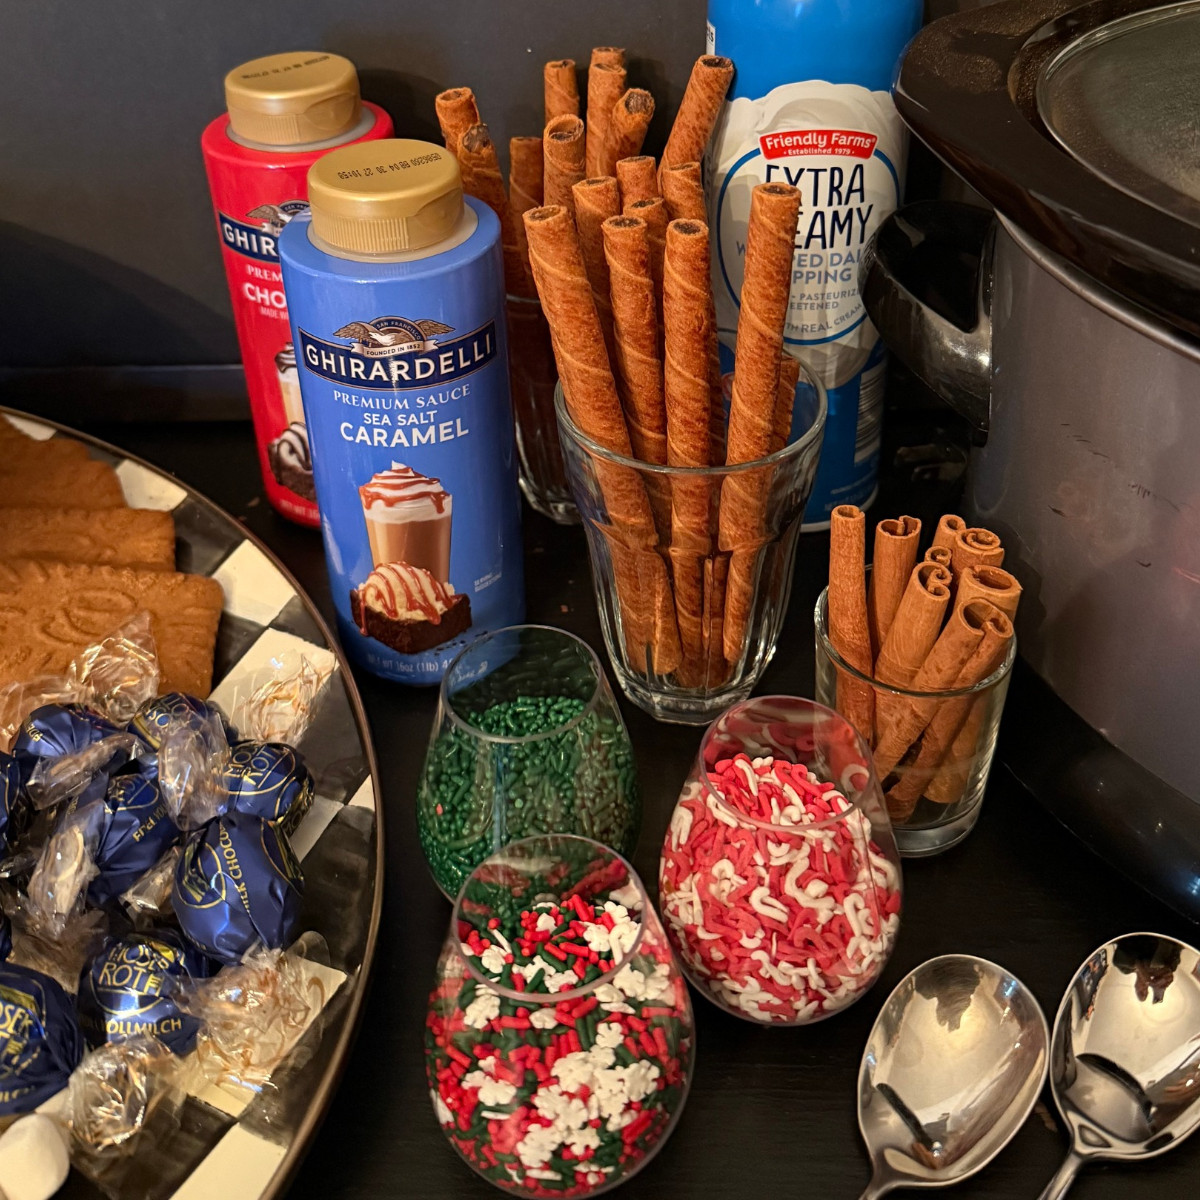
Let’s be honest, it’s all about the toppings. This is where a plain cup of cocoa turns into a magical treat! Use small dishes, fancy cups, or mason jars, and add little spoons or scoops to each one. Squeeze or pump bottles for syrups and sauces add a sweet touch too. Don’t forget the whipped cream (or non-dairy whipped topping), and I love including little cookies and treats in the topping area. Keep the whipped cream in the fridge and set it out in small batches so it stays cold.
Step 4: Add Mugs, Stirrers, and Signs
Once everything is in place, finish by setting mugs or cups at the start of the line so traffic flows in one direction: mugs, then cocoa, then toppings, then stirrers and napkins at the end. A simple framed “Hot Chocolate Bar” sign welcomes everyone, and little labels on each topping help guests (and parents) know what’s in every dish. You can download both in our free printable, along with the recipes above!
How Much Hot Chocolate and Toppings Per Guest
Plan on about 8 to 10 ounces (roughly 1 cup) of hot chocolate per adult and about 6 ounces per young kid. For a 2-hour party, plan 1.5 servings per guest so you don’t run out, since refills happen!
For example, 12 guests at 1.5 servings each is 18 mugs, so you’d make two batches of either recipe above. A 6-quart slow cooker holds a double batch.
For toppings, a good starting point for 12 guests is:
- One 10-ounce bag of mini marshmallows
- One pint of heavy cream whipped (about 4 cups) or one to two cans of whipped cream
- About 1 cup each of four to six other toppings, like crushed peppermint, chocolate chips, and sprinkles
- One bottle each of two sauces
- One or two stirrers per guest
The Ultimate Hot Chocolate Bar Toppings List
When you’re planning your hot chocolate bar toppings, think about variety so there’s a little something for everyone. Think fluffy, crunchy, sweet, and even a little spicy! Here’s the ultimate crowd-pleasing list:
The Fluffy and Creamy Basics
- Marshmallows: mini, regular, or giant (I don’t know if I’ve ever met a kid who didn’t love a marshmallow!)
- Marshmallow fluff
- Whipped cream (or a dairy-free alternative)
Crunchy Bits
- Crushed peppermint or candy canes (don’t worry if you have to buy a whole box, these candy cane desserts will use up the extras)
- Mini chocolate chips: dark, milk, or white chocolate
- Toffee bits or crushed Heath bars
- Holiday sprinkles
The Drizzles
- Chocolate syrup
- Caramel sauce
- Butterscotch or dulce de leche
Spice It Up
- Ground cinnamon
- Pumpkin pie spice
- Nutmeg
- Maple sugar
Edible Stirrers
- Candy canes
- Cinnamon sticks
- Chocolate spoons
- Pirouline wafer cookies or pretzel rods
Hot Chocolate Bar Safety Tips for Kids and Allergies
A hot chocolate bar for kids is so much fun, and a few small steps keep it that way:
- Keep the cocoa on WARM, not HIGH. Even on warm, it’s hot enough to burn little mouths and hands. Have a grown-up do the ladling for younger kids, fill their mugs only halfway, and add a splash of cold milk to cool it down before handing it over.
- Label allergens. Use tent cards to mark any topping that contains nuts or dairy. Toffee bits, some wafer cookies, and some chocolates contain nuts or are made alongside them, so check labels. Set nut-containing toppings at the end of the line with their own spoons so they don’t get mixed into everything else.
- Watch for choking hazards with toddlers. Marshmallows, hard candy, crushed peppermint, candy canes, nuts, and chocolate chips are common choking hazards for children under 4. For little ones, stir marshmallows in until they melt, skip the hard candy, and stick with whipped cream and sprinkles.
- Keep grown-up add-ins separate. If you’re adding a splash of something for the adults, set it on its own clearly labeled “Adults Only” tray away from the kids’ station, and add it to adult mugs only.
Hot Chocolate Bar Ideas for Every Occasion
One of the reasons we love a DIY hot chocolate bar is how versatile it is! Take the basic setup and adapt it to almost any get-together:
- Family Movie Night: A simple muffin tin setup is perfect for a cozy night in! It’s one of the favorites on our winter bucket list for kids.
- Classroom or Neighbor Parties: Use disposable insulated cups with lids so kids can take their cocoa on the go.
- A Family Sledding Day: Pack toppings in a “snackle box” and bring the cocoa in preheated insulated carafes for a sledding day tailgate!
- Your Annual Holiday Tradition: Pair your cocoa bar with other food stations, like my cookie party! If you love a food bar, try our holiday pancake bar ideas for Christmas morning or an easy taco bar setup for a crowd. You’ll find more ideas in our list of Christmas traditions to start this year.
- Grown-Up Night: For an adults-only party, these boozy hot chocolate recipes for cozy winter nights are the grown-up version.
Budget Tips for a Hot Chocolate Bar
You don’t need to spend a fortune to build a beautiful hot chocolate bar. Here are a few mama-tested budget hacks:
- Shop at home! Look through your own dishes and supplies before you shop anywhere else. Mismatched pieces look whimsical and intentional when they’re overflowing with goodies!
- Check the dollar store. Look for glass or plastic bowls and jars, decor, and little add-ons.
- Buy toppings in bulk. Bigger is sometimes better, especially for items you’ll use again over the holidays. Check wholesale clubs or the supermarket baking aisle for bulk bags of mini marshmallows, chocolate chips, and cocoa powder.
- Whip your own cream. Beat 1 cup of cold heavy cream with 2 tablespoons of powdered sugar and 1/2 teaspoon of vanilla until soft peaks form. It makes about 2 cups, and you can make it an hour ahead and keep it chilled.
- Use a muffin tin. Instead of juggling 10 small bowls, use a 12-cup muffin tin as one topping caddy! It looks adorable, keeps everything contained, and saves you a sink full of dishes.
Free Printable Hot Chocolate Bar Signs
Alright, I hope we’ve convinced you to start this fun tradition with your friends and family this year! Ready to set up your own hot cocoa bar? We made it easy with a free printable package, which includes:
- An 8×10 “Hot Chocolate Bar” sign to welcome everyone
- Foldable tent cards to label all your toppings (including allergy labels)
- A printable grocery shopping checklist
- Recipe cards for Crock-Pot hot cocoa (classic and dairy-free)
Hot Chocolate Bar FAQs
What do you need for a hot chocolate bar?
At minimum, you need a warm cocoa base, mugs, and two or three toppings like mini marshmallows, whipped cream, and crushed candy canes. Add spoons or cinnamon sticks for stirring and you have a complete bar. Signs, sauces, and extra treats are fun, but you can skip them for a quick weeknight version.
How do you keep hot chocolate warm for a party?
A slow cooker on the WARM setting is the easiest way, because it holds the cocoa hot for hours without scorching. Stir it every 30 minutes or so to keep a skin from forming. For outdoor gatherings, fill insulated carafes with hot water for a few minutes first, then pour it out and add the cocoa so it stays hot longer.
Can I make hot chocolate ahead of time?
Yes. Make either recipe up to 2 days ahead, cool it, and store it covered in the fridge. Reheat it in the slow cooker on LOW for 1 to 1 1/2 hours, whisking every 30 minutes, then switch to WARM when guests arrive.
How much hot chocolate do I need for 20 people?
Plan about 30 servings, or 1.5 per guest for a 2-hour party. With a mix of adults and kids, that works out to roughly 25 to 30 cups of cocoa, or about three batches of the slow cooker recipe above. A 6-quart slow cooker holds a double batch, so use two slow cookers or make a second batch to swap in halfway through the party.
What toppings go best together on a hot chocolate bar?
Some favorite combos: crushed peppermint with white chocolate chips, caramel sauce with a pinch of cinnamon, and marshmallow fluff with chocolate syrup for a s’mores twist. Put a little card with two or three suggested combos on the bar so guests who feel stuck have a starting point.
Make It Your Own
This DIY hot chocolate bar has become one of my favorite holiday traditions, and it isn’t only for Christmas. From chilly fall days through the long winter months, the answer to any get-together has to be hot chocolate! I hope you’ll try it too. Let your imagination go wild, because when it comes to hot chocolate, I think we’re all kids at heart. Tell me in the comments which toppings your family loves most!
Related Images:

Colleen Rosenthal
Latest posts by Colleen Rosenthal (see all)
- How to Build a Hot Chocolate Bar (Easy Setup + Toppings List) - November 15, 2026
- Portable and Practical: Gift Wrapping Essentials, Tips and Tricks for Busy Moms - November 8, 2026
- The Ultimate Deep Cleaning Checklist (Free Printable Included) - October 25, 2026