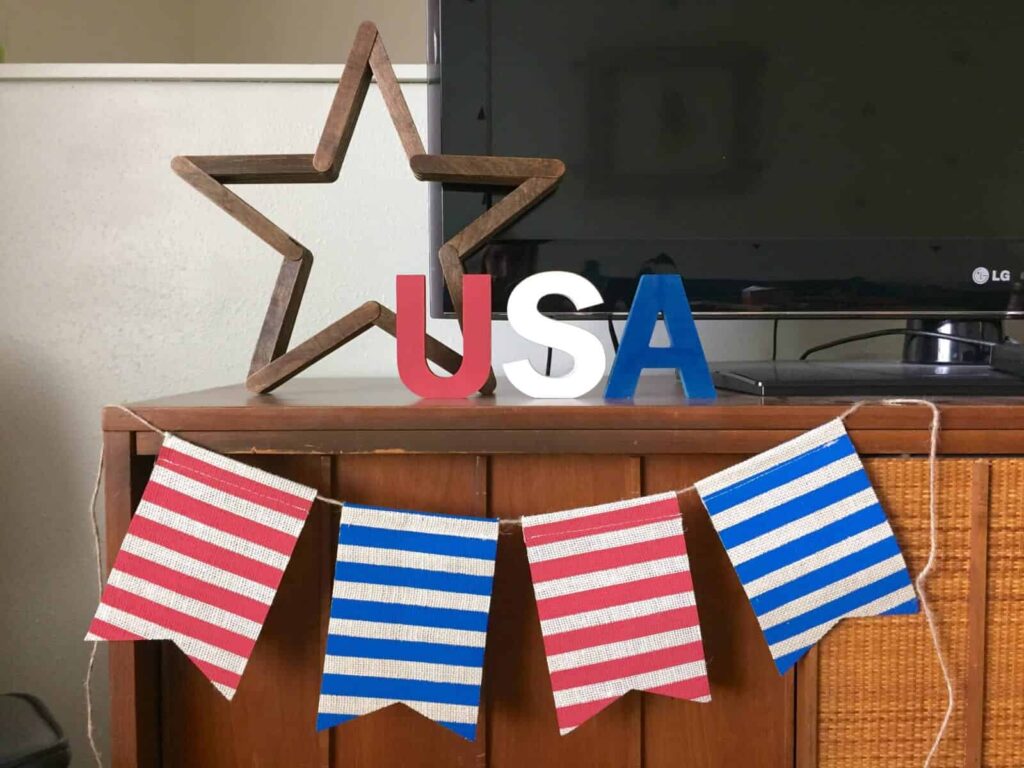
One holiday I love to decorate for is the Fourth of July. There’s just something about having my home decorated in our country’s colors and symbols that makes me feel all proud and mushy inside. As I was looking through Pinterest the other day at patriotic decor, I saw some wooden stars that I loved, but didn’t have the means to make them because I didn’t have any kind of saw. Then, I remembered I had seen a tutorial a couple months back about how to make a similar wooden project using popsicle sticks instead of actual wood pieces. That’s when I had the idea to make the wooden star that I wanted out of popsicle sticks. It would still have the same look I wanted and would be really easy and cheap to make.

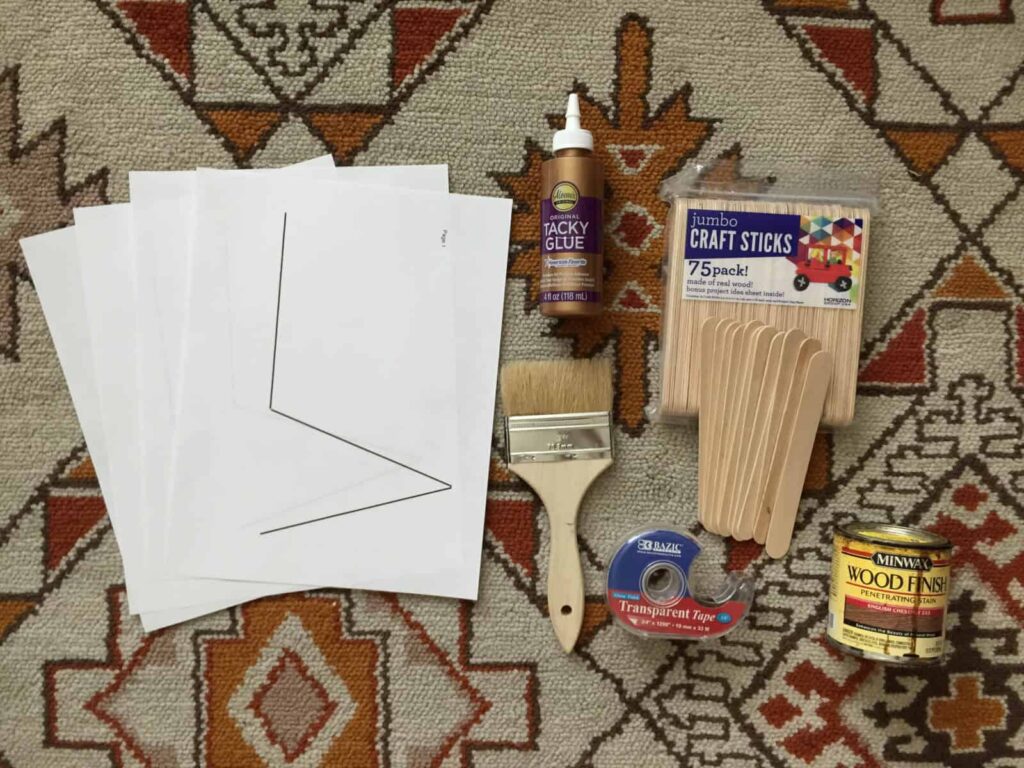
If you’re going to make your own popsicle stick star, here’s what you’ll need:
-wooden popsicle sticks (I bought mine at Walmart. They were 5.9″ x 0.7″ and I used 150 of them)
-tape
-craft glue
-wood stain in desired color
-paint brush
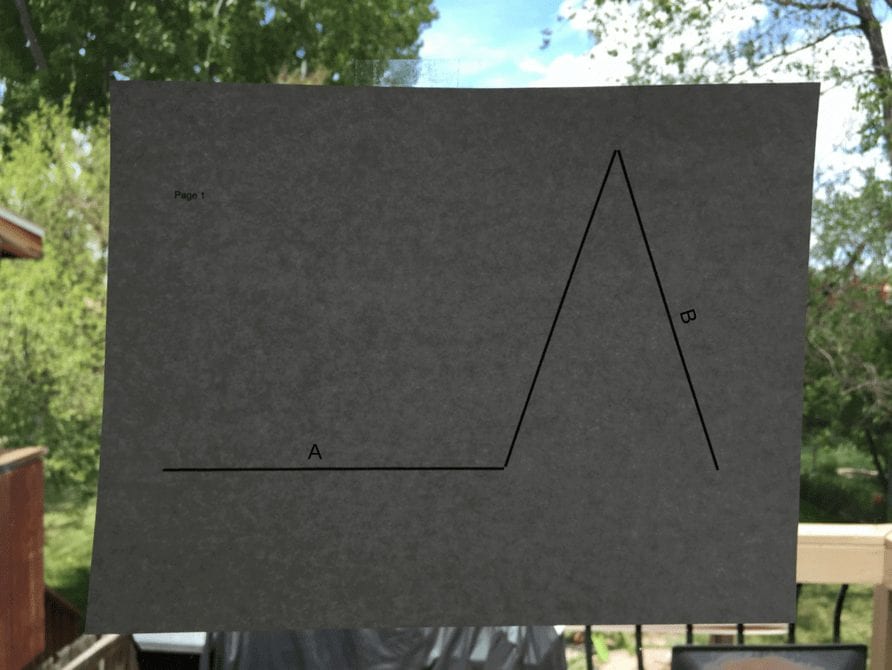
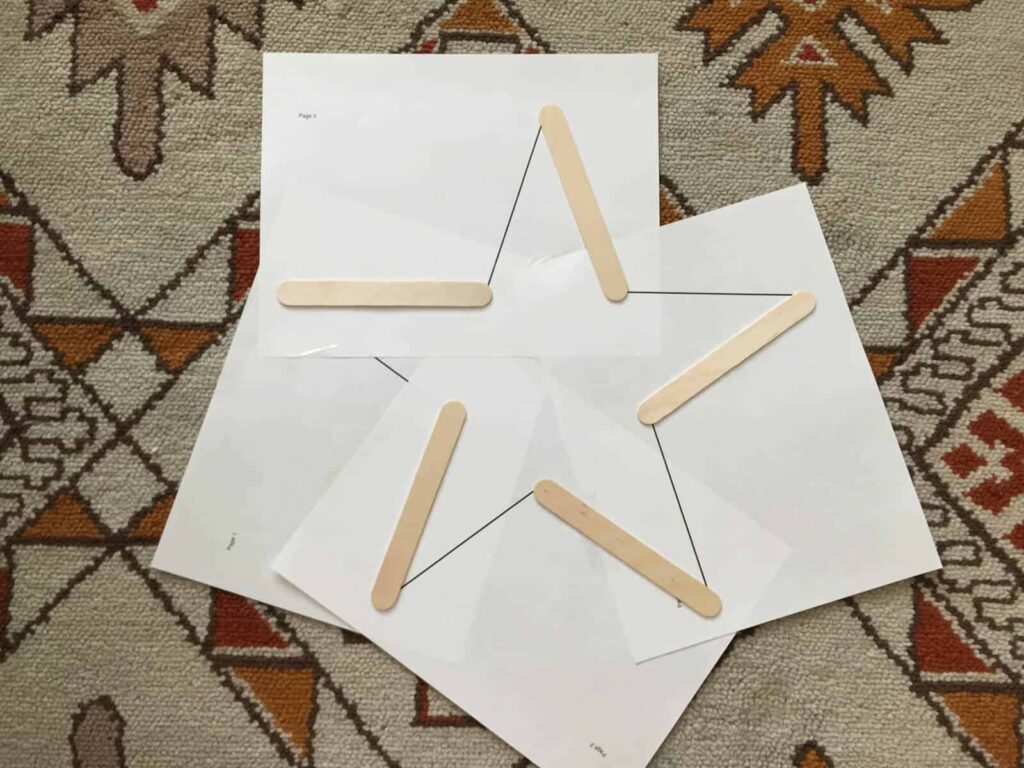
The first thing you need to do before you start gluing your star together is print off the star template I made here. Print the template off then begin taping the pages together. In order to see the star easier, I taped mine on the window so I could easily see the lines as the sun shone through.
Tape page 1 up on the window to begin with. This is the top of the star.
Next, tape page 2 up so that line A overlaps with line A on page 1.
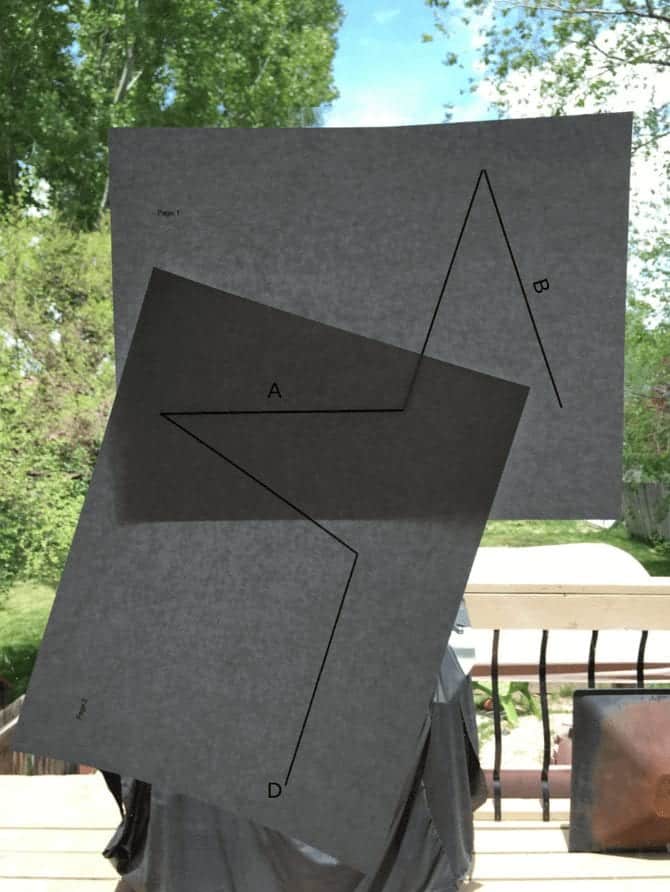
Now, take page 3 and tape it up so that line B overlaps with line B on page 1.

Now, complete the star and tape page 4 up so that points C and D match up with each other from pages 2 and 3.

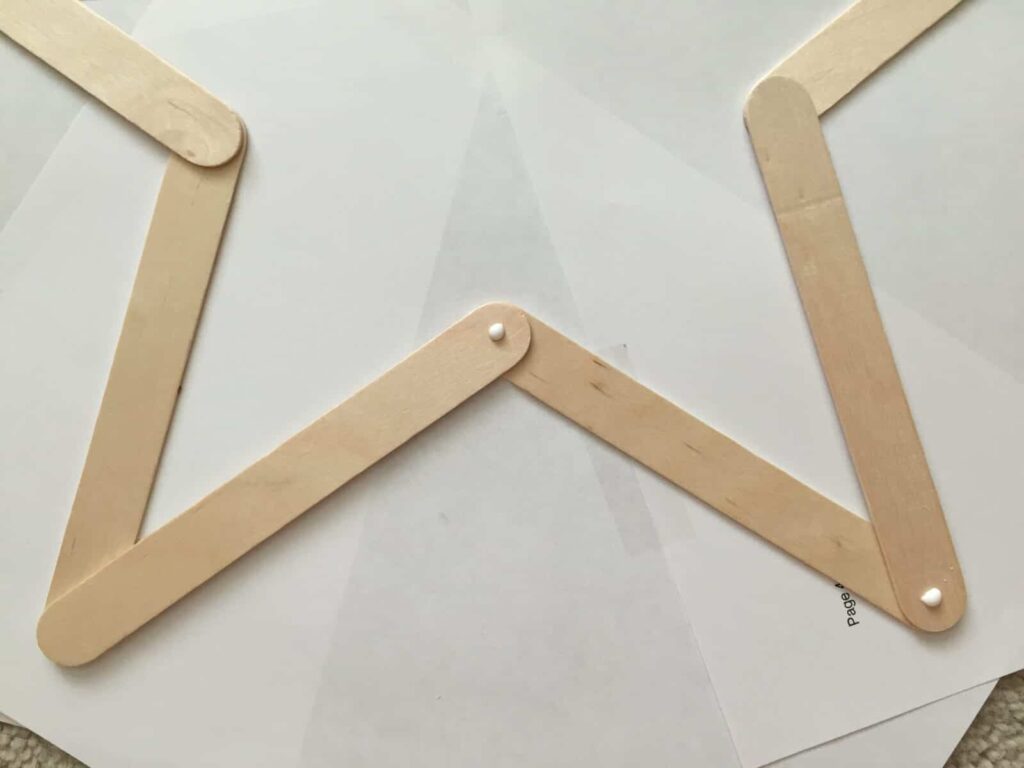
Take down your template and put it on whatever surface you’ll be working on. Start placing popsicle sticks on every other lines.
Dab a small dot of glue at the ends of 2 popsicle sticks and place a new popsicle stick over the glue connecting the sticks together.
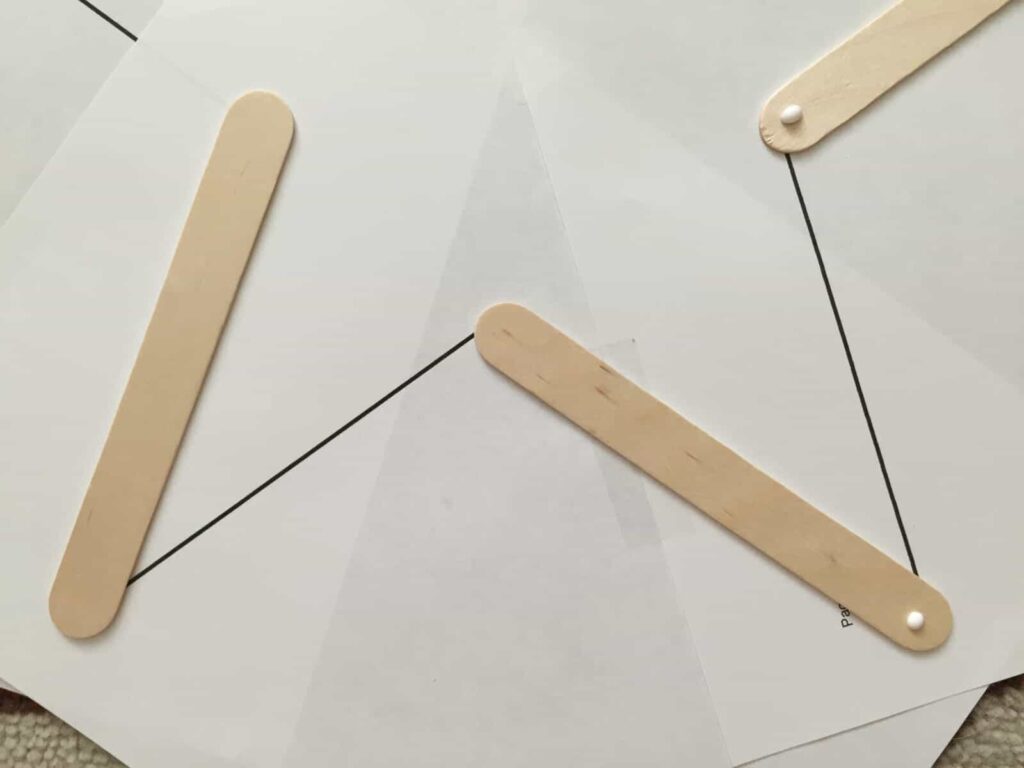
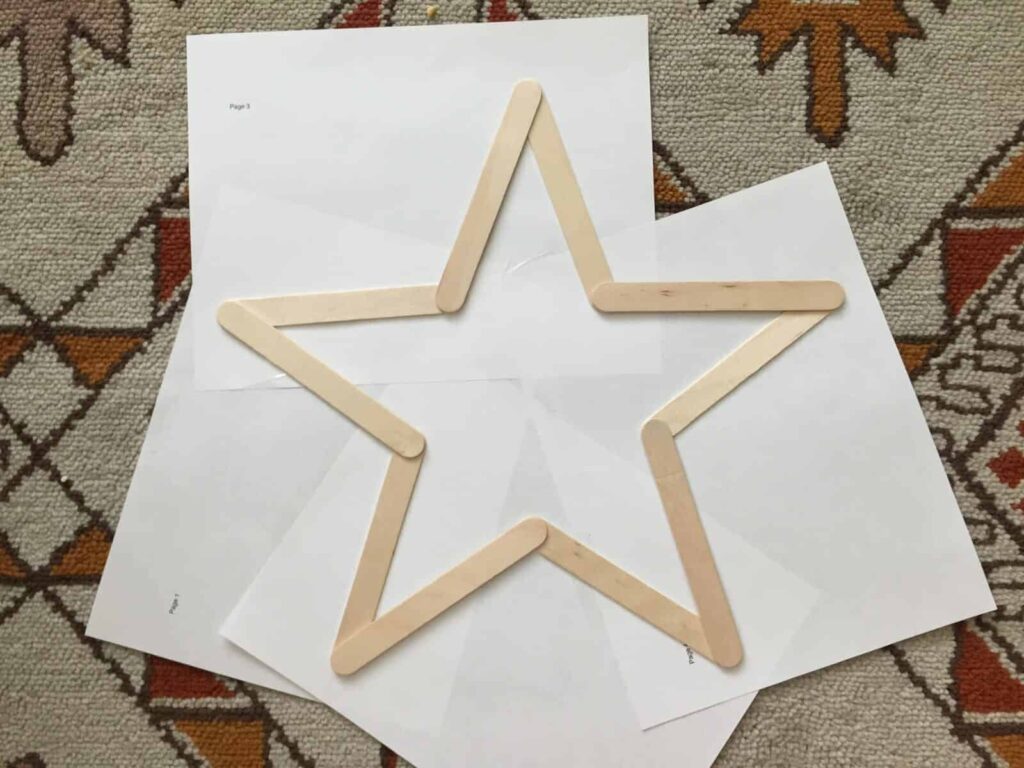
Do this all the way around until you make a complete star. You’ll notice that half the popsicle sticks are laying on top, and half are laying underneath the top ones.
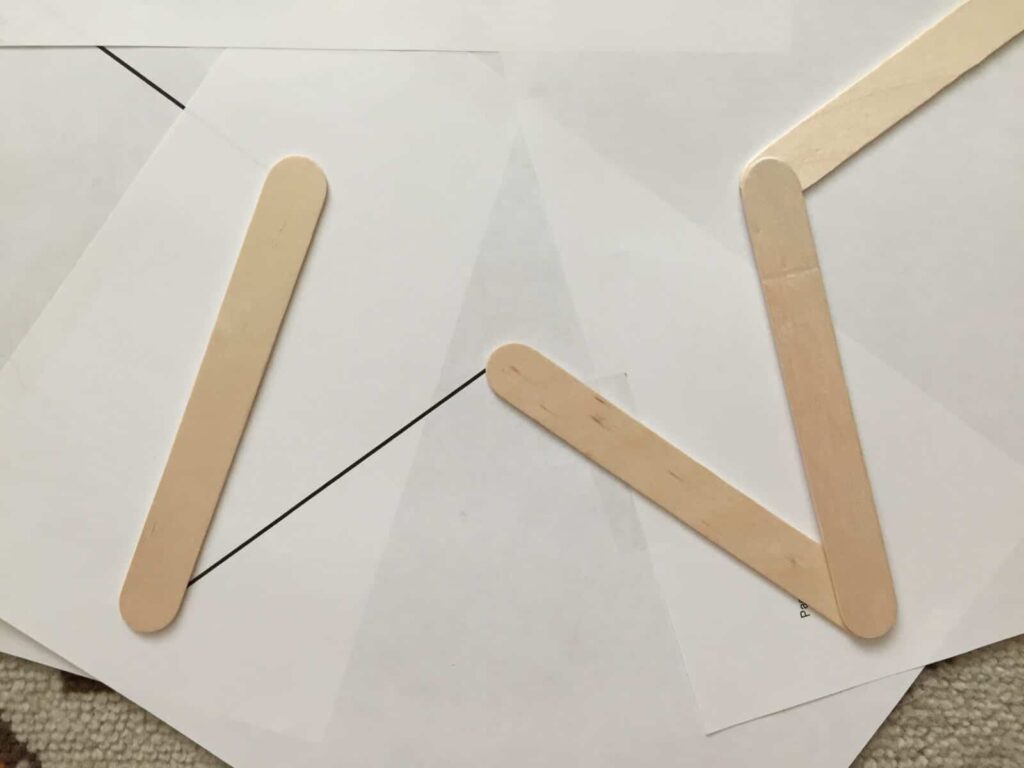
Now, dab some more glue on the ends of each popsicle stick that is laying on top of the other ones, and connect the glue with a new popsicle stick. Keep doing this all the way around the star. Here’s a picture of what my star looked like halfway through.
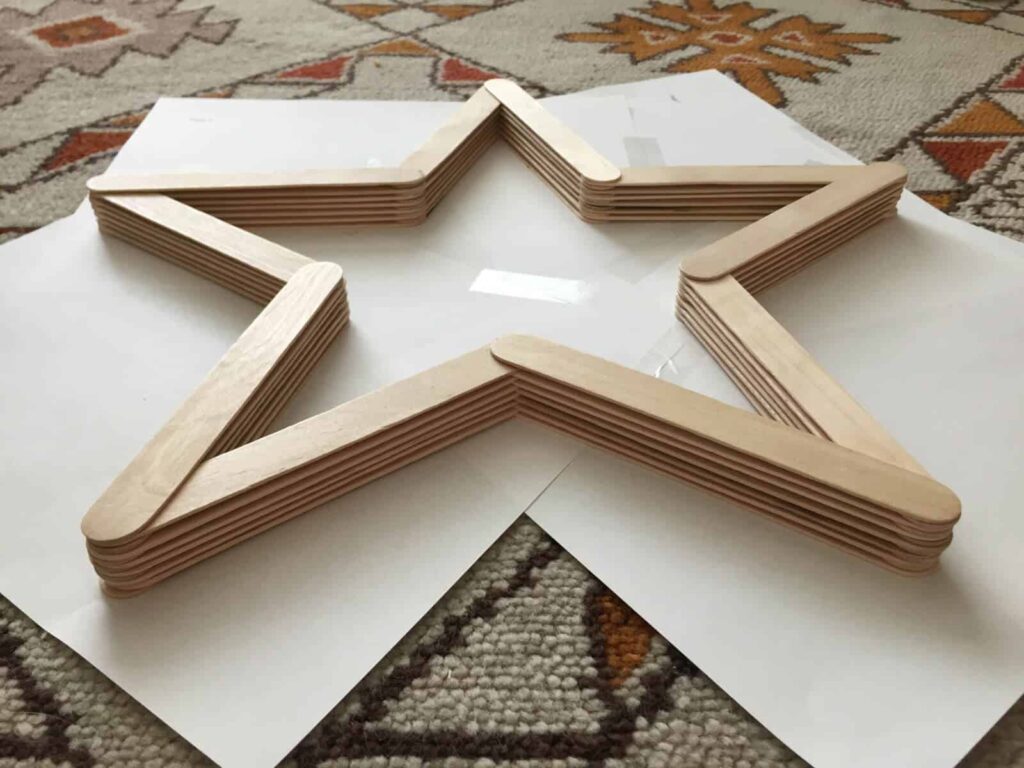
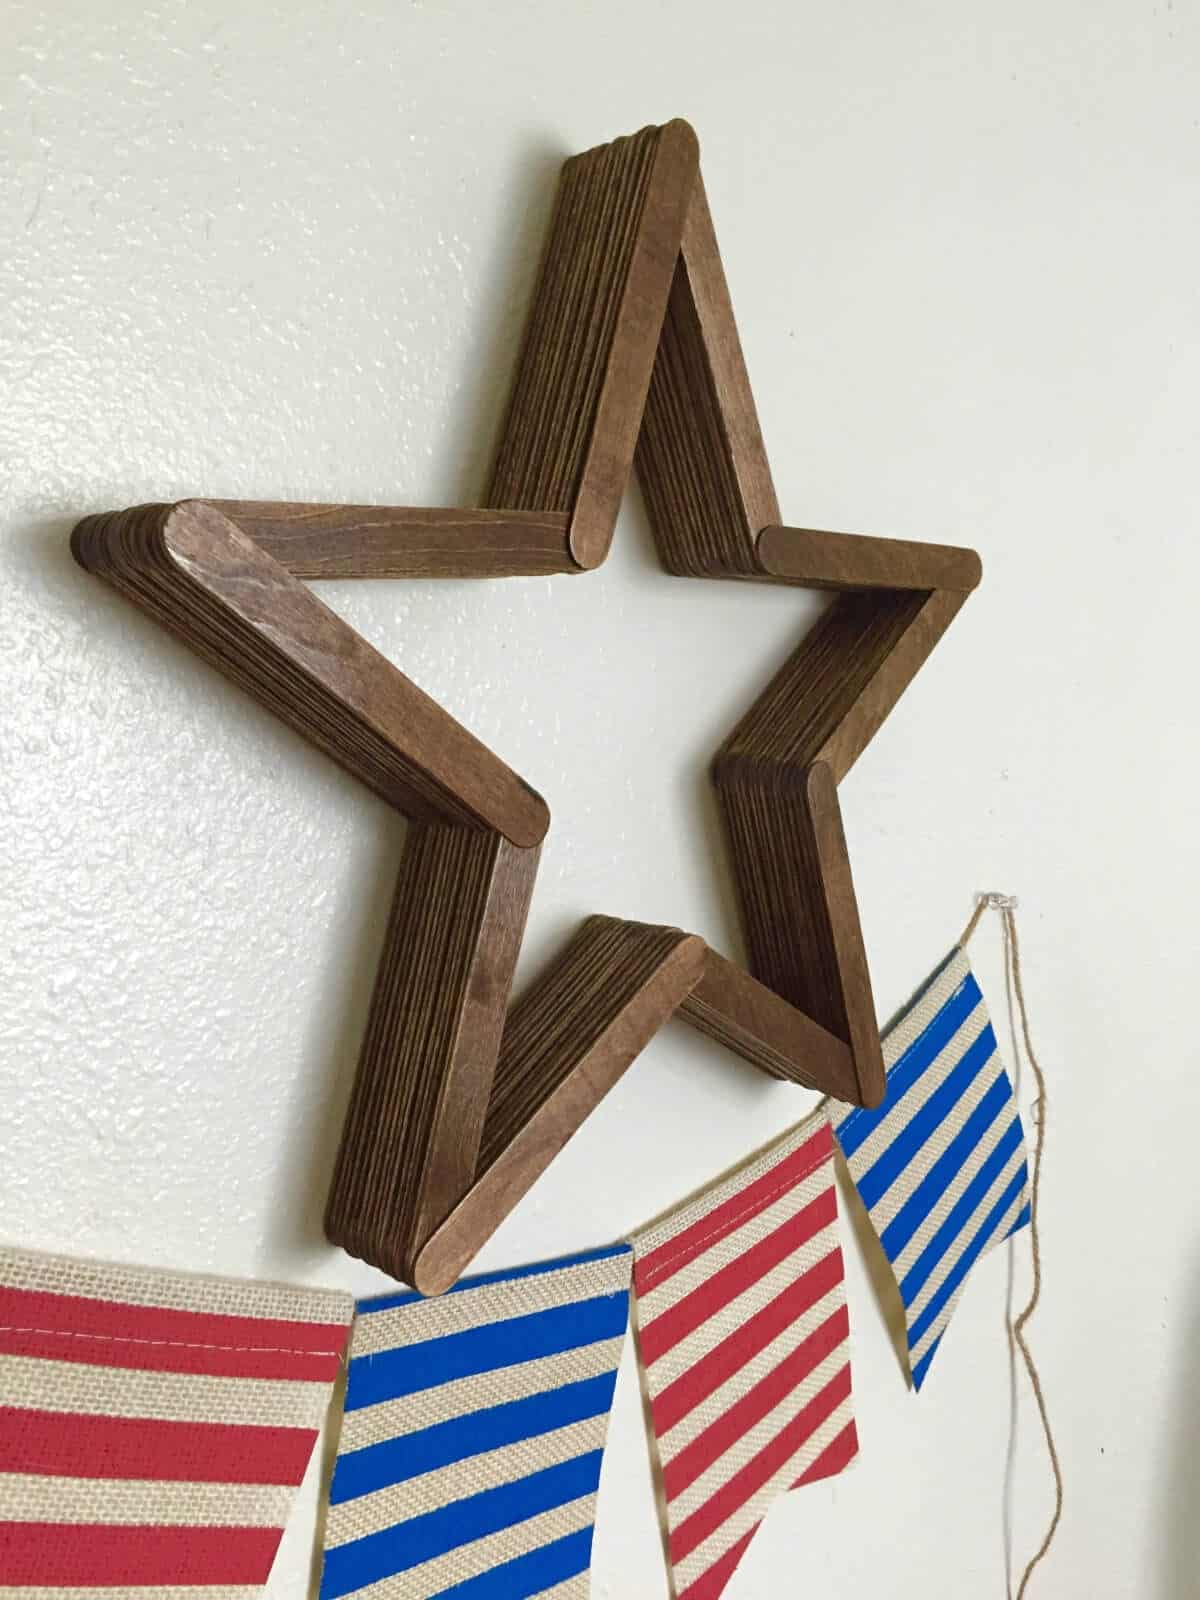
I ended up making my star 15 popsicle sticks high, so each edge on the star has 15 popsicle sticks. You can make yours shorter, or taller if you’d like. I just happened to like the look of 15 sticks.
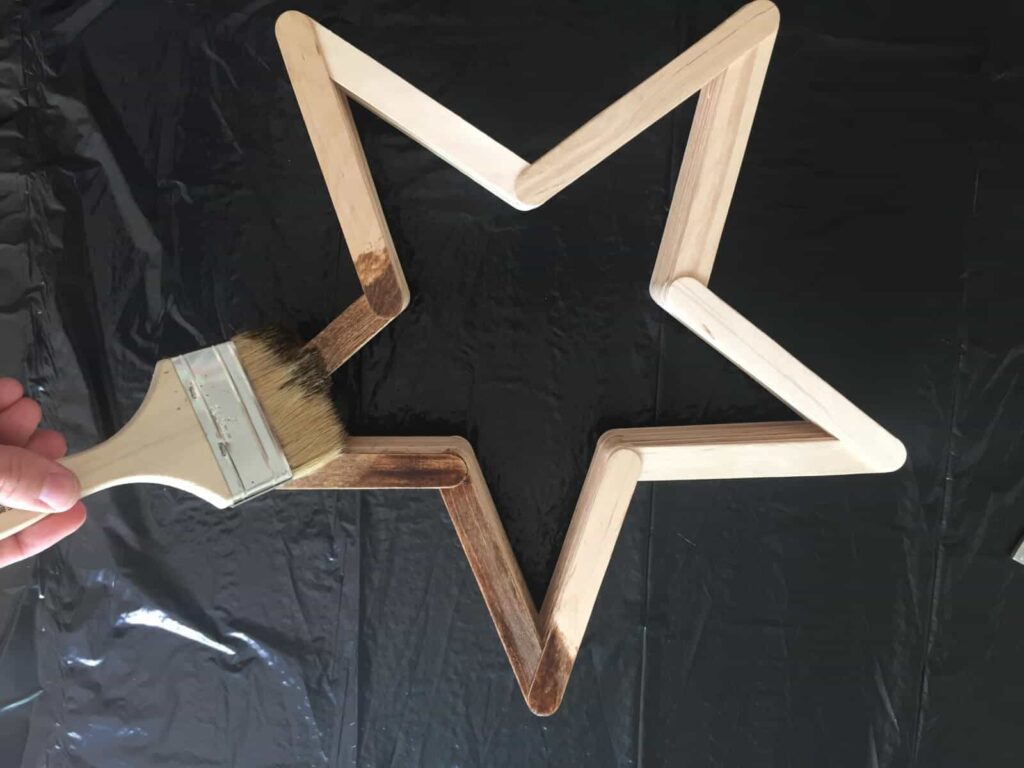
Once the glue has completely dried, you can now begin to stain the wood. Open your stain can, dip your paint brush in, then evenly coat all the sides, front, back, and inside of the star. Be sure to get the stain in between the popsicle sticks, too. I only did one coat of stiain, but if you want your stain to be darker, apply more coats as desired. Let the stain dry for a few hours before handling.

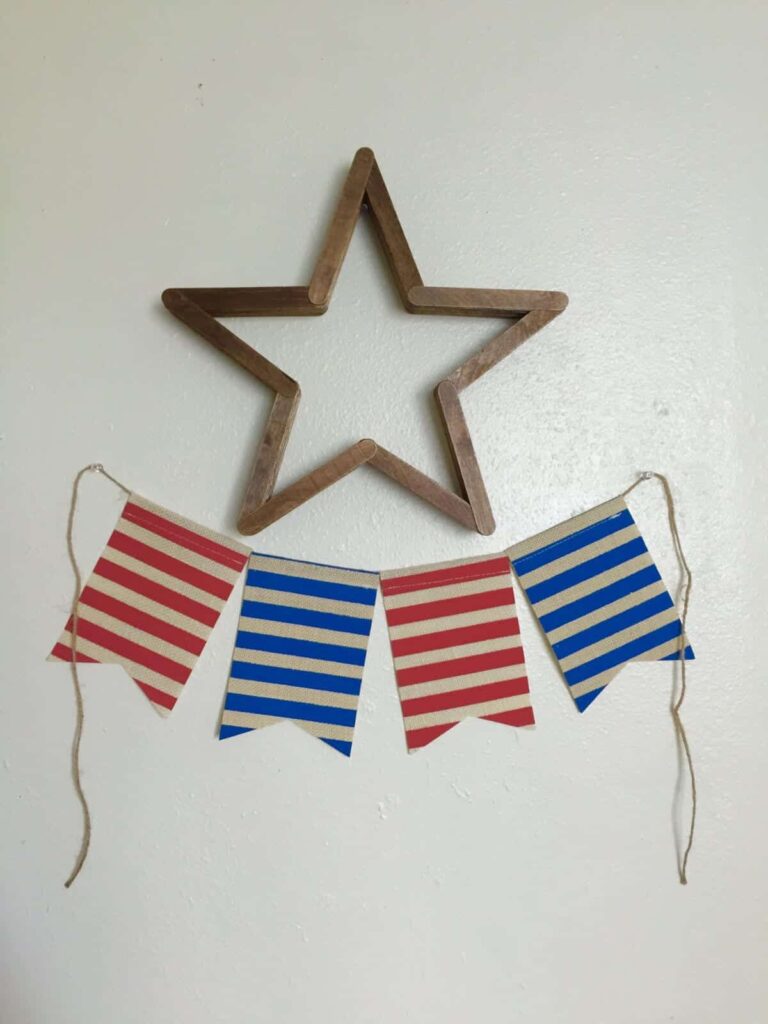
Once everything is dried, you can now set out your cute new wooden star to decorate your house with. I love that you can put it on tables, mantles, or even hang it on the wall. It’s so versatile and looks great no matter where you put it.


Mary Mulroney
Latest posts by Mary Mulroney (see all)
- 5 Easy Changes To A Healthier You - October 12, 2020
- 7 Great Resources For Affordable And Beautiful Rugs - October 12, 2020
- Tips For Switching To A Dairy-Free Diet - September 29, 2020
Related Images:
Mary Mulroney
Latest posts by Mary Mulroney (see all)
- 5 Easy Changes To A Healthier You - October 12, 2020
- 7 Great Resources For Affordable And Beautiful Rugs - October 12, 2020
- Tips For Switching To A Dairy-Free Diet - September 29, 2020