Like most moms trying to unwind from the day, the other evening I found myself browsing Pinterest for some holiday decor ideas. I live in Southern California where most home builders decided long ago that we don’t need a proper fireplace and mantle (since it’s so warm here) and thus, I needed a special kind of garland to hang from my non-existent mantle. I wanted something simple, inexpensive and something I could make myself quite easily. That’s where glitter garland comes in! You can make glitter garland for a variety of occasions: party decor, a great background for photos at a special event and as a great way to adorn your mantle for the holidays. Check out this simple tutorial that you can easily make in 20 minutes.
Here’s What You’ll Need
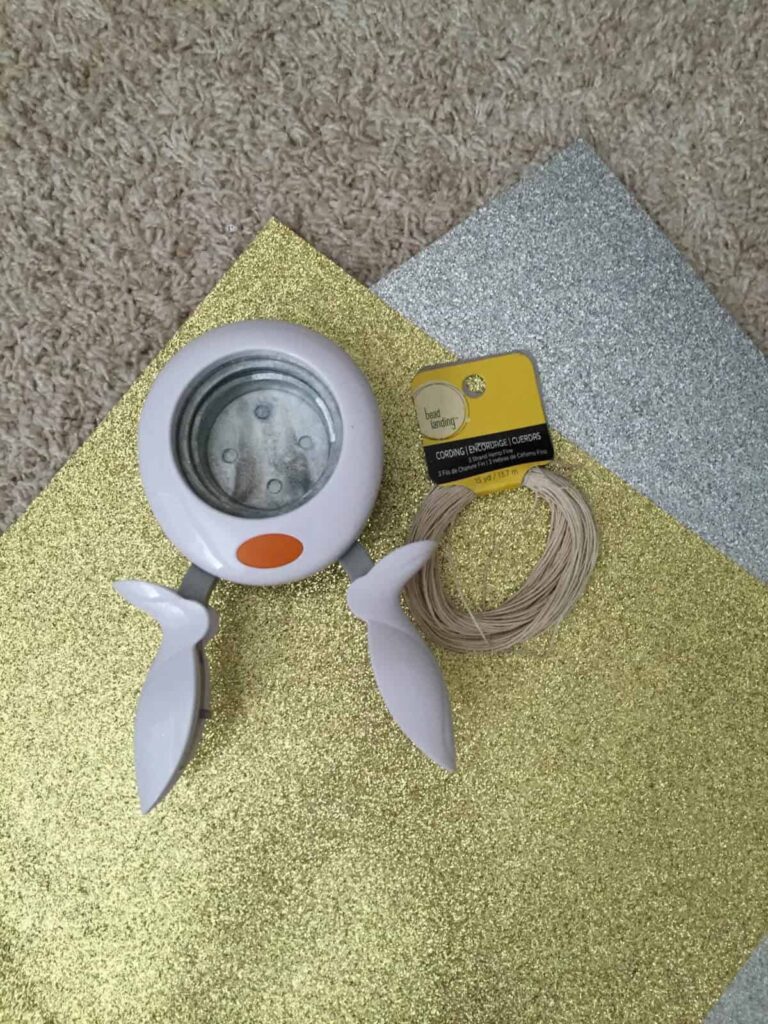
* Glitter Paper (Can be purchased in the open stock paper section of a craft store. I picked two colors to alternate and match my silver and gold Christmas decor)
* Twine or Thread (the thinner the better)
* Hole Punch or Scissors and Stencil
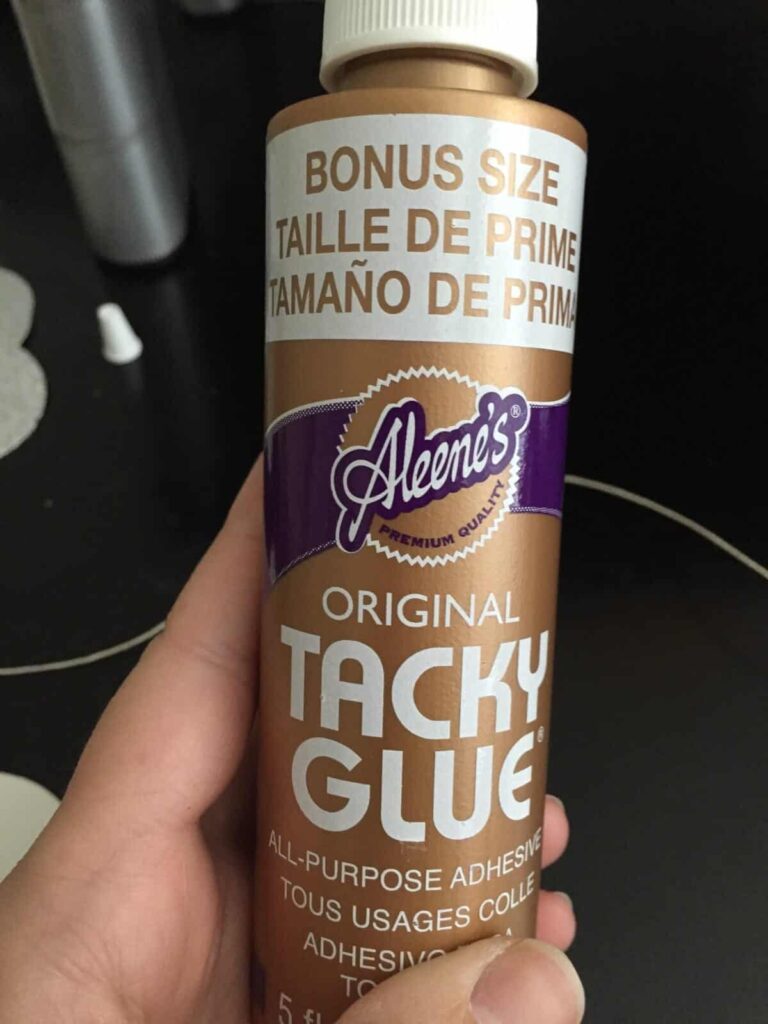
* Glue (I used Tacky Glue, but you can also use other craft glue or hot glue)
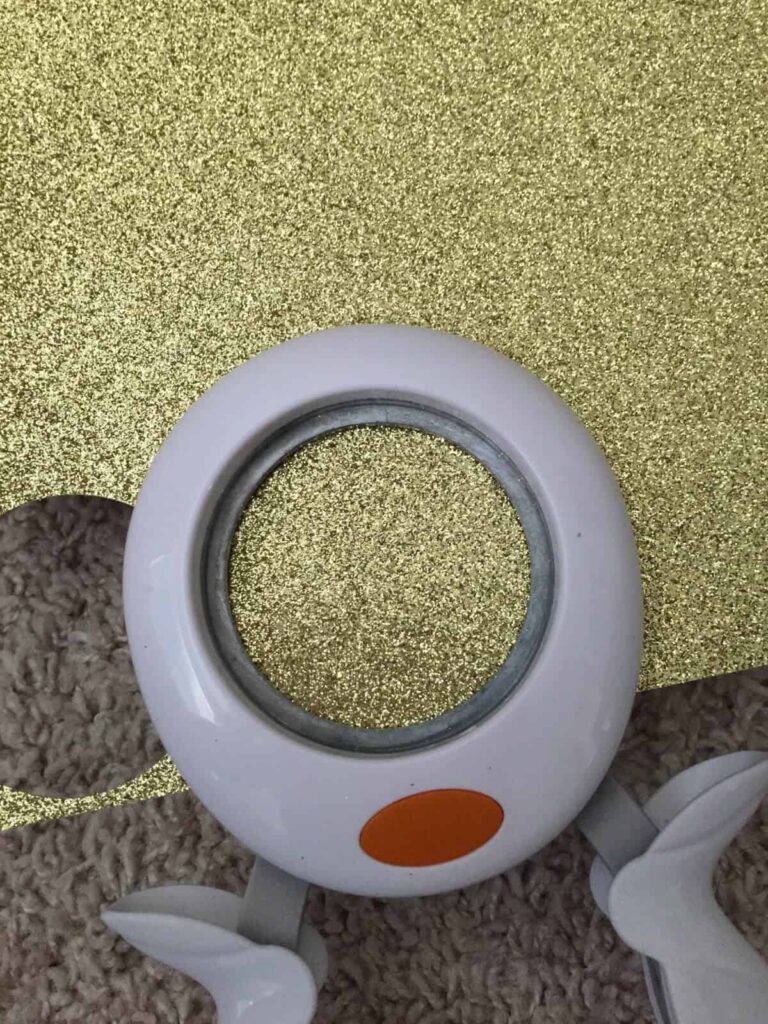
 Begin punching or cutting out your glitter circles. You will need two circles for every added piece, one for the front and one for the back. I just want to go on record and say a circle punch should be a required piece of your crafting supplies! It so useful and worth the money. I got this Fiskers punch at a craft store for less than $10 with a coupon. It works best with cardstock (regular paper sometimes tears) and gives you consistent shapes!
Once you have all your circles punched, lay out your twine or thread and determine how long your garland will be and how far about you’d like each piece to be spaced. You can have them close together or more spread out. I find that the mantle garlands look better with some room between. However if you are going to use this decoration to hang from the ceiling straight down, putting them close together looks awesome.
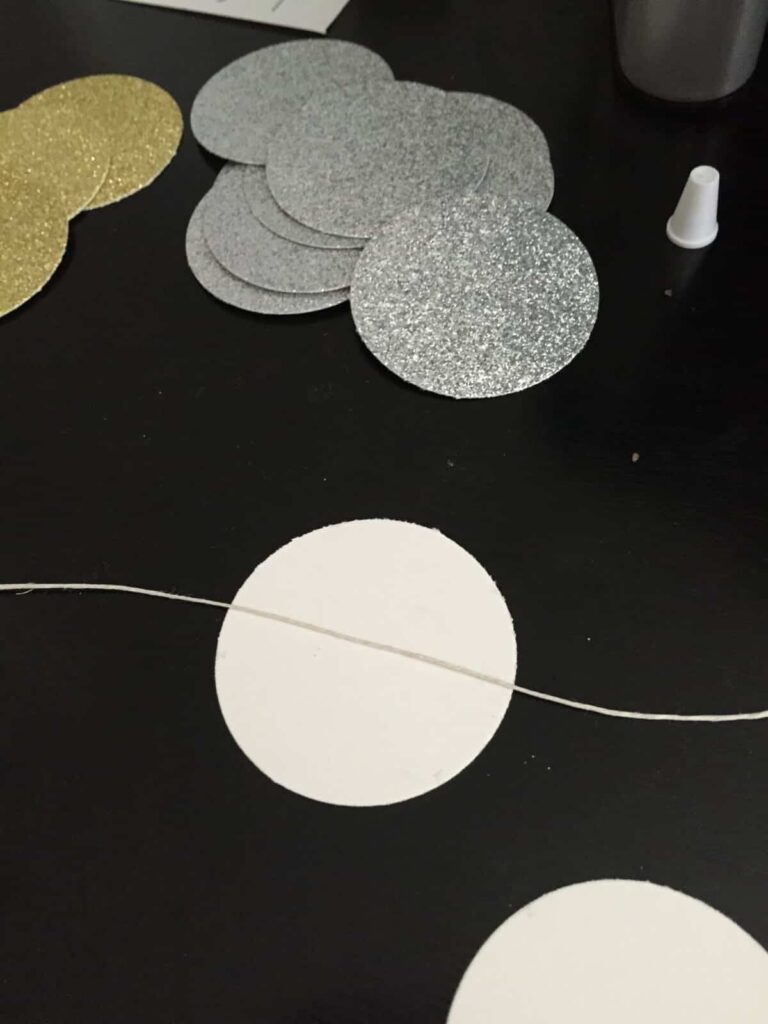
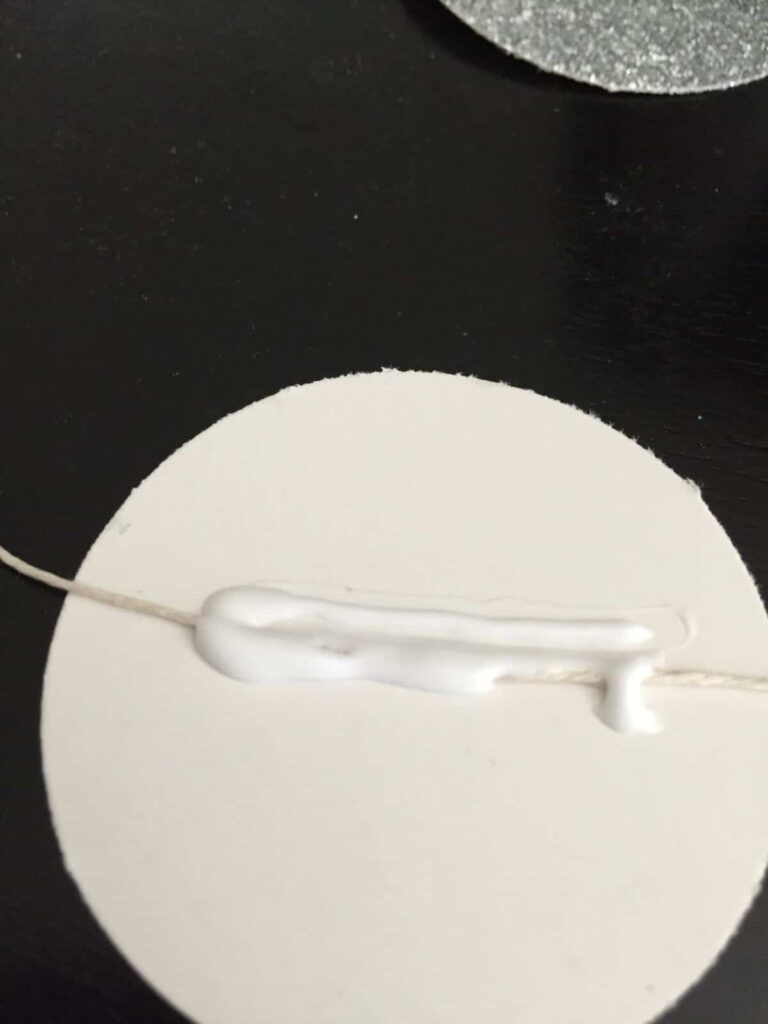
Lay your circle with glitter side down and place twine down the center of the circle. Add glue on circle, focusing on the string. Then lay your second circle on top, sandwiching the string in between. I liked to add a little more glue to ensure all the sides of the circle laid flat (the string will make them come apart if not glued properly.
Then measure how far apart you’d like your circle. I used a ruler because I didn’t want a lopsided garland!
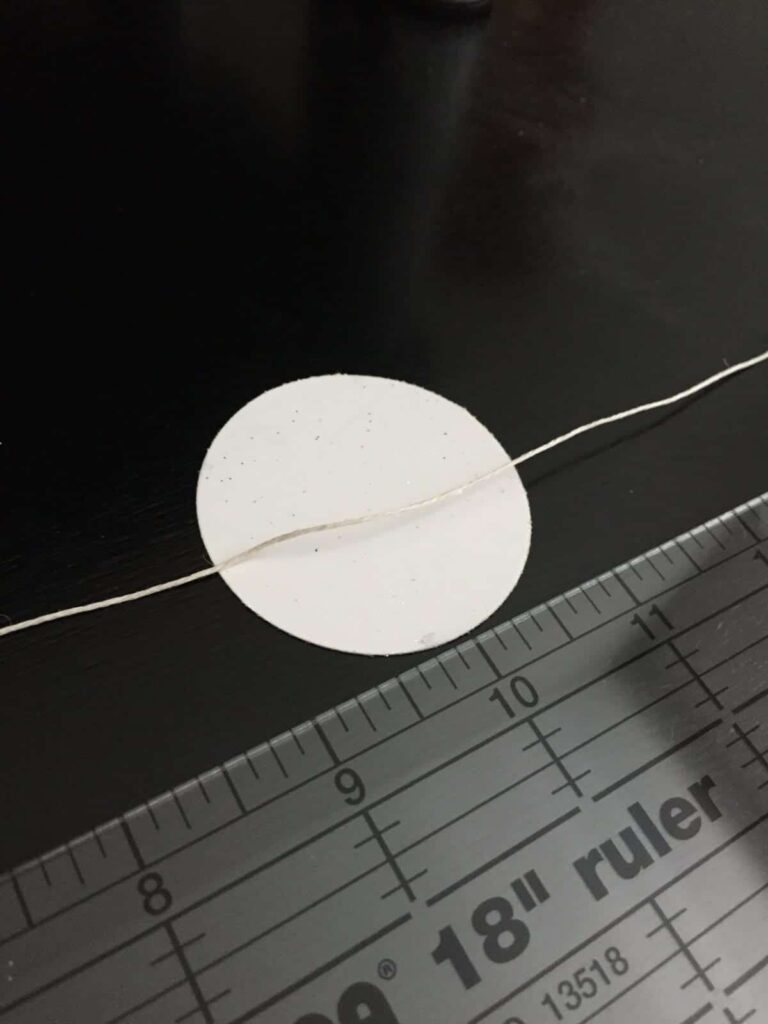
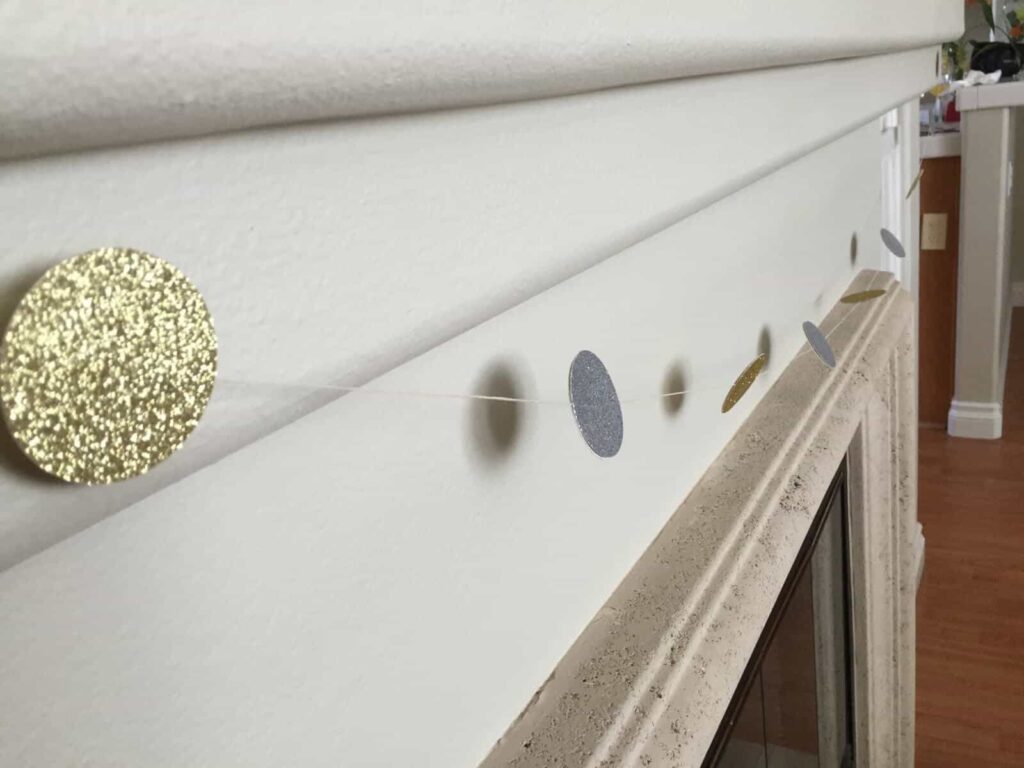
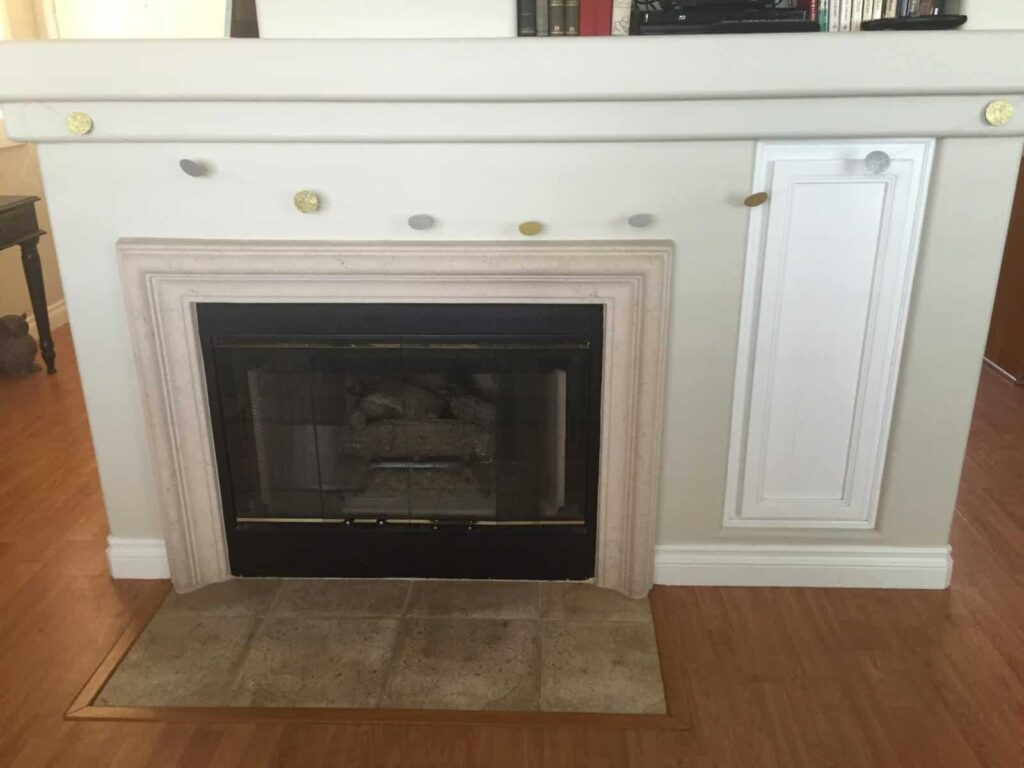
I spaced mine about 10 inches apart, measuring from the center of the starting circle til the center of the next. The rest is simply glueing all your circles until you have the desired length! Seriously, a garland couldn’t be easier and cheaper. All my supplies cost me $5.50, since I already had glue and the hole punch. And if you don’t believe me about having NO mantle, check out this picture below!
Happy Holidays!

Karly Wood
Latest posts by Karly Wood (see all)
- 15 Wonderful White Kitchens - January 14, 2019
- We Want All These Spring Manis And We Want Them Now - January 8, 2019
- DIY Heart-Shaped Valentine’s Day Wreath - January 4, 2019
Related Images:
Karly Wood
Latest posts by Karly Wood (see all)
- 15 Wonderful White Kitchens - January 14, 2019
- We Want All These Spring Manis And We Want Them Now - January 8, 2019
- DIY Heart-Shaped Valentine’s Day Wreath - January 4, 2019