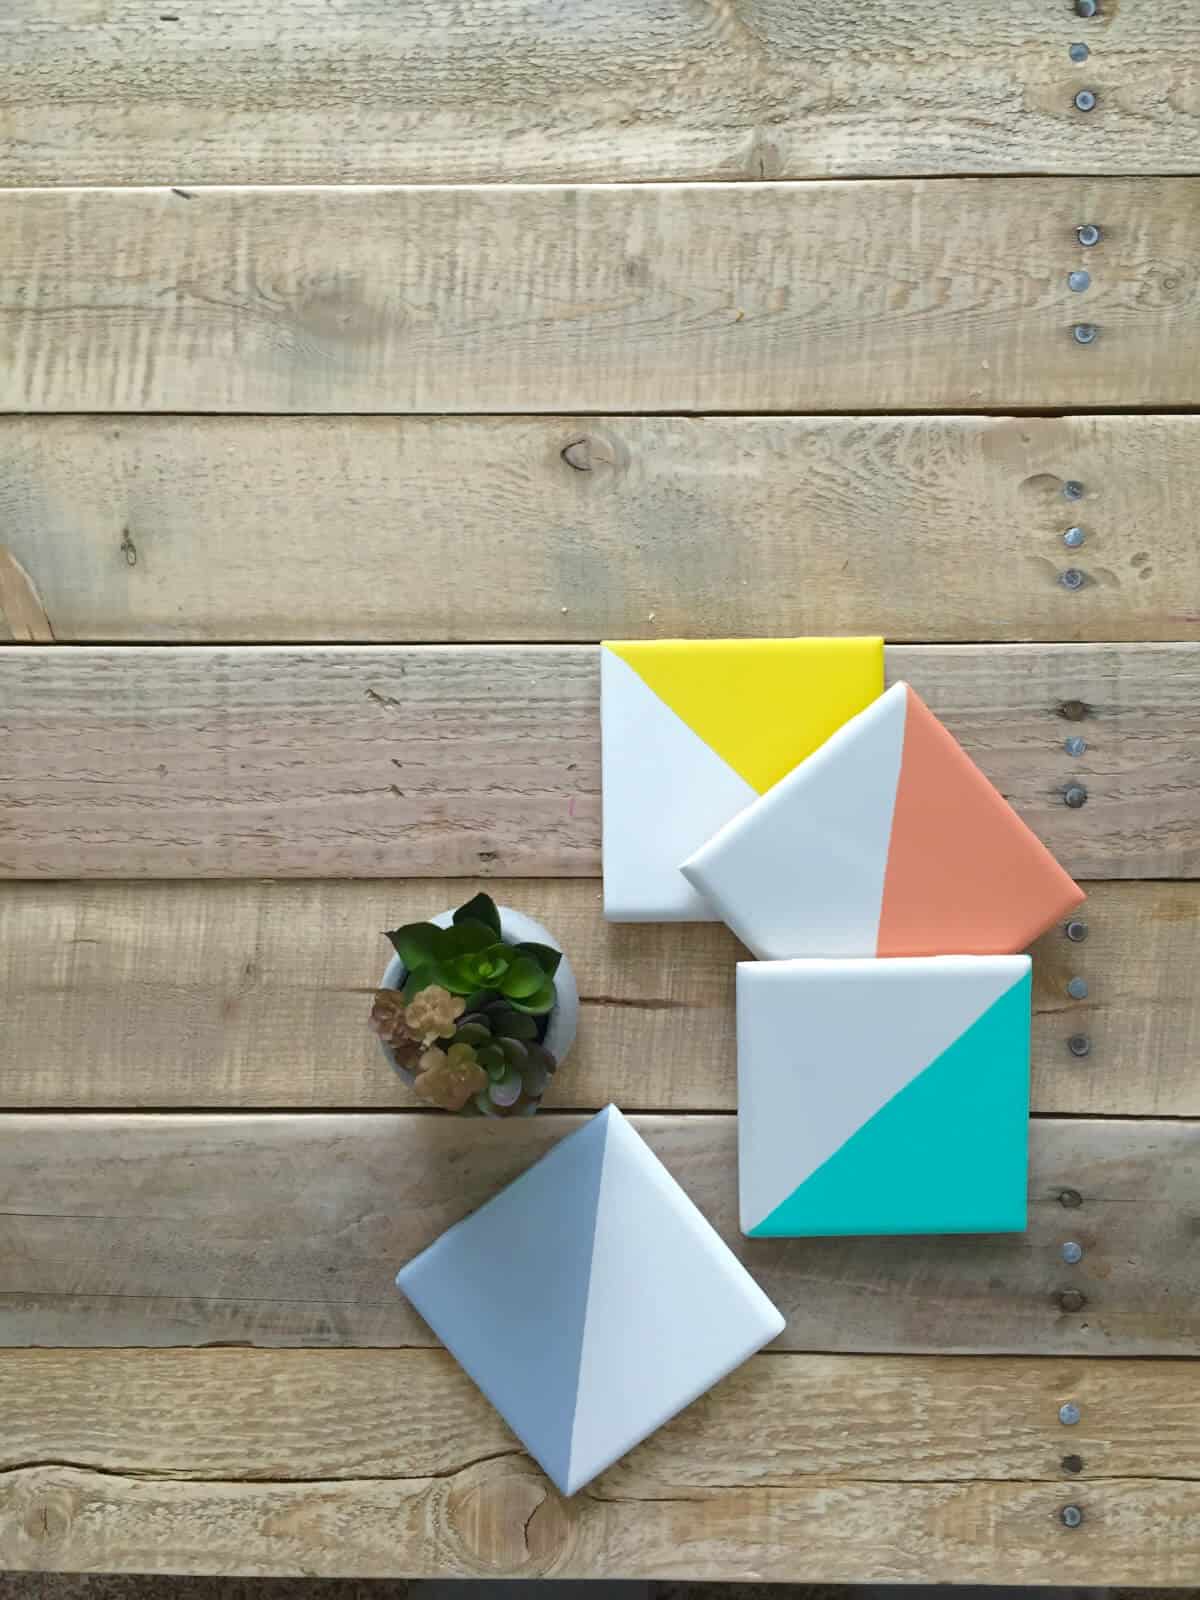
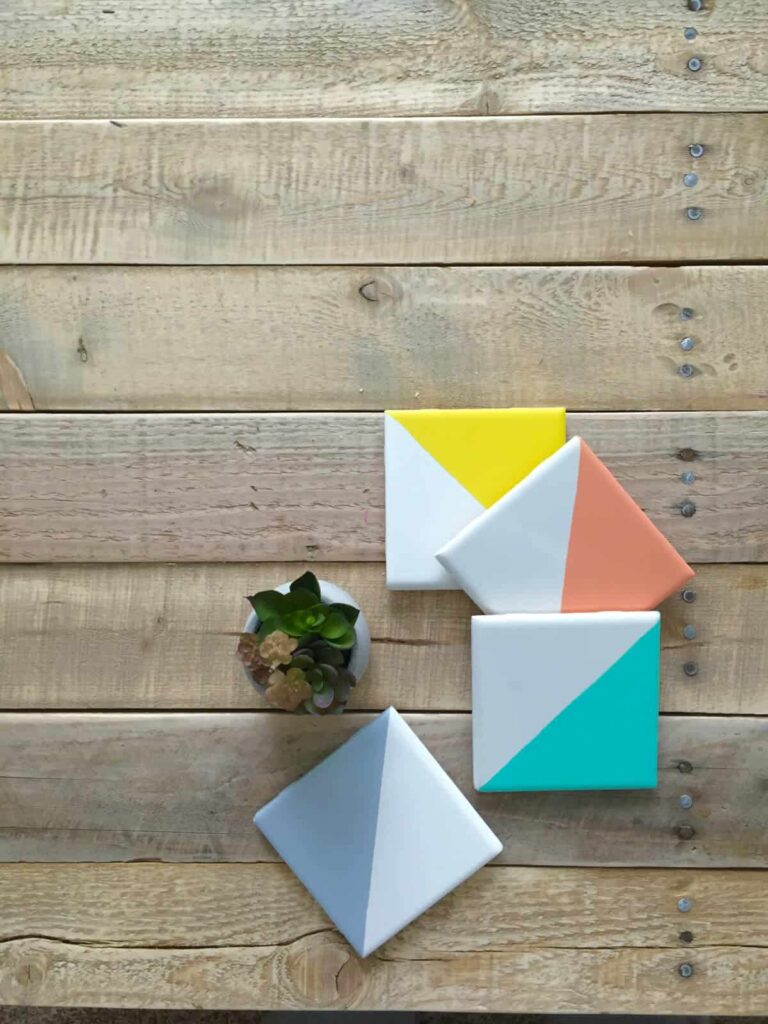
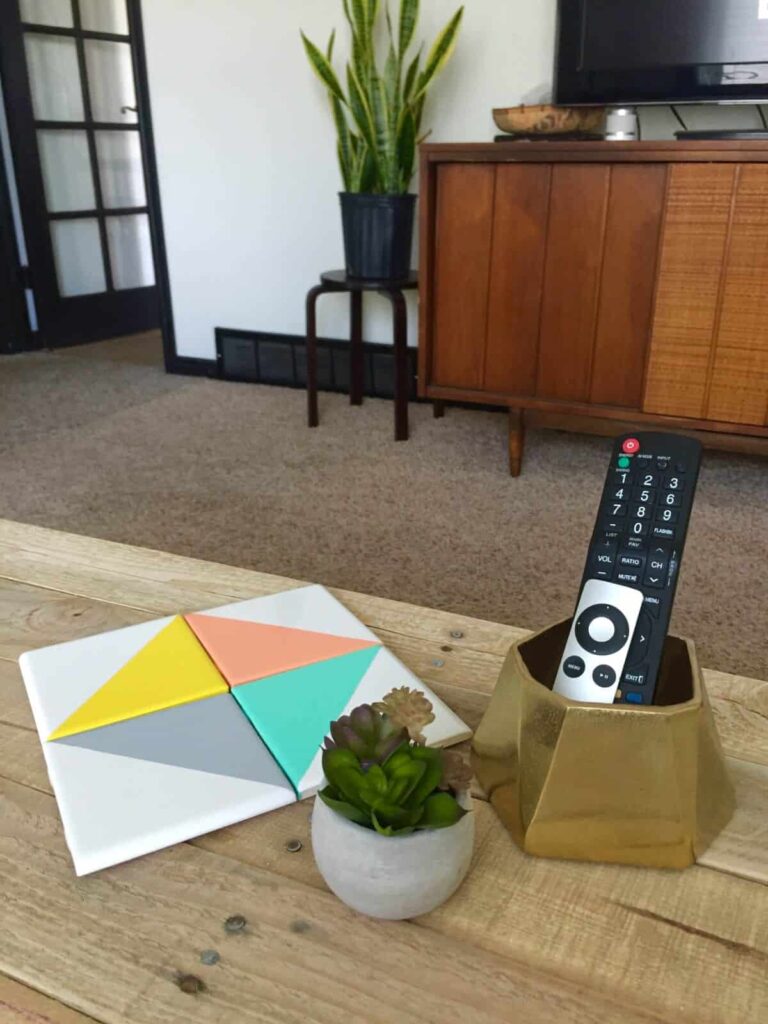
My husband and I just recently finished building a wood coffee table that I absolutely love. I am thrilled with the final result, but since it’s wood we need to be extra careful when we put drinks on the table. That means I needed to find some coasters to put our drinks on. After searching the internet, the only ones I found that I actually liked cost around $30. I didn’t really want to pay that much, so I started thinking about ones that I could make myself. I really liked the idea of using single tiles and paint to create a fun design. Here’s what I came up with:
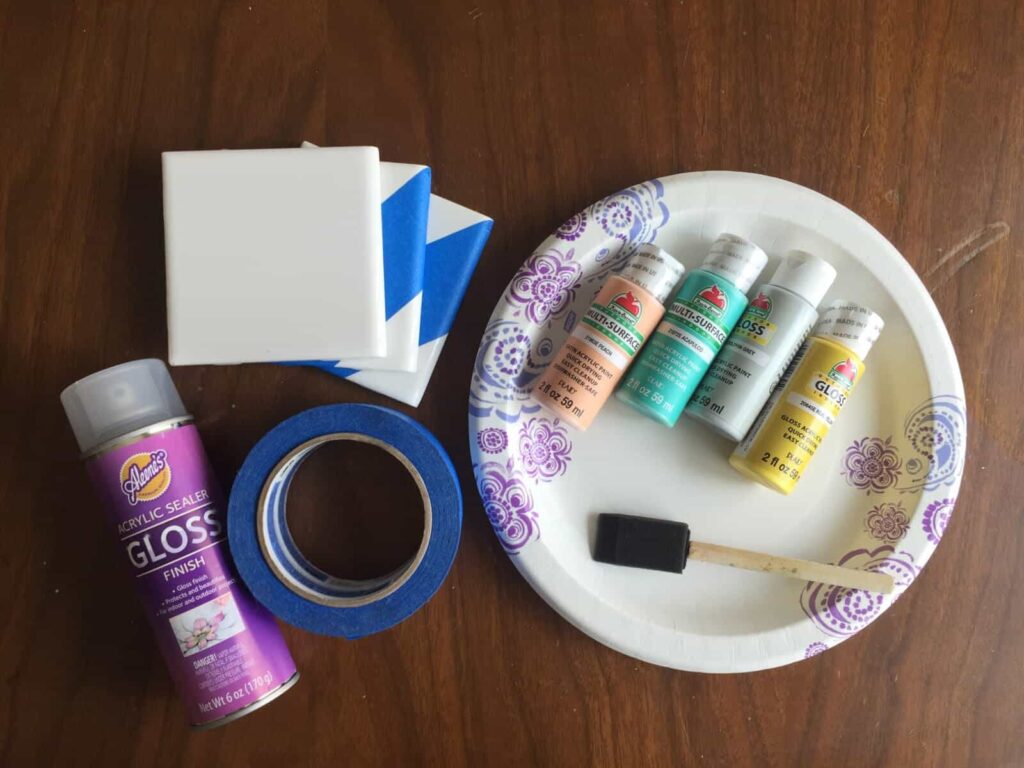
Here are the supplies you’ll need to make your own tile coasters:
-Single tiles (I bought mine from Home Depot for $0.82 each)
-Acrylic paint (Make sure it’s gloss finish. Two of the colors I originally used were satin finish and every time I tried to do a second coat, the first coat would come off)
-Sponge paint brushes
-Paper plates, or some other base to paint on and put your paint on
-Painters tape
-Acrylic Sealer in gloss finish
-Plain cork coasters (not pictured)
-Super glue (also not pictured)
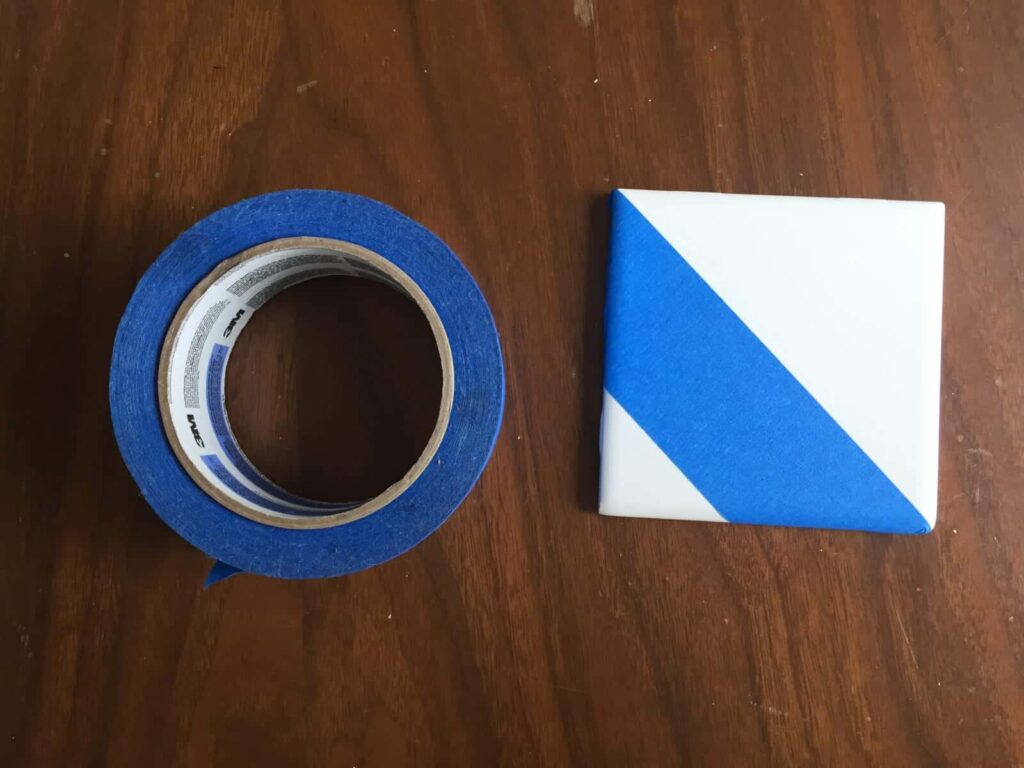
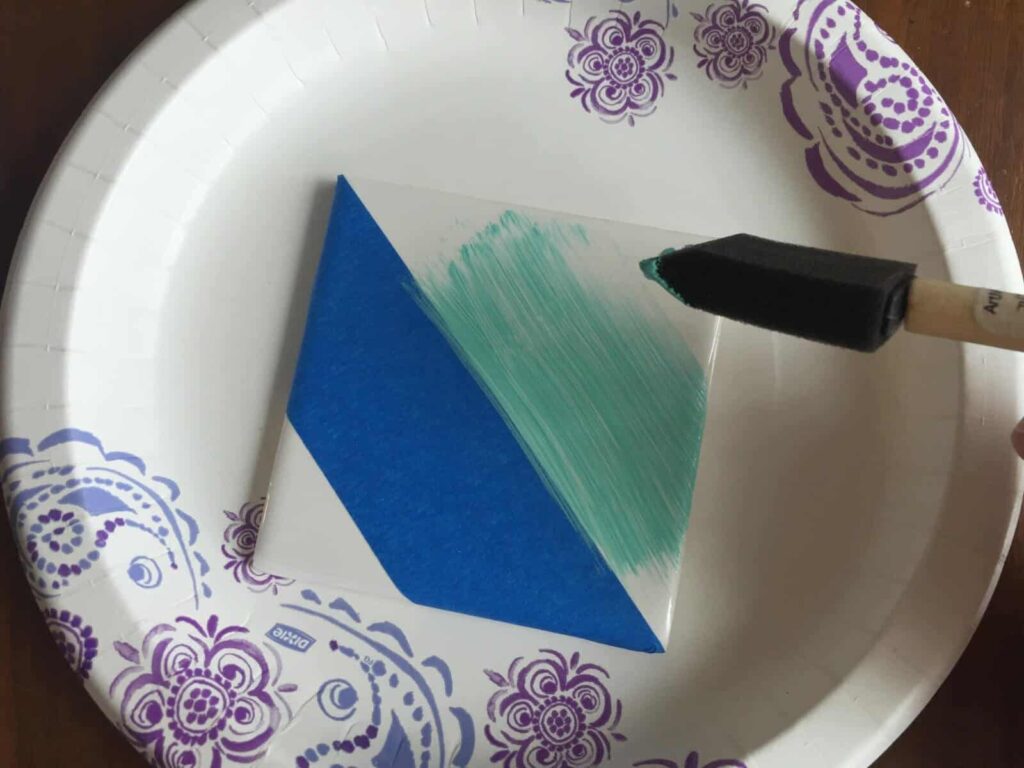
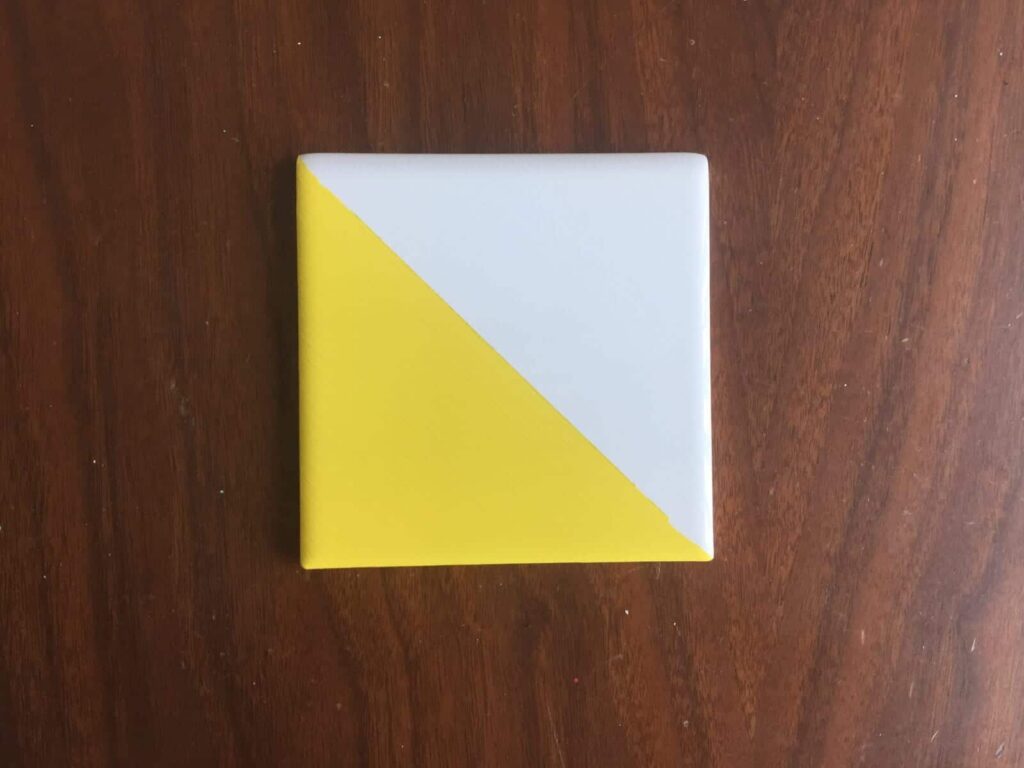
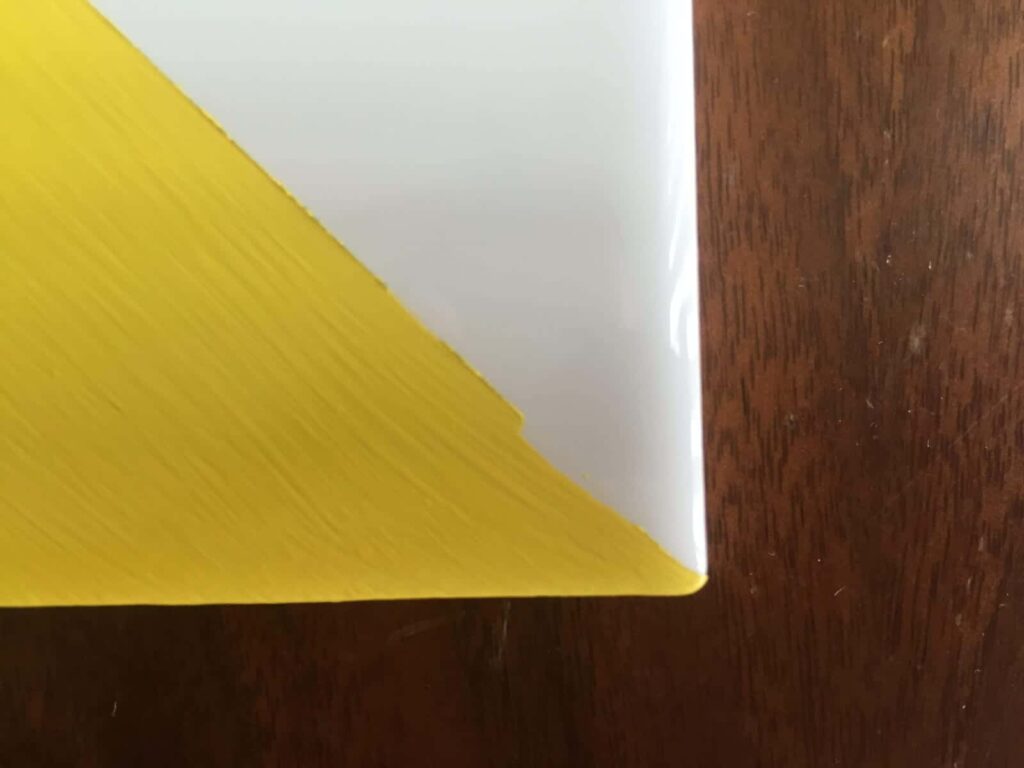
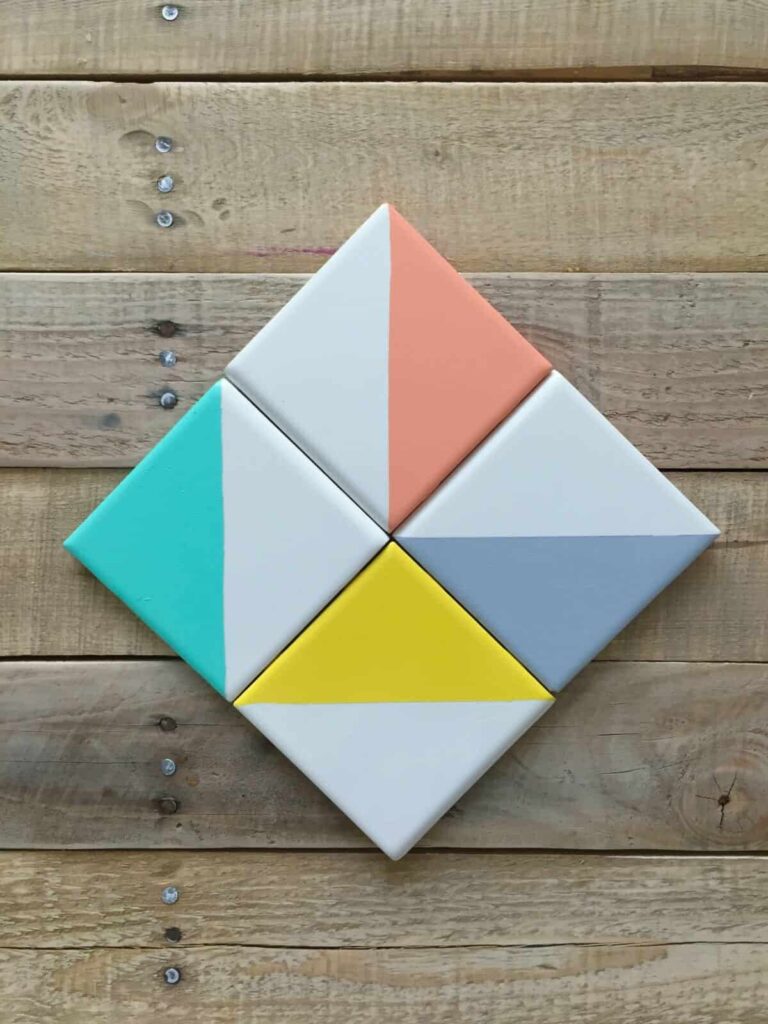
The first thing you’ll want to do is tape off your tiles in the design that you want. You can create endless amounts of designs like stripes, chevrons, waves, etc., but I just wanted mine to be simply split in half diagonally. Be sure to press down as hard as you can on the tape near the edge where you’ll be painting. You don’t want any paint to seep through under the tape.
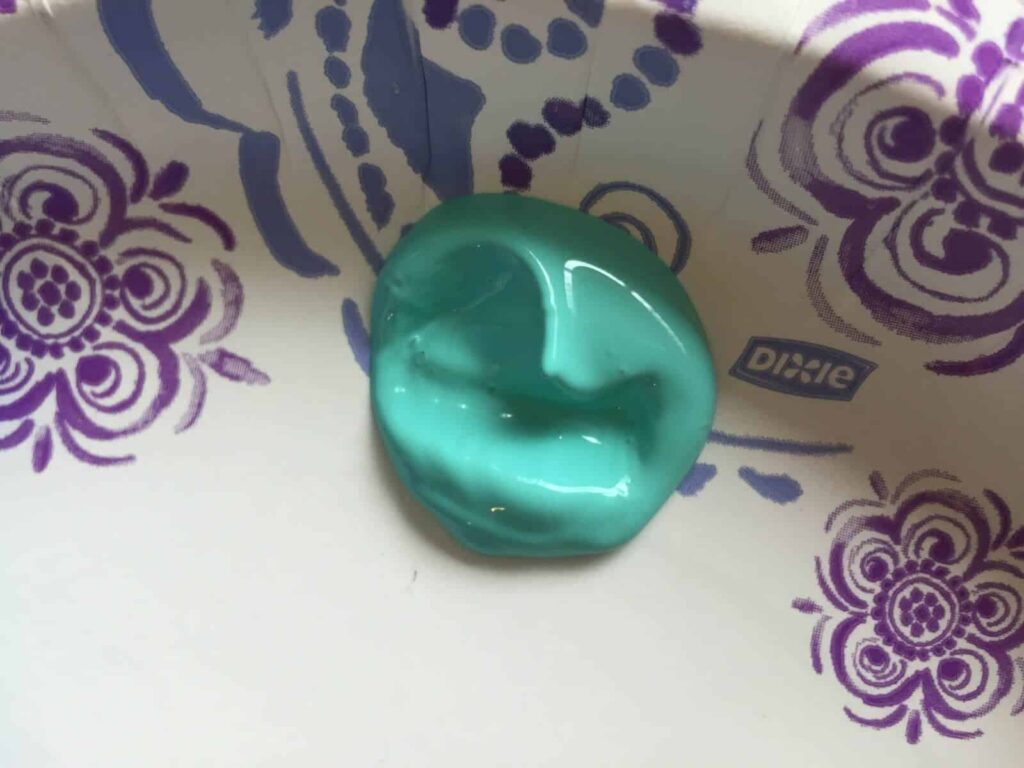
Now, you can start the fun part – painting! Just squeeze some paint out of the bottle onto your paper plate.
Dip the brush in the paint, then begin painting the tile. Be sure to stroke your paint brush in the direction that your design is going. Since mine is diagonal, I made sure to paint it diagonally so it would all look uniform.
Paint each tile with a light coat, then wait an hour in between coats. Be sure to wait the full hour, because if you try to paint it too soon, the bottom coat won’t be completely dry enough and will get messed up when you paint the new coat. I did a total of three coats on each tile.
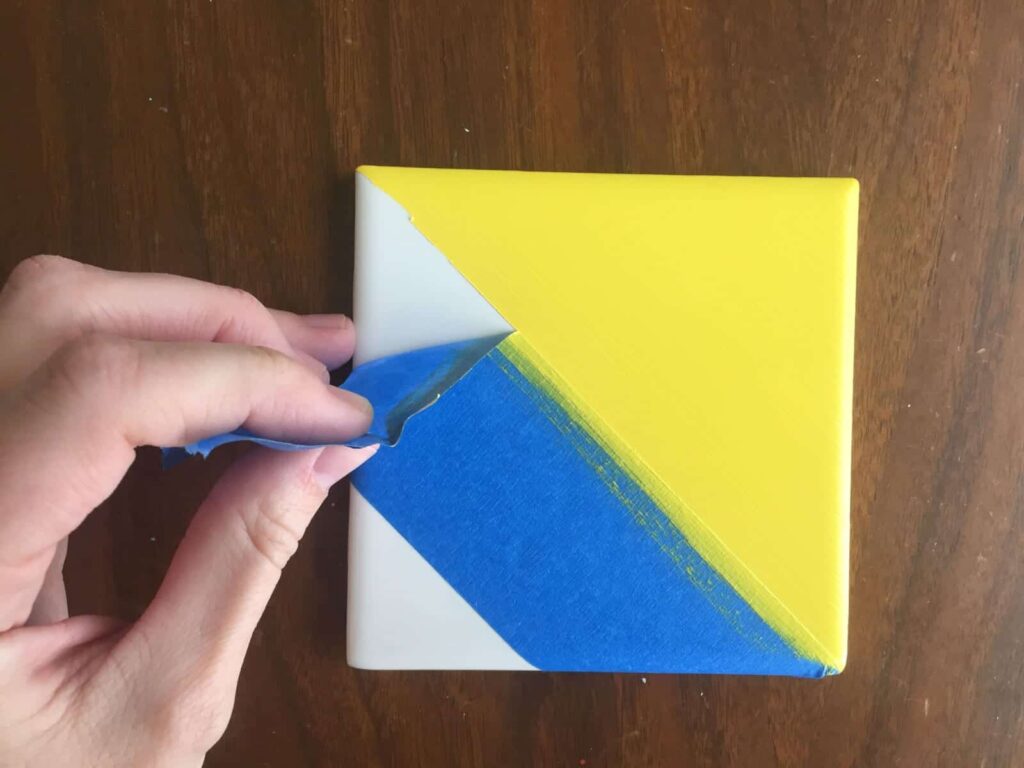
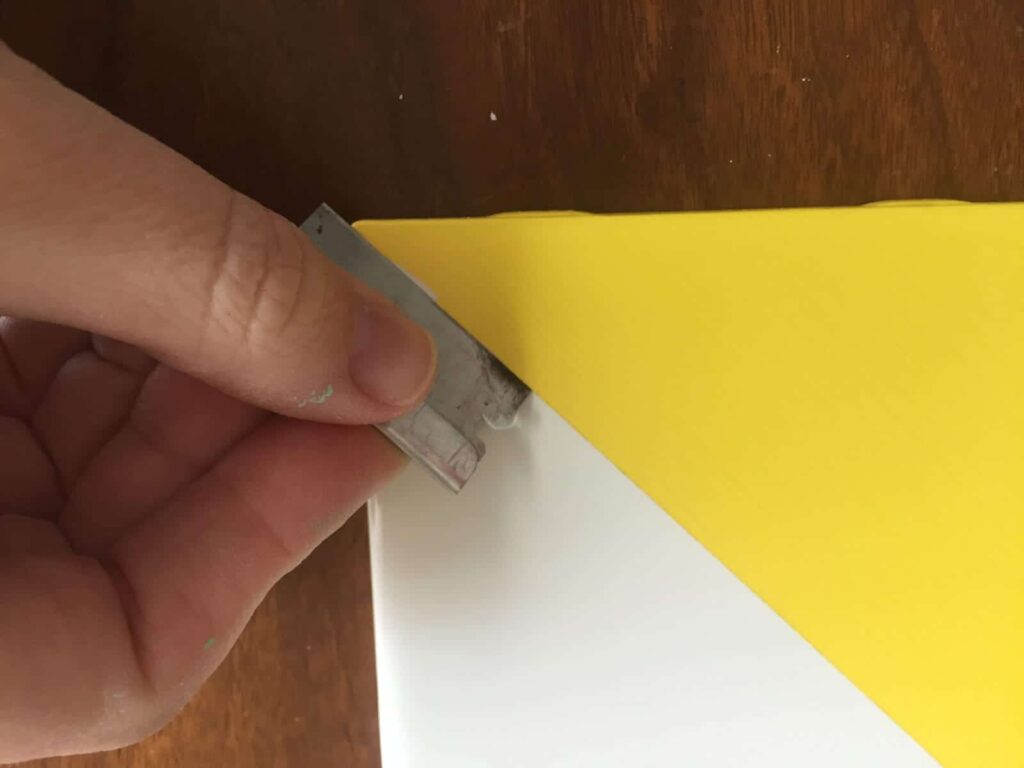
After the final coat, once again, wait at least an hour before taking off the painter’s tape. Once you do remove it, if there are any parts where paint seeped through under the paint, you can take a razor blade and trim it off.
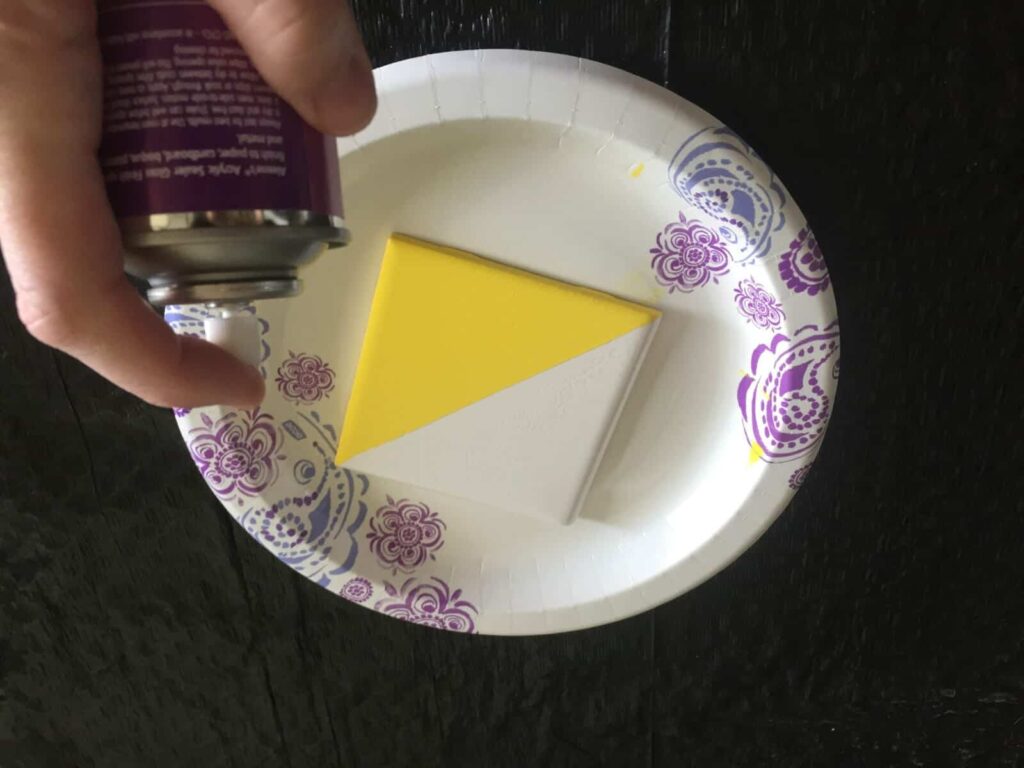
Now that they’re all painted, you’ll want to seal them with the acrylic gloss sealer so that the paint won’t get ruined when wet drinks are sitting on them. I bought one in a spray can because I wanted it to look more uniform, but you can also buy the kind that you paint on. For the spray can, just spray the sealer in a uniform layer over each tile and let dry. I did three coats of this, as well. The thinner the coats, the better. You don’t want it to get too goopy and drip.
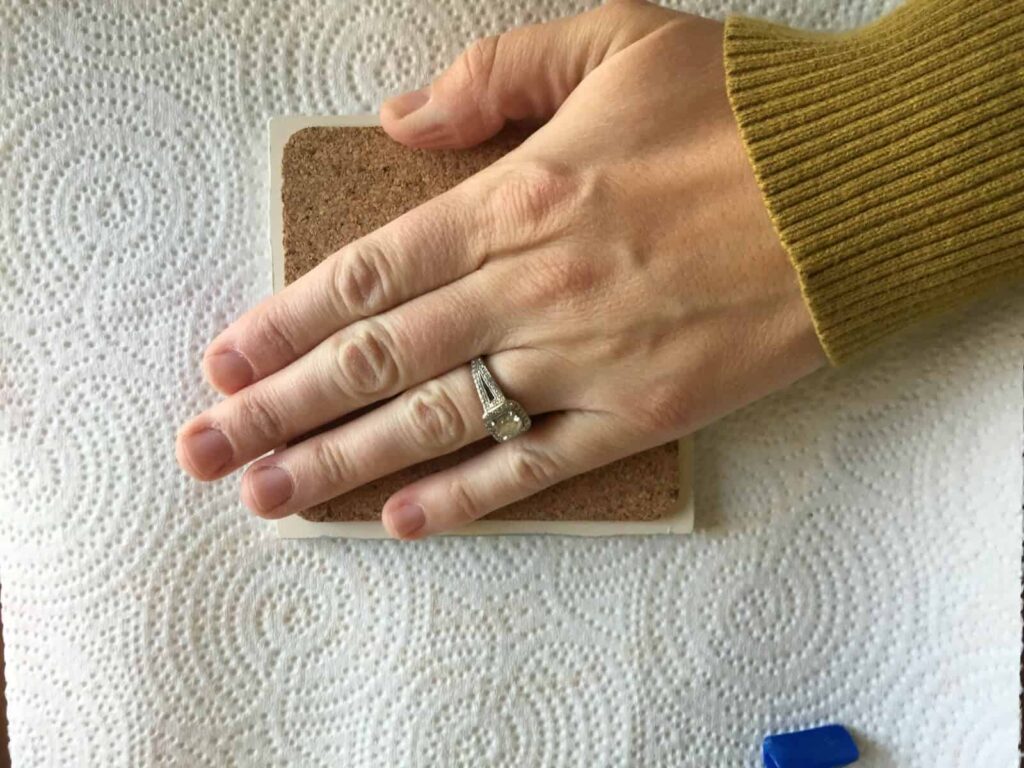
Once the sealer is dry, you now need to adhere the cork coasters to the bottom of the tiles. Turn your tiles upside down, then take your super glue and put a think line of glue all around the edge where the cork is going to go. You can put it in the middle, too, if you want.

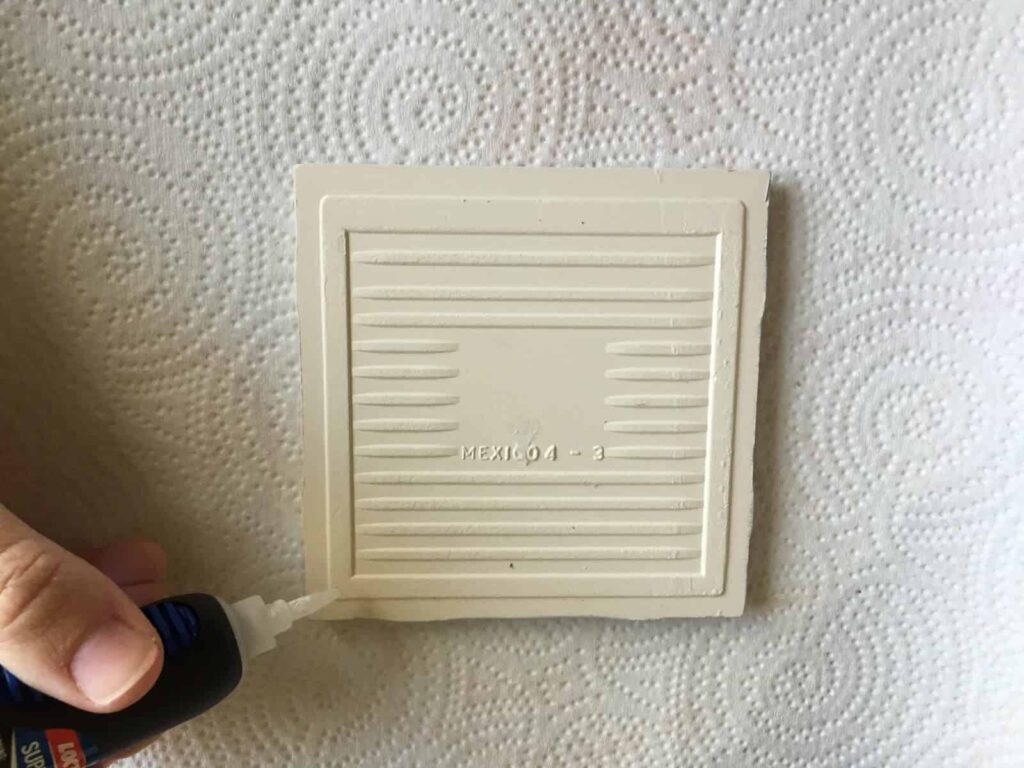
Place the cork on top of the glue and press down for a few seconds. Turn the coaster over and press down again for a few seconds, then let dry for a few hours so that the glue sets.
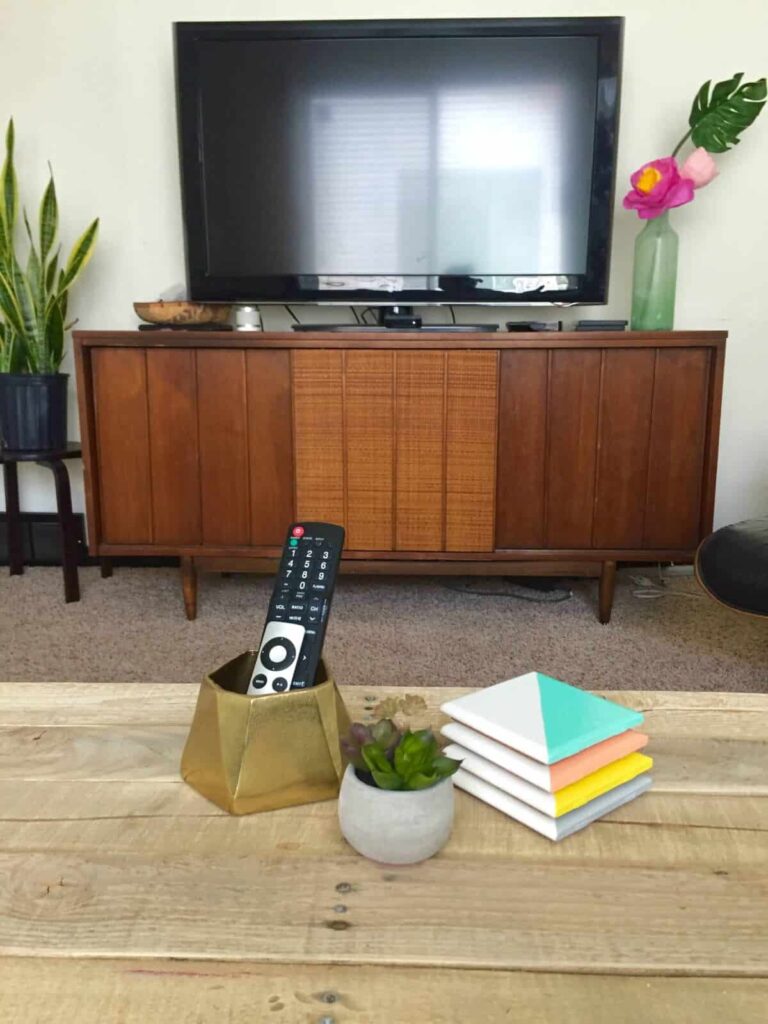
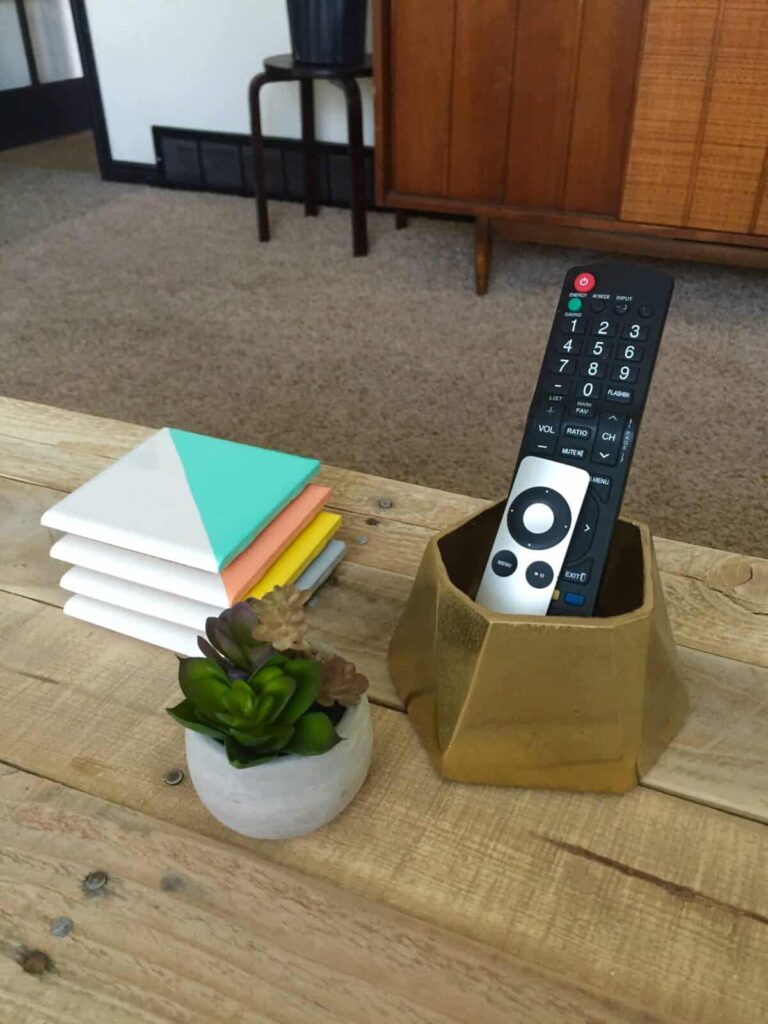
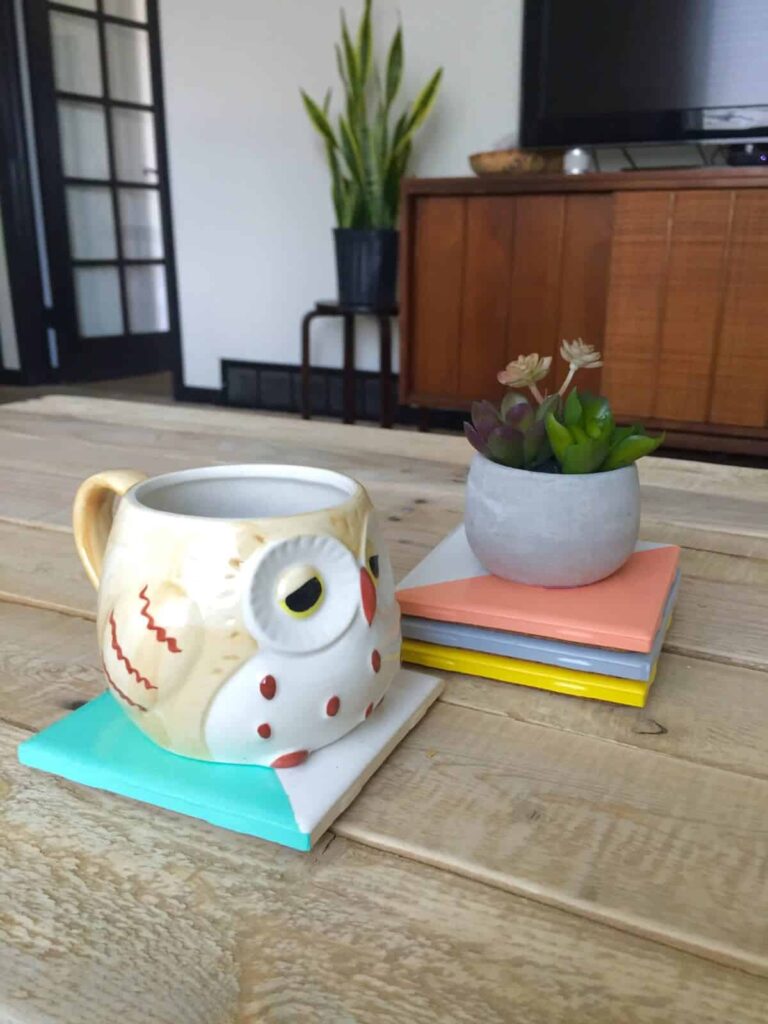
Once everything is dry, you can now use your beautiful new coasters! I love the end result and couldn’t be happier. Not only are they functional, but they’re a fun little piece of decoration that adds a pop of color in my living room.


Mary Mulroney
Latest posts by Mary Mulroney (see all)
- 5 Easy Changes To A Healthier You - October 12, 2020
- 7 Great Resources For Affordable And Beautiful Rugs - October 12, 2020
- Switching to a Dairy Free Diet? 15 Tips to Make It Easy - September 29, 2020
Related Images:
Mary Mulroney
Latest posts by Mary Mulroney (see all)
- 5 Easy Changes To A Healthier You - October 12, 2020
- 7 Great Resources For Affordable And Beautiful Rugs - October 12, 2020
- Switching to a Dairy Free Diet? 15 Tips to Make It Easy - September 29, 2020