Sparking Creativity for the New School Year
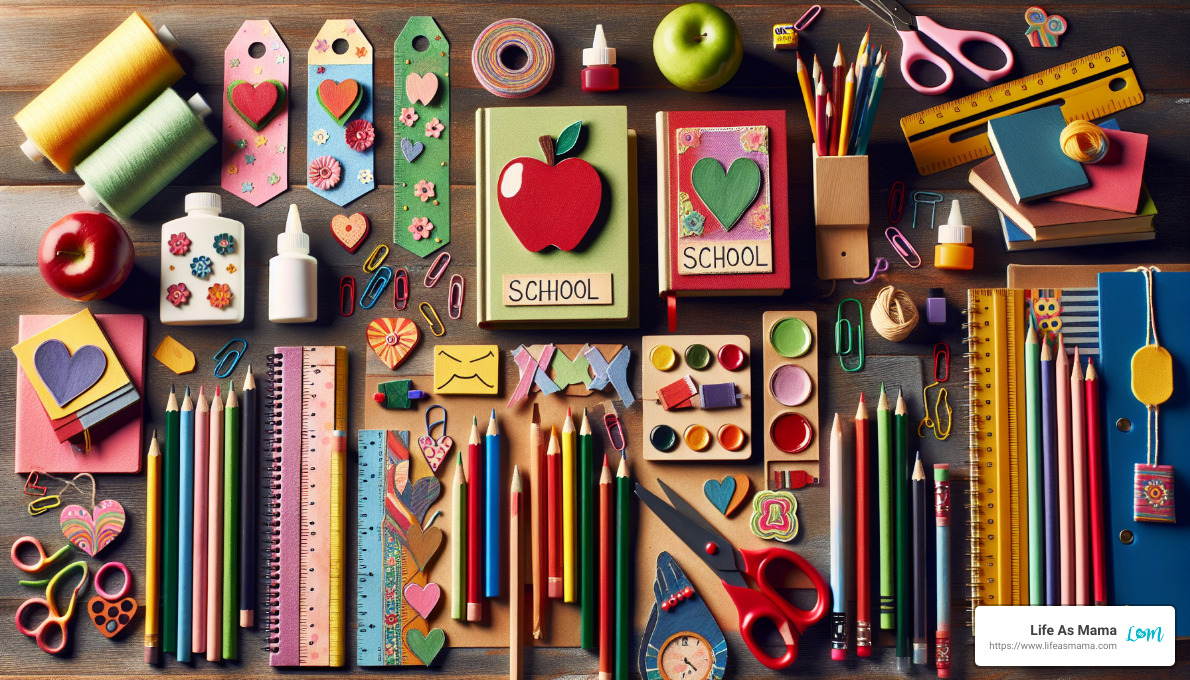
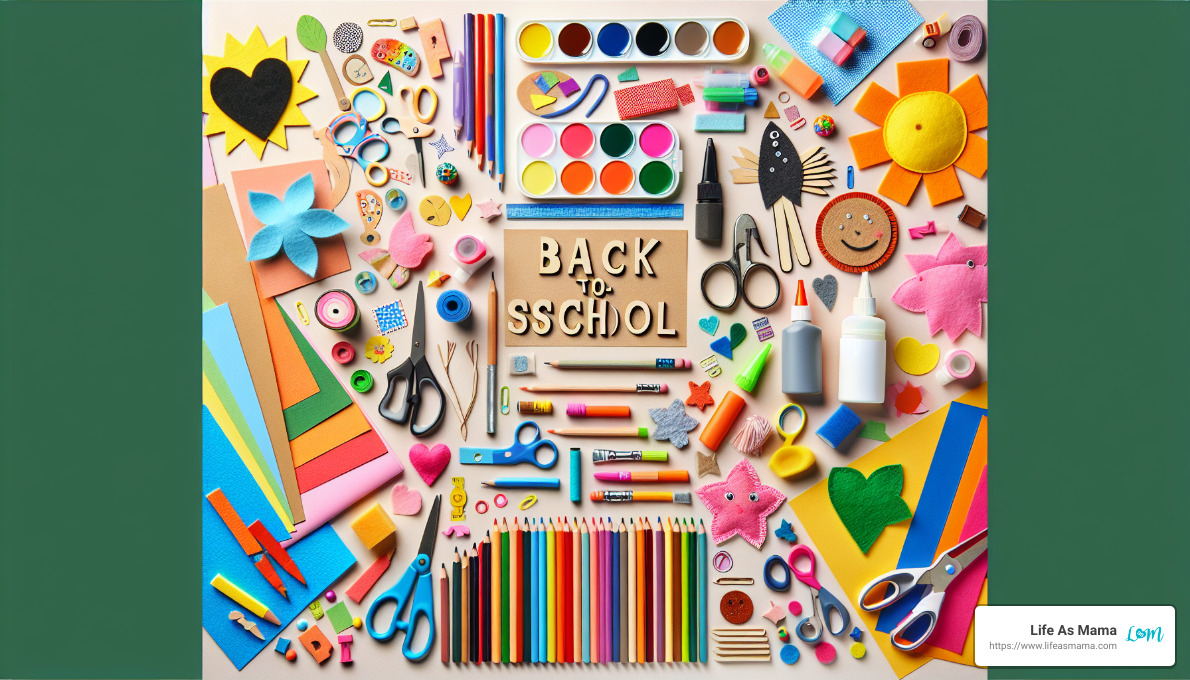
Easy back to school crafts can transform the start of the school year into an inspired, fun-filled time for kids and parents. Giving students unique, handmade school supplies not only reduces first-day jitters but also adds a personal touch to their daily routine.
Quick Craft Ideas:
- Handprint Apple Craft
- Popsicle Stick School Bus
- Paper Plate Apple Lacing Activity
Back-to-school season carries a special kind of excitement: new backpacks, fresh notebooks, and, of course, the chance to add a dash of creativity to these blank slates. From simple paper crafts to easy DIY decorations, these family-friendly activities offer a great way to ease your kids back into school while making lasting memories.
As an occupational therapist turned full-time mom and blogger, I’m Amanda Schmitt, here to guide you through Easy back to school crafts. With practical experience and a passion for crafting, I know how these activities can make your family’s school year start on a high note.
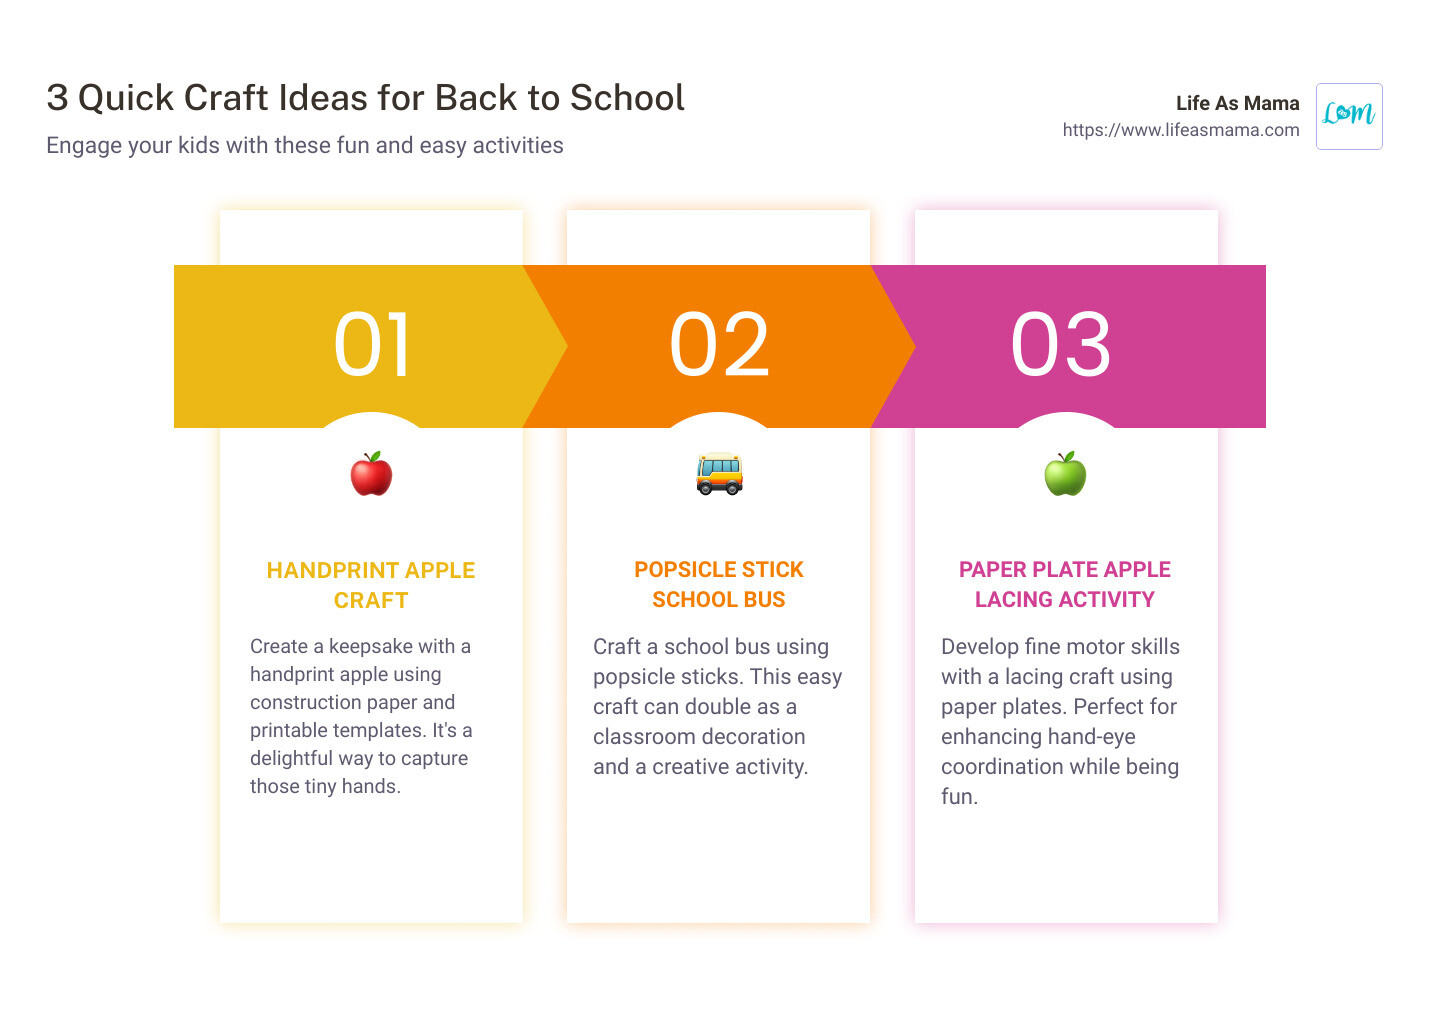
1. Handprint Apple Craft
The Handprint Apple Craft is a perfect way to kick off the school year with a touch of creativity and a dash of nostalgia. This craft combines the simplicity of construction paper with the personal touch of your child’s handprint, making it a cherished keepsake for years to come.
What You’ll Need:
- Printable apple template
- Red, green, and brown construction paper
- Glue stick
- Scissors
- Marker
Steps:
-
Print the Apple Template: Start by printing a free apple template. This will serve as the base for your craft.
-
Tear the Construction Paper: Have your child tear red construction paper into small pieces. This is a great activity to develop fine motor skills.
-
Glue the Pieces: Glue the torn pieces onto the apple template. Cover the entire apple shape to make it bright and colorful.
-
Add the Handprint: Trace your child’s hand on green construction paper and cut it out. Glue this handprint to the top of the apple as the leaf.
-
Finish with Details: Use brown construction paper to cut out a stem and glue it in place. You can also use a marker to add seeds in the center of the apple.
Why It’s Great:
This craft is not only simple but also a wonderful way to create a memento of your child’s early school years. Display it on the fridge or bulletin board as a reminder of their growth and creativity.
“First up is our cute handprint apple craft made with the printable apple template, torn construction paper, and your preschooler’s tiny handprint.” – Life As Mama
By engaging in this activity, you’re not only making a cute decoration but also helping your child practice important skills like tearing, gluing, and following instructions. Plus, it’s a wonderful keepsake that parents will love looking back on.
Next up, let’s dive into another fun project that will surely be a hit with your little ones.
2. Popsicle Stick School Bus
Creating a Popsicle Stick School Bus is a fun and easy way to get kids excited about the new school year. This craft is perfect for classroom decorations or as a creative project at home.
What You’ll Need:
- Popsicle sticks (craft sticks)
- Yellow paint
- Black and white construction paper
- Glue
- Scissors
- Markers
Steps:
-
Paint the Popsicle Sticks: Start by painting several popsicle sticks yellow. You’ll need enough to form the body of the school bus. Let them dry completely.
-
Assemble the Bus: Once the sticks are dry, line them up side by side to create the bus’s body. Glue a couple of sticks horizontally across the back to hold them together.
-
Add Wheels and Windows: Cut out small circles from black construction paper for the wheels and rectangles from white construction paper for the windows. Glue these onto the bus.
-
Draw Details: Use markers to add details like the bus number, headlights, and door. Encourage your child to get creative with the decorations.
-
Final Touches: If you want, you can also add a small photo of your child in one of the windows to personalize it.
Why It’s Great:
This easy craft not only serves as a creative outlet but also makes for a fantastic classroom decoration. Kids will love seeing their handiwork displayed, and it can help ease first-day jitters by making the school environment feel more familiar and welcoming.
“This craft is easy to accomplish with craft sticks, paint, and glue; the resulting school bus serves up a pretty sweet ride down memory lane.” – Life As Mama
Engaging in this activity helps children practice important skills like cutting, gluing, and painting. Plus, it offers a fun way to discuss school routines and transportation, making the transition back to school smoother.
Next, let’s explore another engaging and educational craft that will keep little hands busy and minds sharp.
3. Paper Plate Apple Lacing Activity
The Paper Plate Apple Lacing Activity is a fantastic way to get kids excited about back to school while enhancing their fine motor skills and hand-eye coordination.
What You’ll Need:
- Red paper plates (or plain plates and red paint)
- Green construction paper
- Yarn or string
- Single hole punch
- Tape
- Scissors
Steps:
-
Prepare the Apple Base: If you’re using plain paper plates, start by painting them red and allowing them to dry. If you have red plates, you can skip this step.
-
Punch Holes: Use a single hole punch to create evenly spaced holes around the edge of the paper plate. This will be where the yarn laces through.
-
Cut Out Leaves: From the green construction paper, cut out a leaf shape and glue it to the top of the plate. You can add a small brown rectangle for the apple’s stem if you’d like.
-
Prepare the Yarn: Cut a length of yarn or string that is long enough to lace around the plate. Tape one end of the yarn to prevent fraying and make it easier for little hands to thread through the holes.
-
Lacing Time: Show your child how to thread the yarn through the holes around the edge of the plate. This step helps develop hand-eye coordination and fine motor skills.
-
Secure the Yarn: Once the lacing is complete, tie the ends of the yarn together at the back of the plate to secure it.
Why It’s Great:
This easy back to school craft not only creates a cute apple decoration but also provides significant developmental benefits. Lacing activities like this one are excellent for improving fine motor skills, which are crucial for writing and other classroom tasks.
“Help preschoolers develop fine motor skills and work on hand-eye coordination with this paper plate apple lacing craft.” – Preschool Inspirations
Engaging in this activity also introduces kids to the concept of following a sequence and completing a task, which are important skills for academic success. Plus, the finished product makes a charming decoration for the classroom or home, adding a touch of back-to-school spirit.
Next, let’s dive into another creative and low-mess craft that kids will love: Toilet Paper Roll Crayons.
4. Toilet Paper Roll Crayons
Toilet Paper Roll Crayons are a fantastic and low-mess craft that will bring a splash of color to your back-to-school preparations. This easy craft is perfect for young children and uses materials you likely already have at home.
What You’ll Need:
- Empty toilet paper rolls
- Construction paper (various colors)
- Googly eyes
- Glue stick
- Scissors
- Black marker
Steps:
-
Prepare the Construction Paper: Cut the construction paper into rectangles that will wrap around the toilet paper rolls. You can use different colors to represent various crayon shades.
-
Wrap the Rolls: Apply glue to one side of the construction paper rectangle and wrap it around the toilet paper roll. Press firmly to ensure it sticks well.
-
Add Googly Eyes: Glue two googly eyes near the top of the wrapped roll. This gives the crayon a friendly face.
-
Draw the Details: Use the black marker to draw a smiley face below the googly eyes. You can also add squiggly lines near the top and bottom of the roll to mimic the look of a crayon wrapper.
-
Create a Crayon Tip: Cut a small triangle from the construction paper and glue it to the top of the roll to form the crayon tip. This step is optional but adds a nice finishing touch.
Why It’s Great:
This easy back to school craft is not only simple but also mess-free, making it ideal for young children. Toilet Paper Roll Crayons are a wonderful way to recycle materials and spark creativity. Kids will love making their colorful crayon friends, and these can be used as fun decorations or even as part of imaginative play.
“Recycle toilet paper rolls to make these colorful cardboard tube crayons. It’s a low-mess craft because there’s no paint involved, so it’s ideal for young children.” – The Best Ideas for Kids
By engaging in this craft, children also get to practice their fine motor skills through cutting, gluing, and drawing. Plus, the use of googly eyes adds a playful element that kids find irresistible.
Next, we’ll explore another charming and creative project: Pencil Bookmark Craft.
5. Pencil Bookmark Craft
Creating personalized pencil bookmarks is a fun and practical back to school craft. These bookmarks are not only useful but also make great gifts for classmates or teachers.
What You’ll Need:
- Colored paper or cardstock
- Scissors
- Ruler
- Pencil
- Glue stick
- Markers or colored pens
- Decorative items (stickers, washi tape, etc.)
Steps:
-
Cut the Paper: Use the ruler and pencil to measure and cut the colored paper into long, thin rectangles (approximately 6 inches by 1 inch). These will be your bookmarks.
-
Create the Pencil Tip: Cut a small triangle from one end of the bookmark to form the pencil tip. You can use a different color of paper for the pencil lead and glue it to the triangle.
-
Decorate the Bookmark: This is where you can get creative. Use markers, stickers, or washi tape to decorate your bookmark. Write your name or a fun message to personalize it.
-
Add Finishing Touches: If you want to make your bookmark even more special, consider adding googly eyes or small decorative items. You can also laminate the bookmark for durability.
Why It’s Great:
This easy back to school craft is perfect for kids of all ages. It allows for a lot of creativity and personalization, making it a unique and thoughtful gift.
“Origami bookmarks are a great way to get kids interested in reading. They can personalize their bookmarks, making them feel more connected to their books.” – A Girl and a Glue Gun
Tips for Success:
-
Use Sturdy Paper: Cardstock or thick paper works best to ensure the bookmark is durable.
-
Personalization: Encourage kids to add their names or favorite quotes to make the bookmark special.
-
Gift Idea: These bookmarks can be bundled together and given as a thoughtful back-to-school gift.
By making these pencil bookmarks, kids not only create something useful but also practice their cutting and decorating skills. It’s a simple yet rewarding project that brings a touch of creativity to their reading time.
Next, let’s dive into another delightful and tactile project: Puffy Paint School Bus.
6. Puffy Paint School Bus
Creating a Puffy Paint School Bus is a fun, tactile project that’s perfect for the back-to-school season. This craft combines glue and shaving cream to make a unique puffy paint, giving the school bus a textured, 3D look.
What You’ll Need:
- Yellow paint
- White glue
- Shaving cream
- Black construction paper
- Scissors
- Paintbrush
- Markers or crayons
- School bus template (optional)
Steps:
-
Prepare the Puffy Paint: Mix equal parts of white glue and shaving cream in a bowl. Add yellow paint to the mixture and stir until you get a smooth, fluffy consistency.
-
Draw or Print the Bus Shape: Use a school bus template or draw a simple bus shape on a piece of paper. Cut out the bus shape if you prefer to paint it separately.
-
Paint the Bus: Use a paintbrush to apply the puffy paint to your bus shape. The mixture will dry with a raised, puffy texture that looks and feels unique.
-
Add Details: While the puffy paint is still wet, add details like windows, wheels, and a stop sign using black construction paper or markers. You can also use small pieces of colored paper for the windows and wheels.
-
Let It Dry: Allow the puffy paint to dry completely. This may take a few hours, depending on the thickness of the paint.
Why It’s Great:
This easy back to school craft is not only fun but also helps kids develop fine motor skills. The puffy paint adds a sensory element that makes the craft even more engaging.
Tips for Success:
-
Smooth Consistency: Make sure the puffy paint mixture is smooth and fluffy for the best texture.
-
Add Details Early: Add the windows and wheels while the paint is still wet so they stick well.
-
Drying Time: Be patient and let the paint dry completely to avoid smudging.
By creating a Puffy Paint School Bus, kids can enjoy a hands-on, creative activity that results in a fun, textured piece of art. It’s a perfect project to get them excited about the new school year.
Next, let’s answer some common questions about easy back to school crafts.
Frequently Asked Questions about Easy Back to School Crafts
What craft is easy to make?
Hand-painted bangles are a simple and fun craft. All you need are plain wooden bangles, some paint, and brushes. Kids can personalize their bangles with their favorite colors and patterns.
Another easy option is rose petal bath salts. Mix Epsom salts with dried rose petals and a few drops of essential oil. Store the mixture in a jar for a beautiful and fragrant gift.
Creating a butterfly frame is also straightforward. Use a plain photo frame and decorate it with paper butterflies. Just cut out butterfly shapes from colorful paper and glue them onto the frame.
What are easy crafts for disabled children?
Slime is a great sensory craft that is easy to make and fun to play with. Mix glue, baking soda, and contact lens solution to create stretchy, squishy slime.
Play-Doh is another excellent choice. It’s soft, easy to mold, and can be used to create a variety of shapes and figures.
Foam crafts are perfect for sensory engagement. Use foam sheets to cut out different shapes that kids can stick together to create pictures or 3D models.
How to make crafts to sell at school?
Homemade soap is a popular item. Melt soap base, add colors and scents, and pour it into molds. Once it hardens, you have beautiful, custom soaps ready to sell.
Painted rocks are another easy and creative craft. Collect smooth rocks and paint them with designs or inspirational words. They make great paperweights or decorative items.
Tie-dye clothing is always a hit. Use tie-dye kits to create vibrant patterns on t-shirts, socks, or bags. Each piece is unique and colorful.
Personalized keychains are simple to make and can be customized with names or initials. Use beads, charms, and key rings to create unique designs that are perfect for back-to-school.
By exploring these easy back to school crafts, kids can create beautiful, personalized items while developing their creativity and fine motor skills.
Conclusion: Embracing Fun Back-to-School Crafts for 2024
At Life As Mama, we know that the back-to-school season is a special time for families. It’s a moment filled with excitement, new beginnings, and a touch of nervousness. Our family-friendly guides aim to make this transition smoother and more enjoyable for everyone involved.
Crafting together is a wonderful way to create memorable occasions. Whether it’s a Popsicle Stick School Bus that adorns your classroom or a Handprint Apple Craft that becomes a treasured keepsake, these activities offer more than just a creative outlet. They provide a chance to bond, laugh, and make lasting memories.
Our practical tips are designed to be simple and accessible. We believe that every family should have the tools to create something beautiful, no matter their crafting experience. From Toilet Paper Roll Crayons to Pencil Bookmark Crafts, each project is carefully chosen to ensure that it’s easy to make and fun for all ages.
For more ideas on how to make the back-to-school season exciting, check out our 9 Fun Ways to Get Your Kids Excited About Going Back to School.
Thank you for joining us on this creative journey. We hope these easy back to school crafts inspire you to make this school year the best one yet!
Related Images:
Amanda Schmitt
Latest posts by Amanda Schmitt (see all)
- Fruit Infused Waters That Make Summer Hydration Fun - July 1, 2025
- Light Up Your Life: Home Lighting Decoration Ideas - June 30, 2025
- Let’s Taco Party! Easy Steps for a Perfect Taco Bar Setup - June 27, 2025